Category Archives: Self-Defense

A Writer’s Guide to Fighting: The Jab

Welcome to the October 2015 edition of Righting Crime Fiction. This month, I’m continuing with the “Writer’s Guide to Fighting” series and moving into strikes. Authors will probably find the section on strikes, which will cover quite a number of lessons and span many months, the most relevant. This is where I’ll describe how to execute different strikes and provide the correct names for each. When it comes to fight scenes in fiction, this is where I see the most mistakes. An author might have a character knock another character unconscious with a jab or have a right-handed character deliver a left cross. While these are not “fatal” errors, readers with fight experience will recognize the lack of research and might mention it negatively in a review.

Speaking of the jab, it’s the strike I’ll highlight this month. While I’ll be speaking to your “cop” characters, these techniques are not unique to law enforcement, so any of your characters can use them. As an example, if you’re writing a romance, your protagonist could shoot a jab to the nose of your antagonist, snapping his head back and causing blood to spill from his nostrils.

LEFT JAB (to the head)

The jab is a quick, snapping punch that is executed with the lead hand. The lead hand is the left hand for right-handed fighters, and the right hand for left-handed fighter. Since your lead hand is closest to the suspect, the jab will connect at a higher rate than other punches. The jab can be used to distract an aggressive suspect, to set up follow-up punches, and can even be used defensively to disrupt a suspect’s attack. If developed properly and delivered correctly, it can be a very effective punch in your bag of striking tricks.

While it is not a power punch, a stiff jab to the face can potentially snap a suspect’s head back and stun him. This could be enough to cause some suspects to discontinue their aggressive behavior, but this will be the exception and not the norm. You should always be prepared to execute follow-up strikes after a jab, and these strikes should be delivered immediately and explosively—before the suspect has time to uncross his eyes and clear his head.

Target Areas:   Forehead, Eyes, Nose, Chin, Throat

Step One:  For maximum power, from the Fighting Stance (see Fig. 2.1) utilize a Front Step while quickly extending your left fist forward in a straight line from your chin toward the target (see Fig. 2.2). Do not lift your left elbow away from your body as your arm unfolds into the punch, because this will detract from your power and speed of delivery. Your elbow should travel directly upward as your arm extends.

2.1  2.2

Step Two:  As your left fist nears the end of the extension (approximately the last six inches of the punch), rotate your left hand sharply over in a clockwise direction so that your palm is facing the floor and your fist is at an approximate forty-five degree angle at the end of the punch, while completing the Front Step by bringing your rear leg forward (see Fig. 2.3). The rotating motion of your fist will roll your left shoulder over so that the ball of your shoulder shields your chin. This shielding of the chin will provide protection against a counter right hand. Additionally, rotating your fist to a forty-five degree angle will ensure that you strike with the large knuckles of the index and middle fingers.

2.3

Step Three: As quickly and explosively as you executed the Jab, pull your fist back toward your chin (see Fig. 2.4) and return to the Fighting Stance (see Fig. 2.5).

2.4  2.5

LEFT JAB (to the body)

Target Areas:   Chest, Solar Plexus, Stomach, Arms

Executing the left jab to your suspect’s body can be an effective set up punch. It can draw your suspect’s hands down, thereby creating an opening for a strike to the head. When executed to the solar plexus, it can cause some suspects to discontinue their aggressive behavior and sink to the ground, because this is a highly sensitive area for most folks.

Step One:  Dip your body quickly by bending at the knees. The dipping motion will lower your body and, depending on your height versus the suspect’s height, place your shoulders more in line with his torso.

Step Two:  Immediately execute the jab to the body in the same manner as previously described for the jab to the head.

CONCLUSION

Well, that wraps up the October 2015 segment of Righting Crime Fiction. If any of you have any questions or comments or suggested topics, feel free to contact me at rightingcrimefiction@gmail.com and I will reply as soon as I can.

Until next time, write, rewrite, and get it right!

BJ Bourg is the author of JAMES 516 (Amber Quill Press, 2014), THE SEVENTH TAKING (Amber Quill Press, 2015), and HOLLOW CRIB (Five Star-Gale-Cengage, 2016).

Copyright © 2015 by BJ Bourg. All rights reserved.

A Writer’s Guide to Fighting: Footwork 2

Welcome to the August 2015 edition of Righting Crime Fiction. This month, I’m continuing with the footwork techniques segment of my “Writer’s Guide to Fighting” series. After wrapping up the techniques, I’ll detail some exercises to help improve a fighter’s footwork.

DIAGONAL FRONT STEP

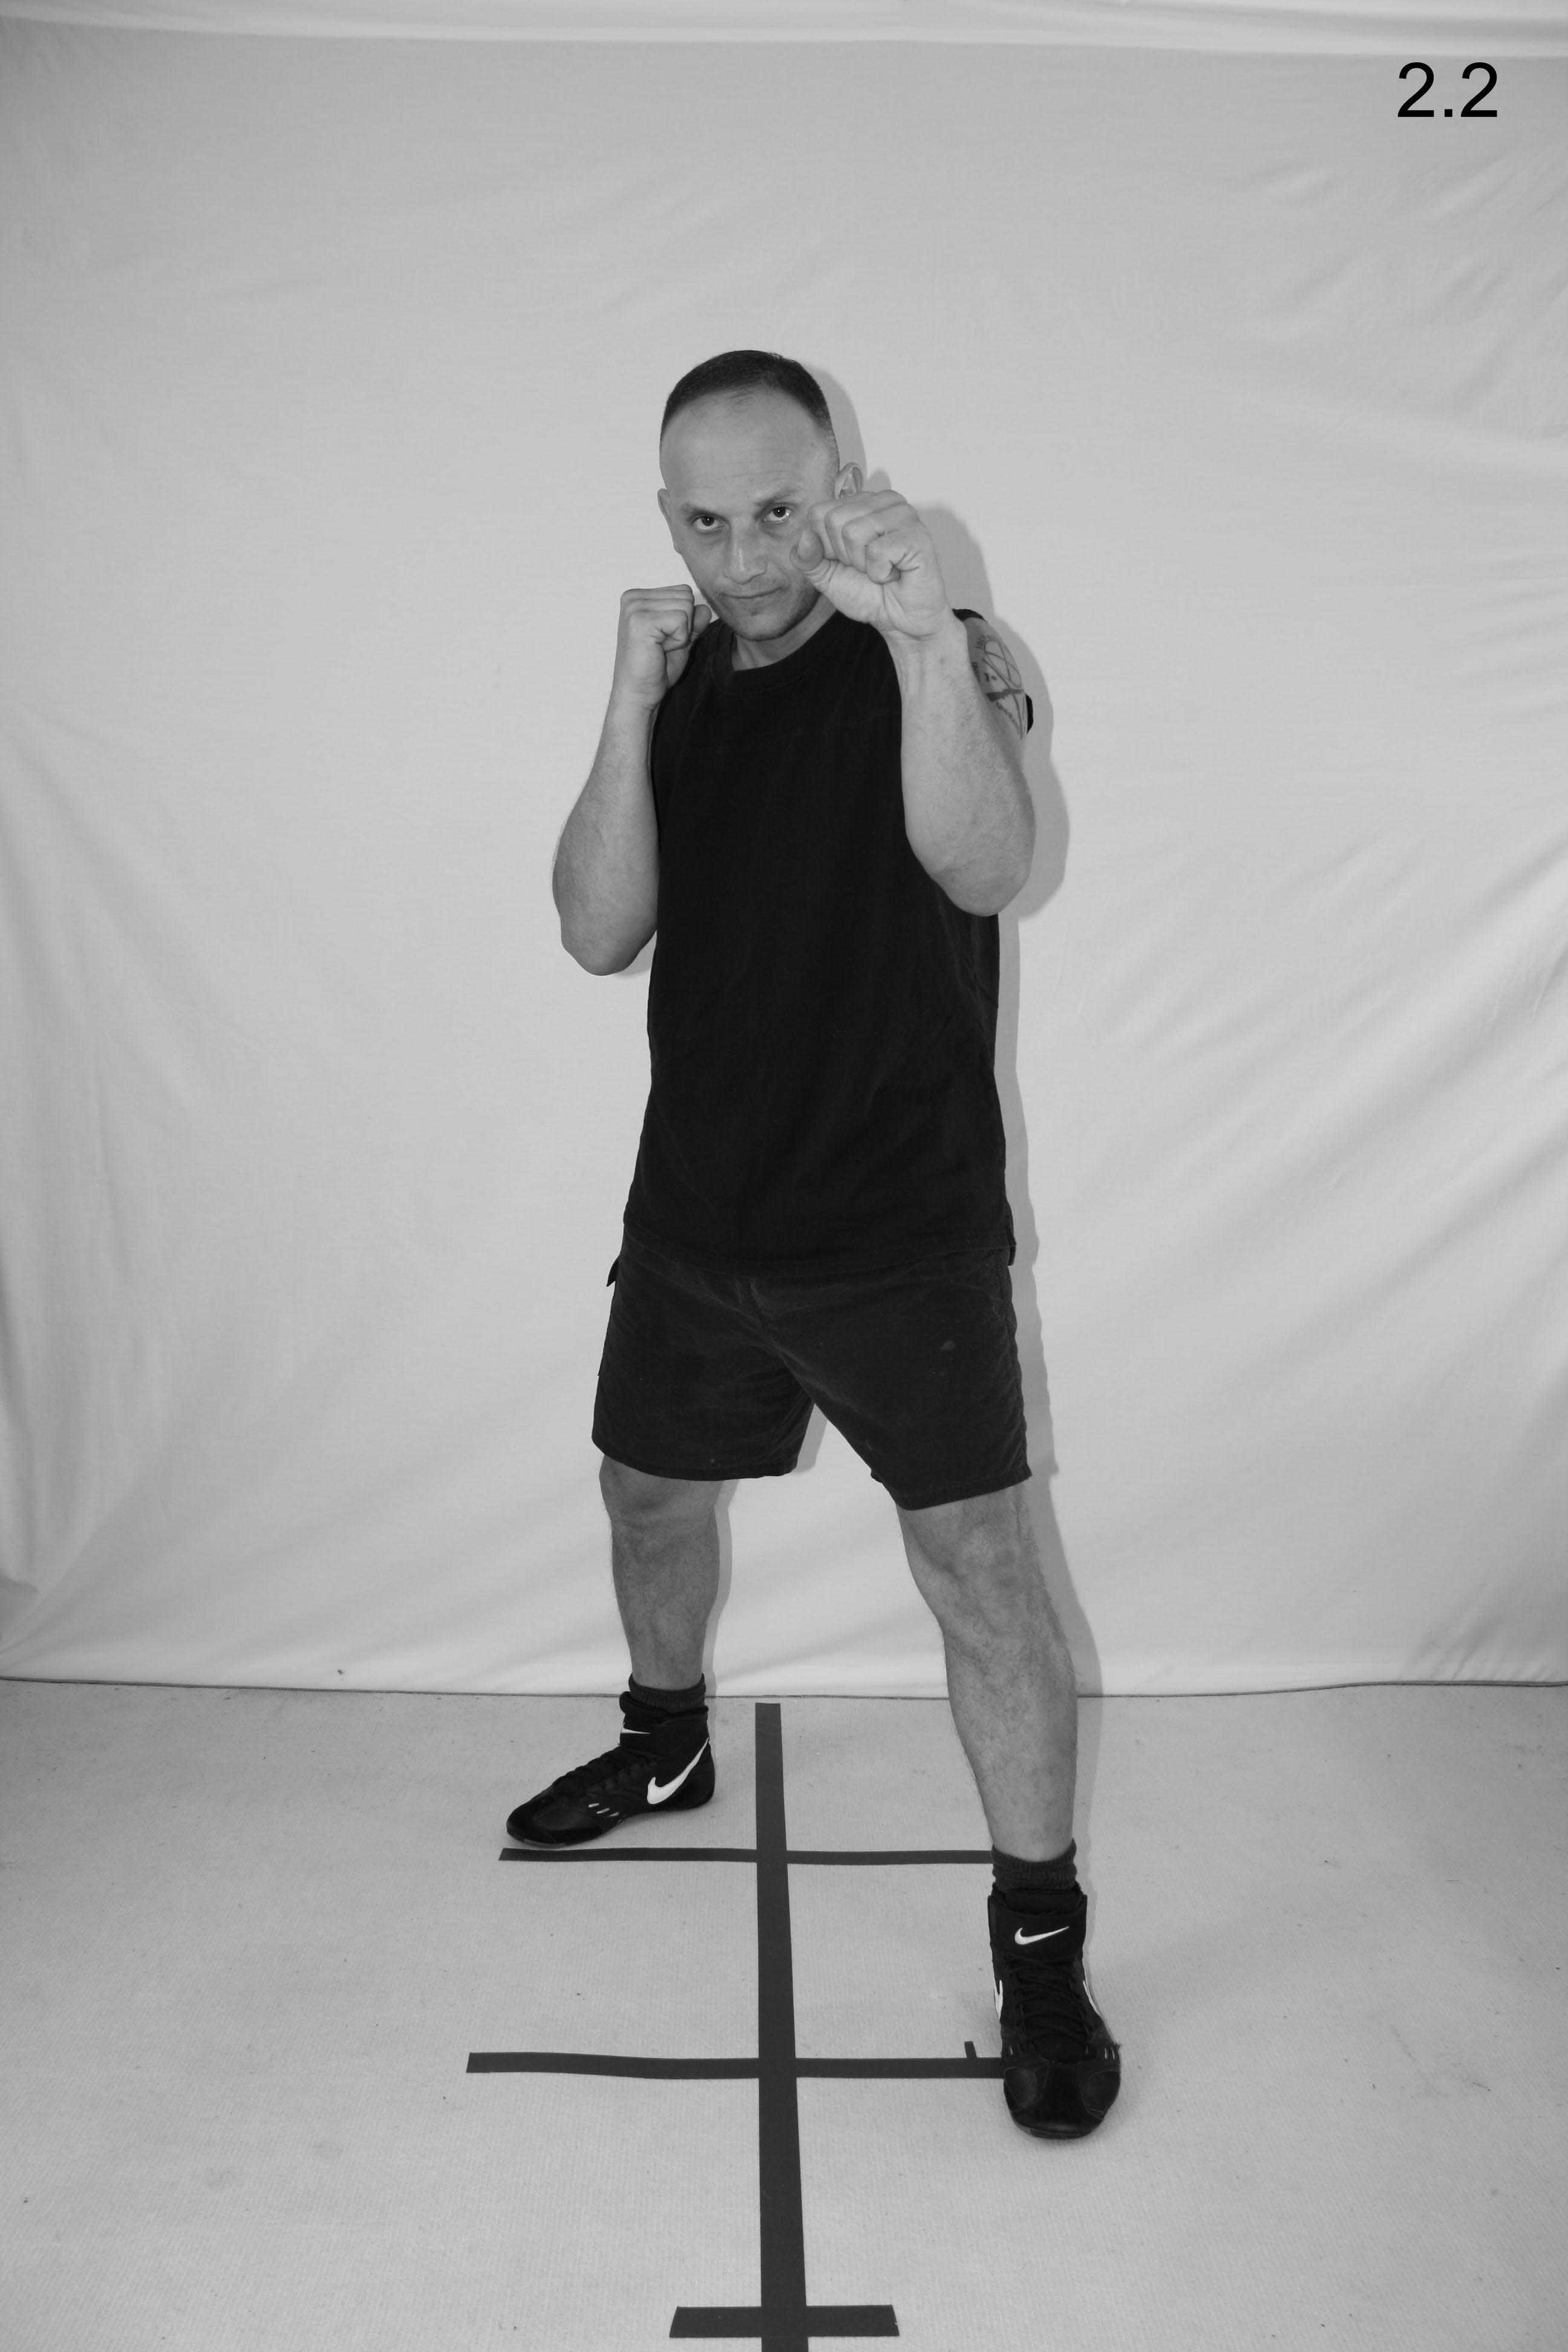
Moving directly forward against a retreating suspect can sometimes be risky, because your head and body remain along the same line of attack. Utilizing the diagonal front step can move you forward while taking your body out of the line of attack and creating an angle from which to deliver strikes of your own.

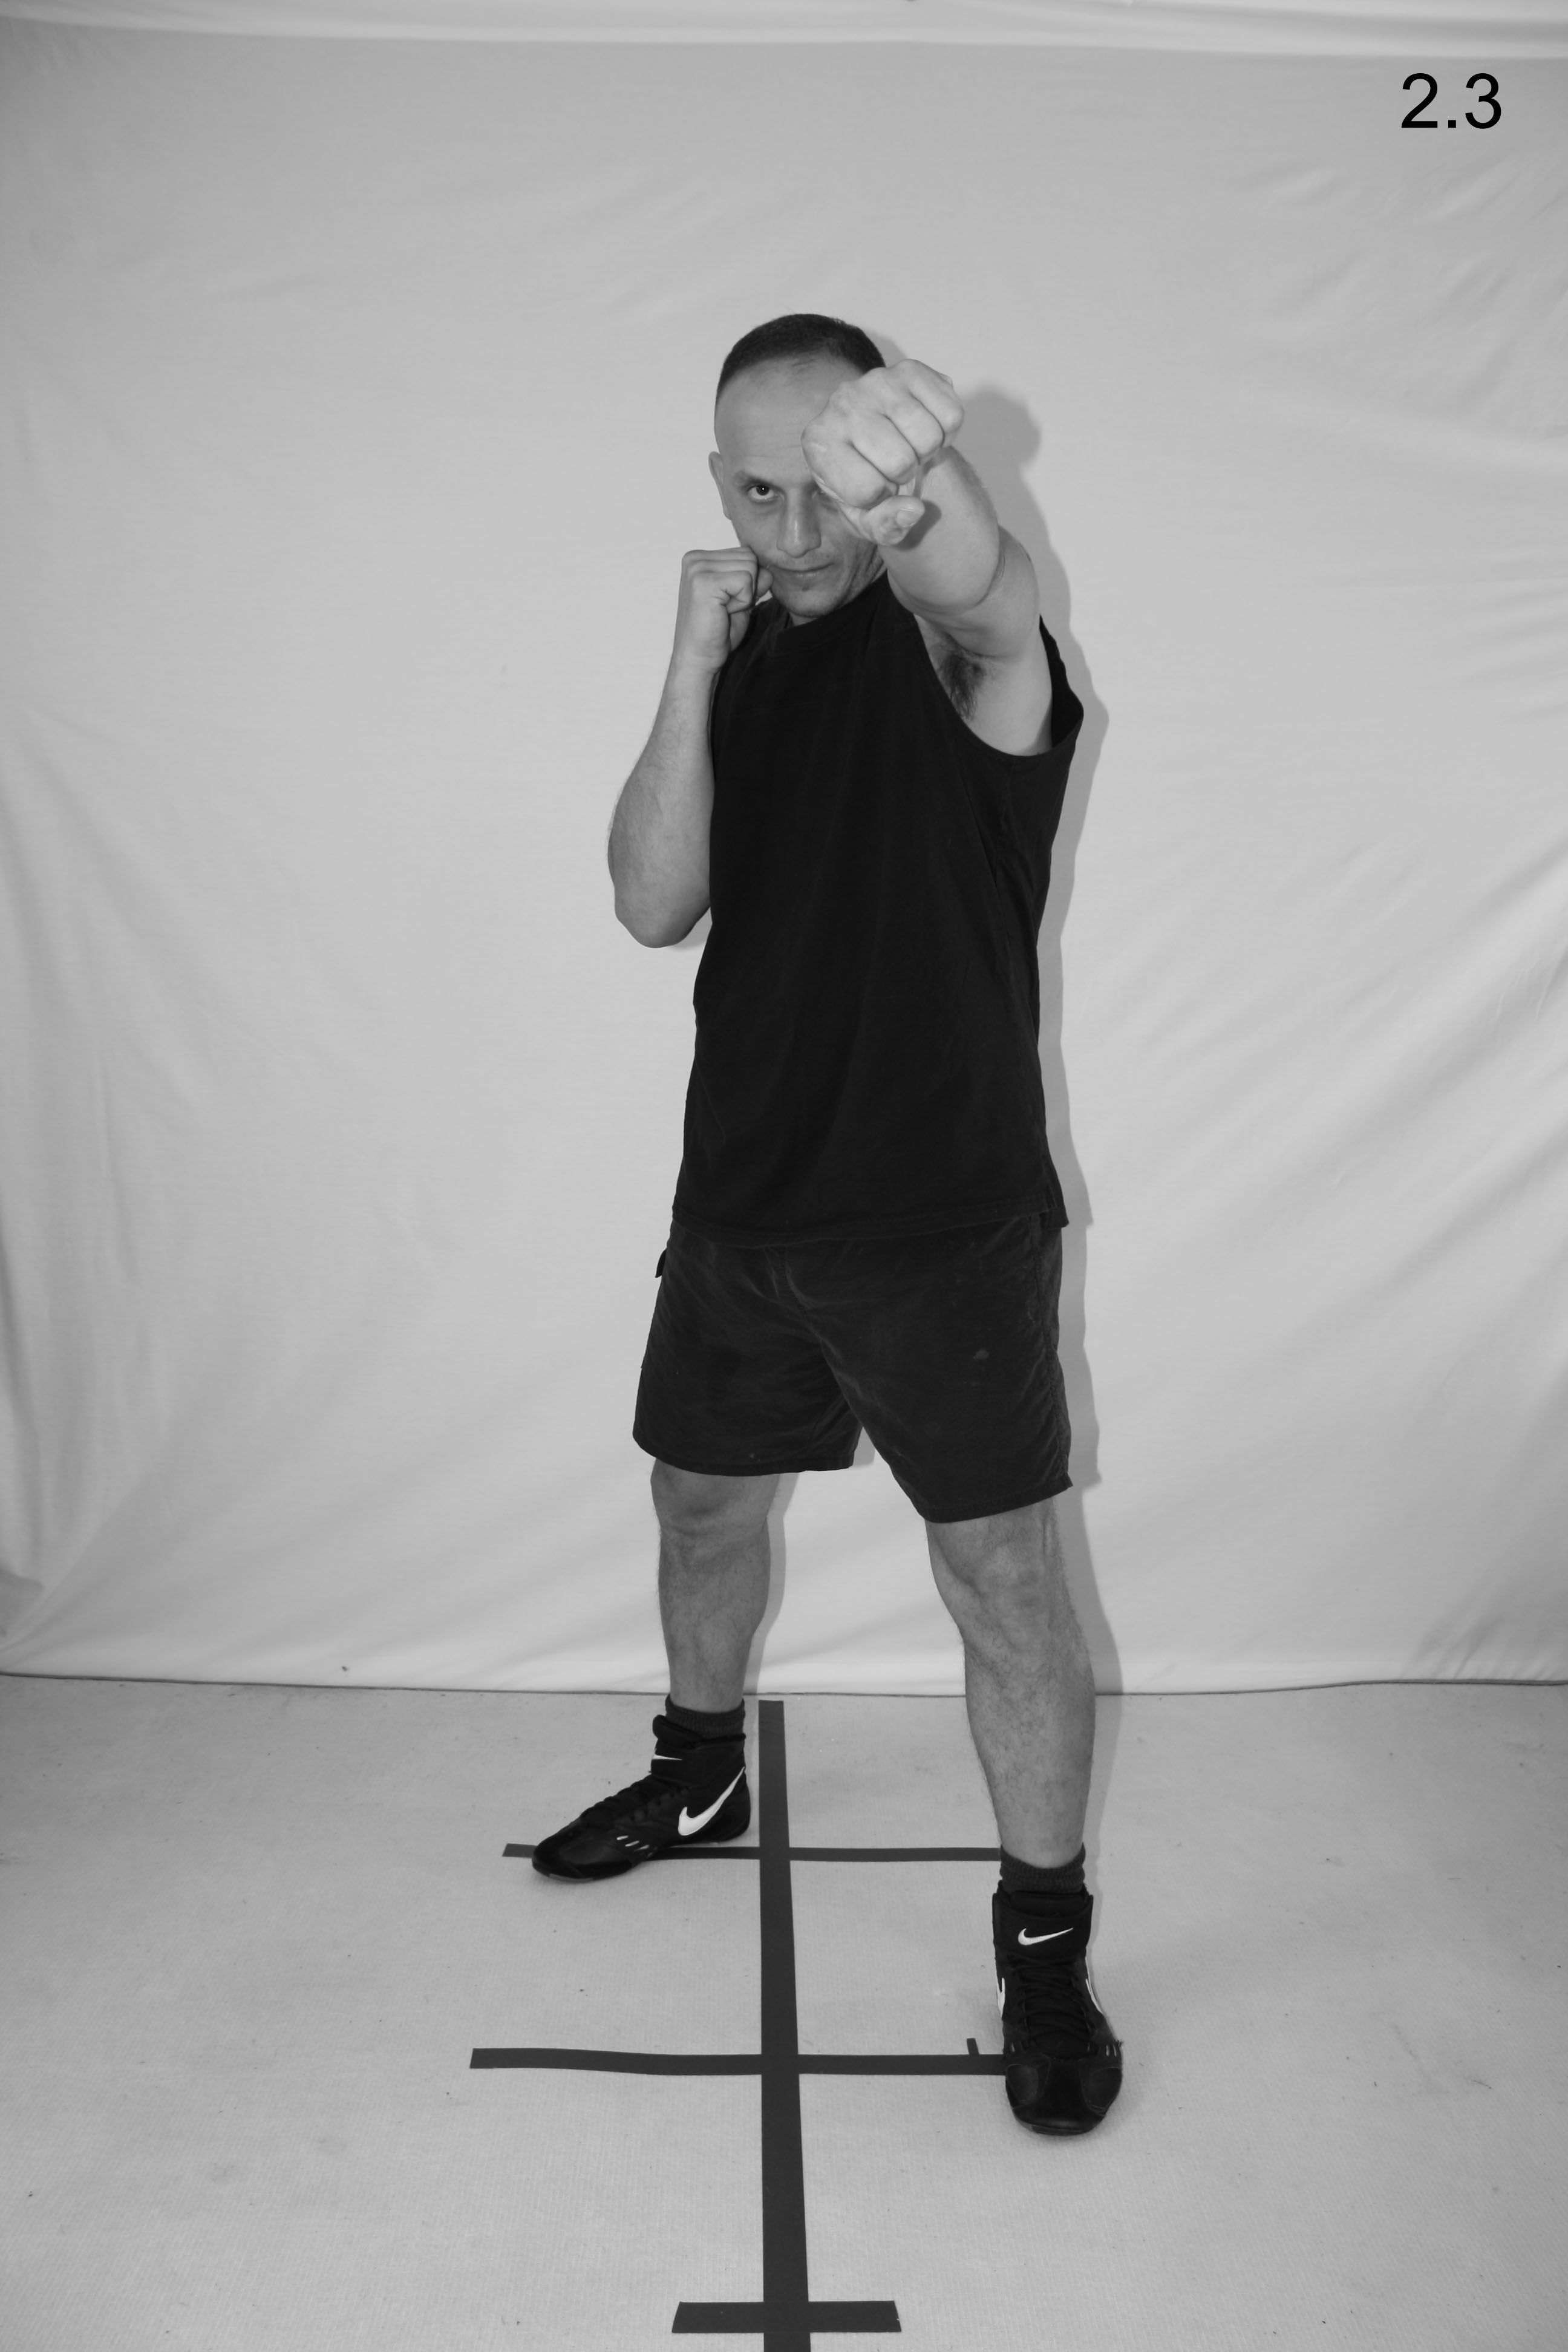
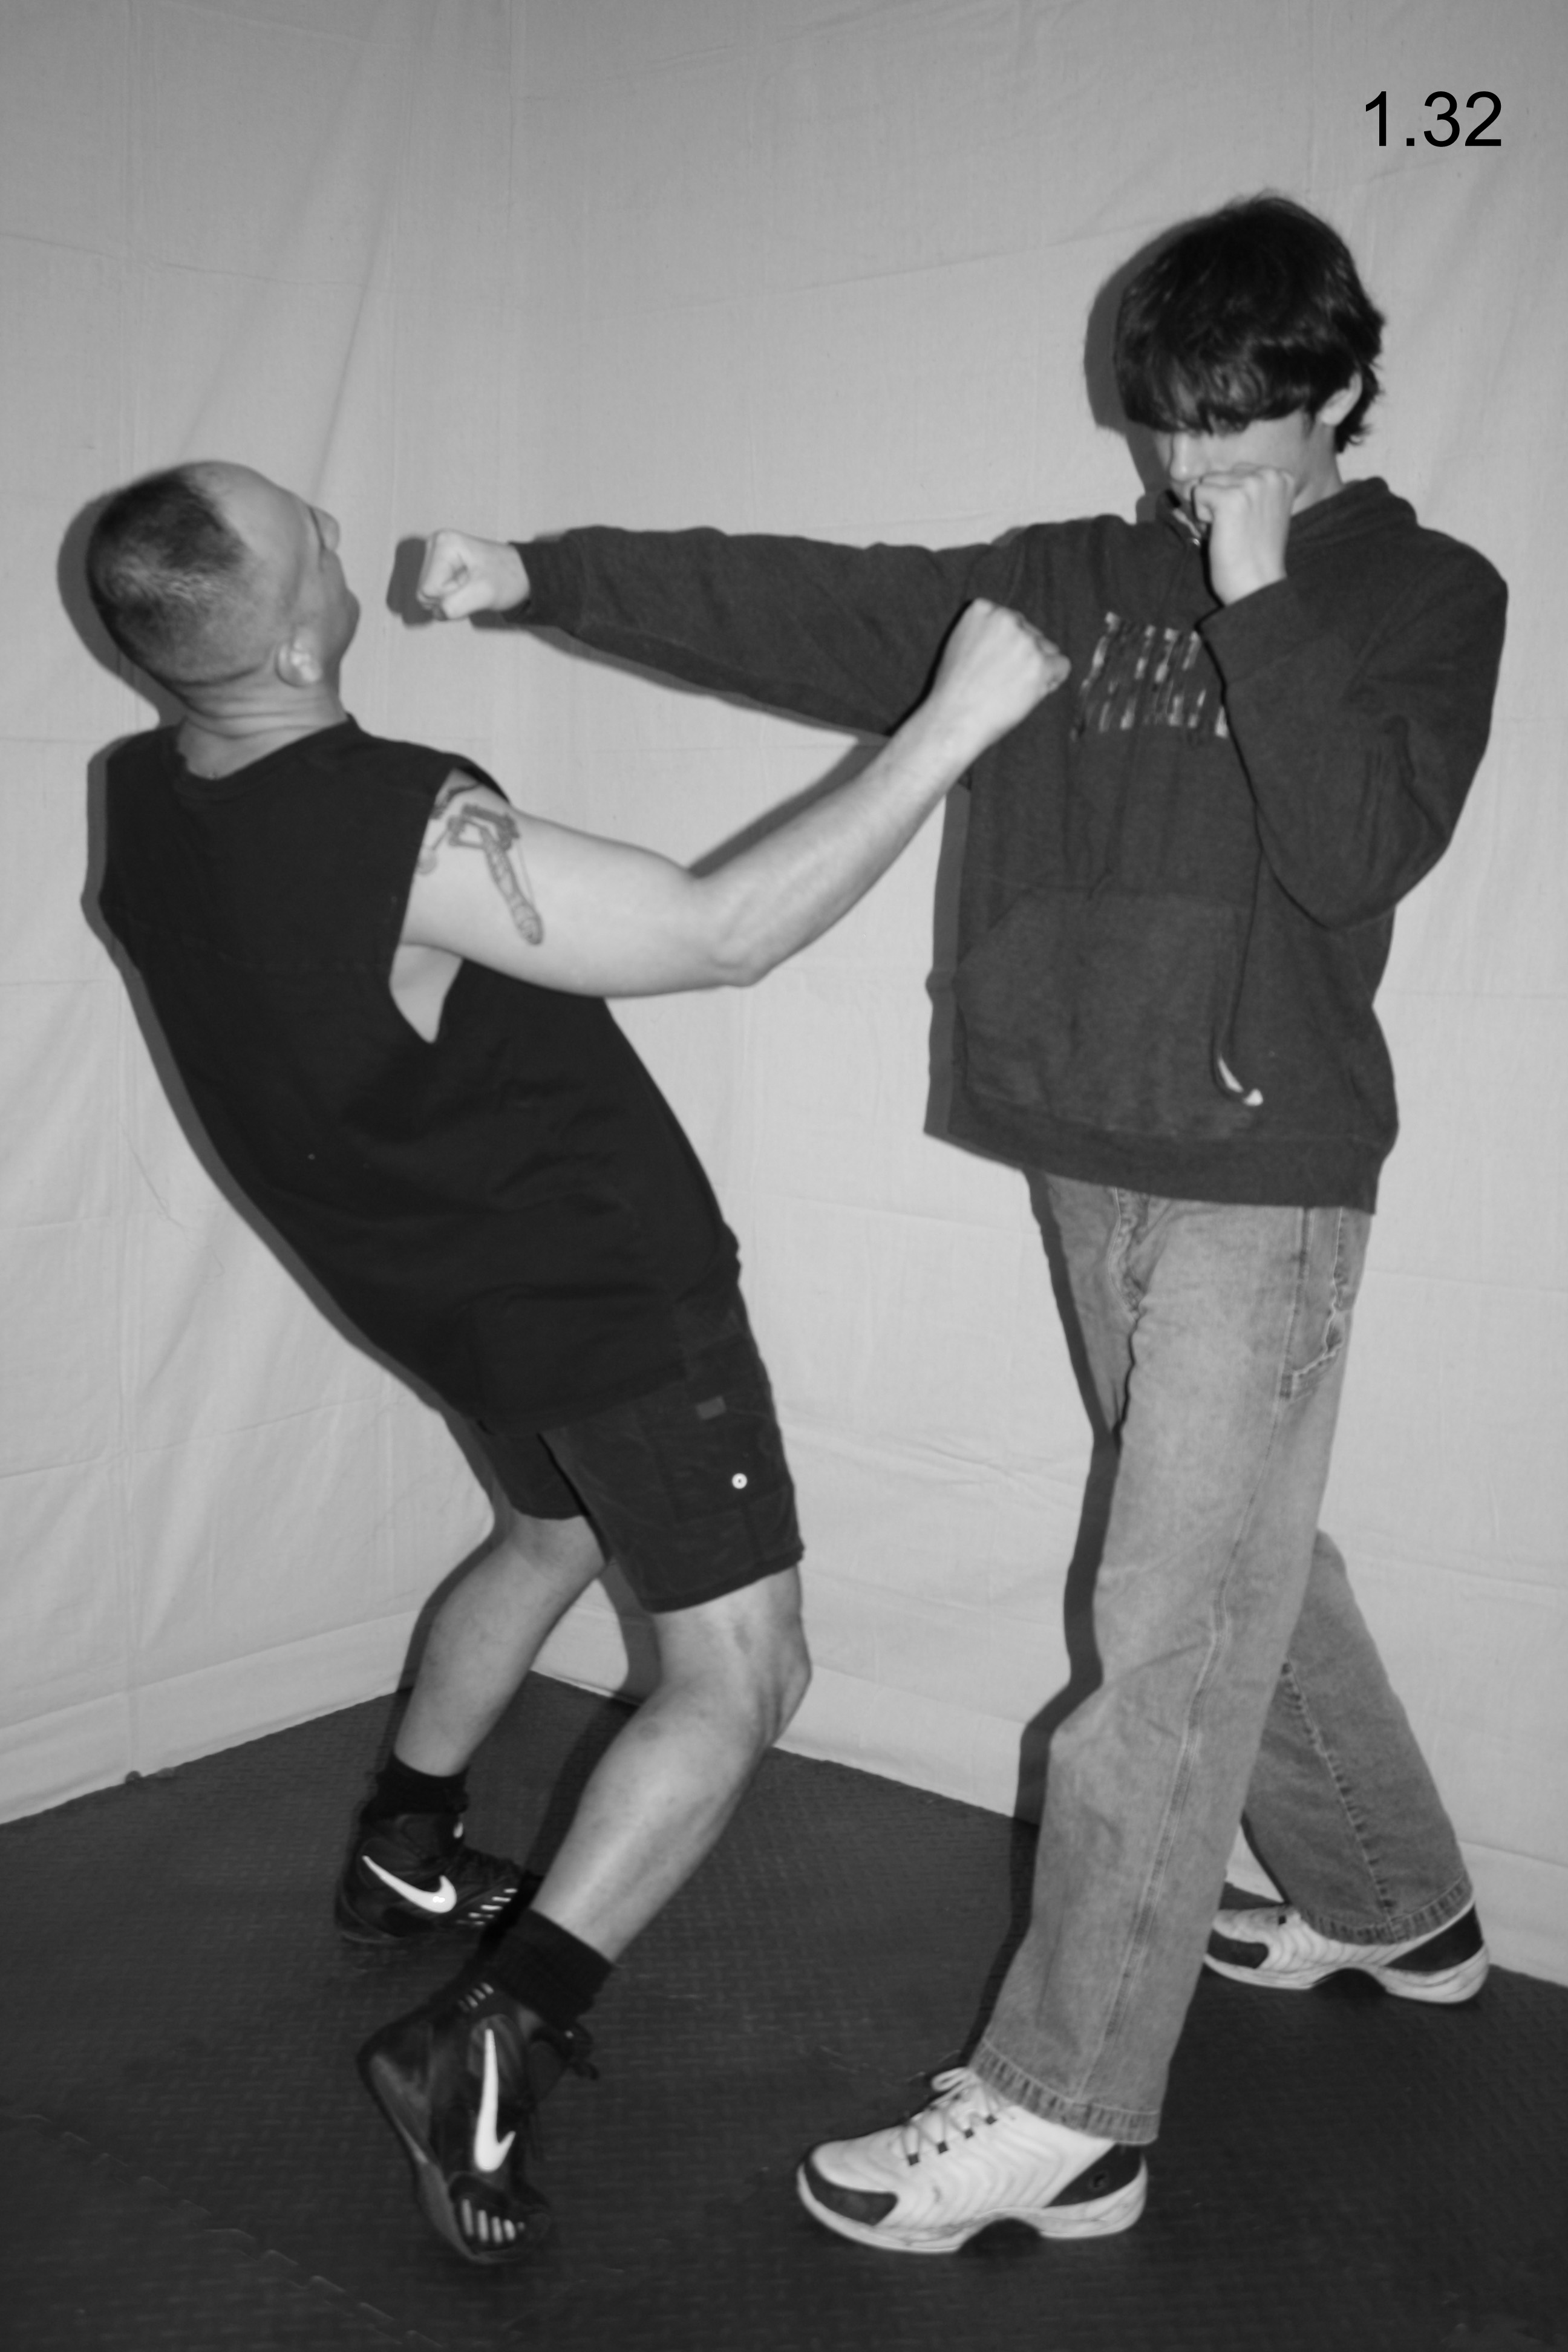
Additionally, the diagonal front step can be effective against a suspect who is advancing toward you. By utilizing the diagonal front step, you will be able to close the gap quicker than your suspect expected while moving your body out of the line of fire. You can simultaneously execute various types of strikes, such as a right straight knee, to help end the physical confrontation.

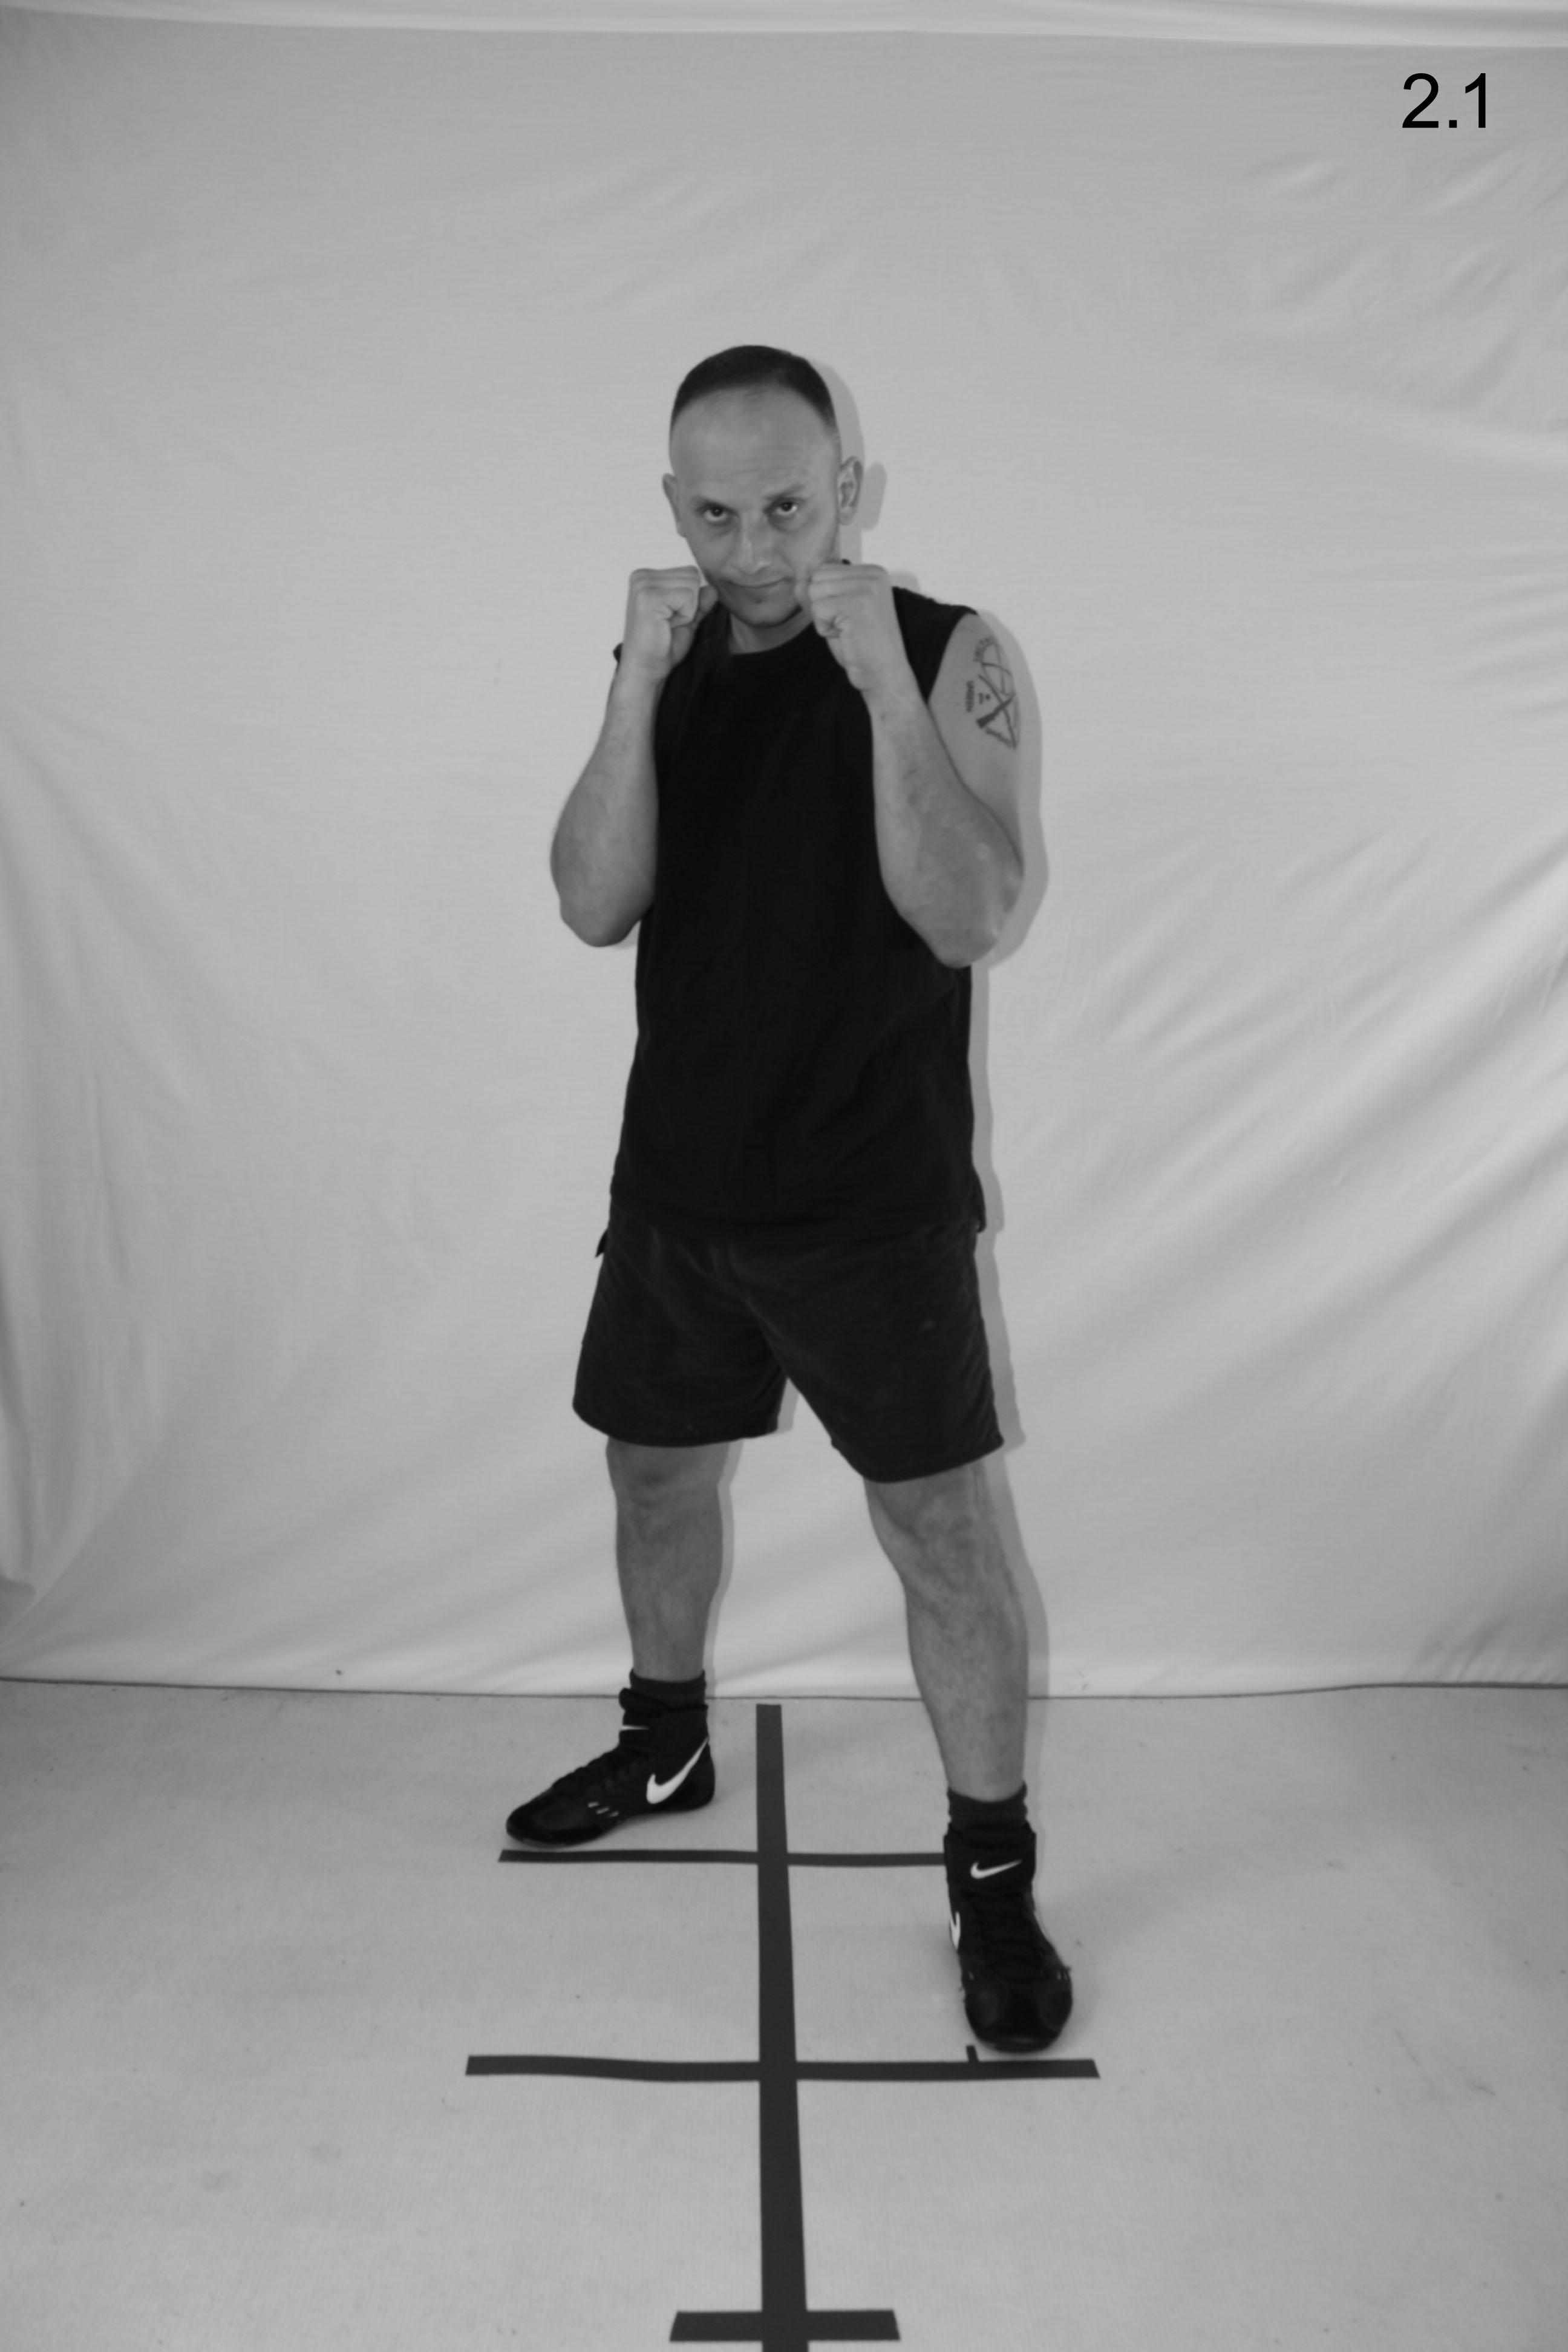
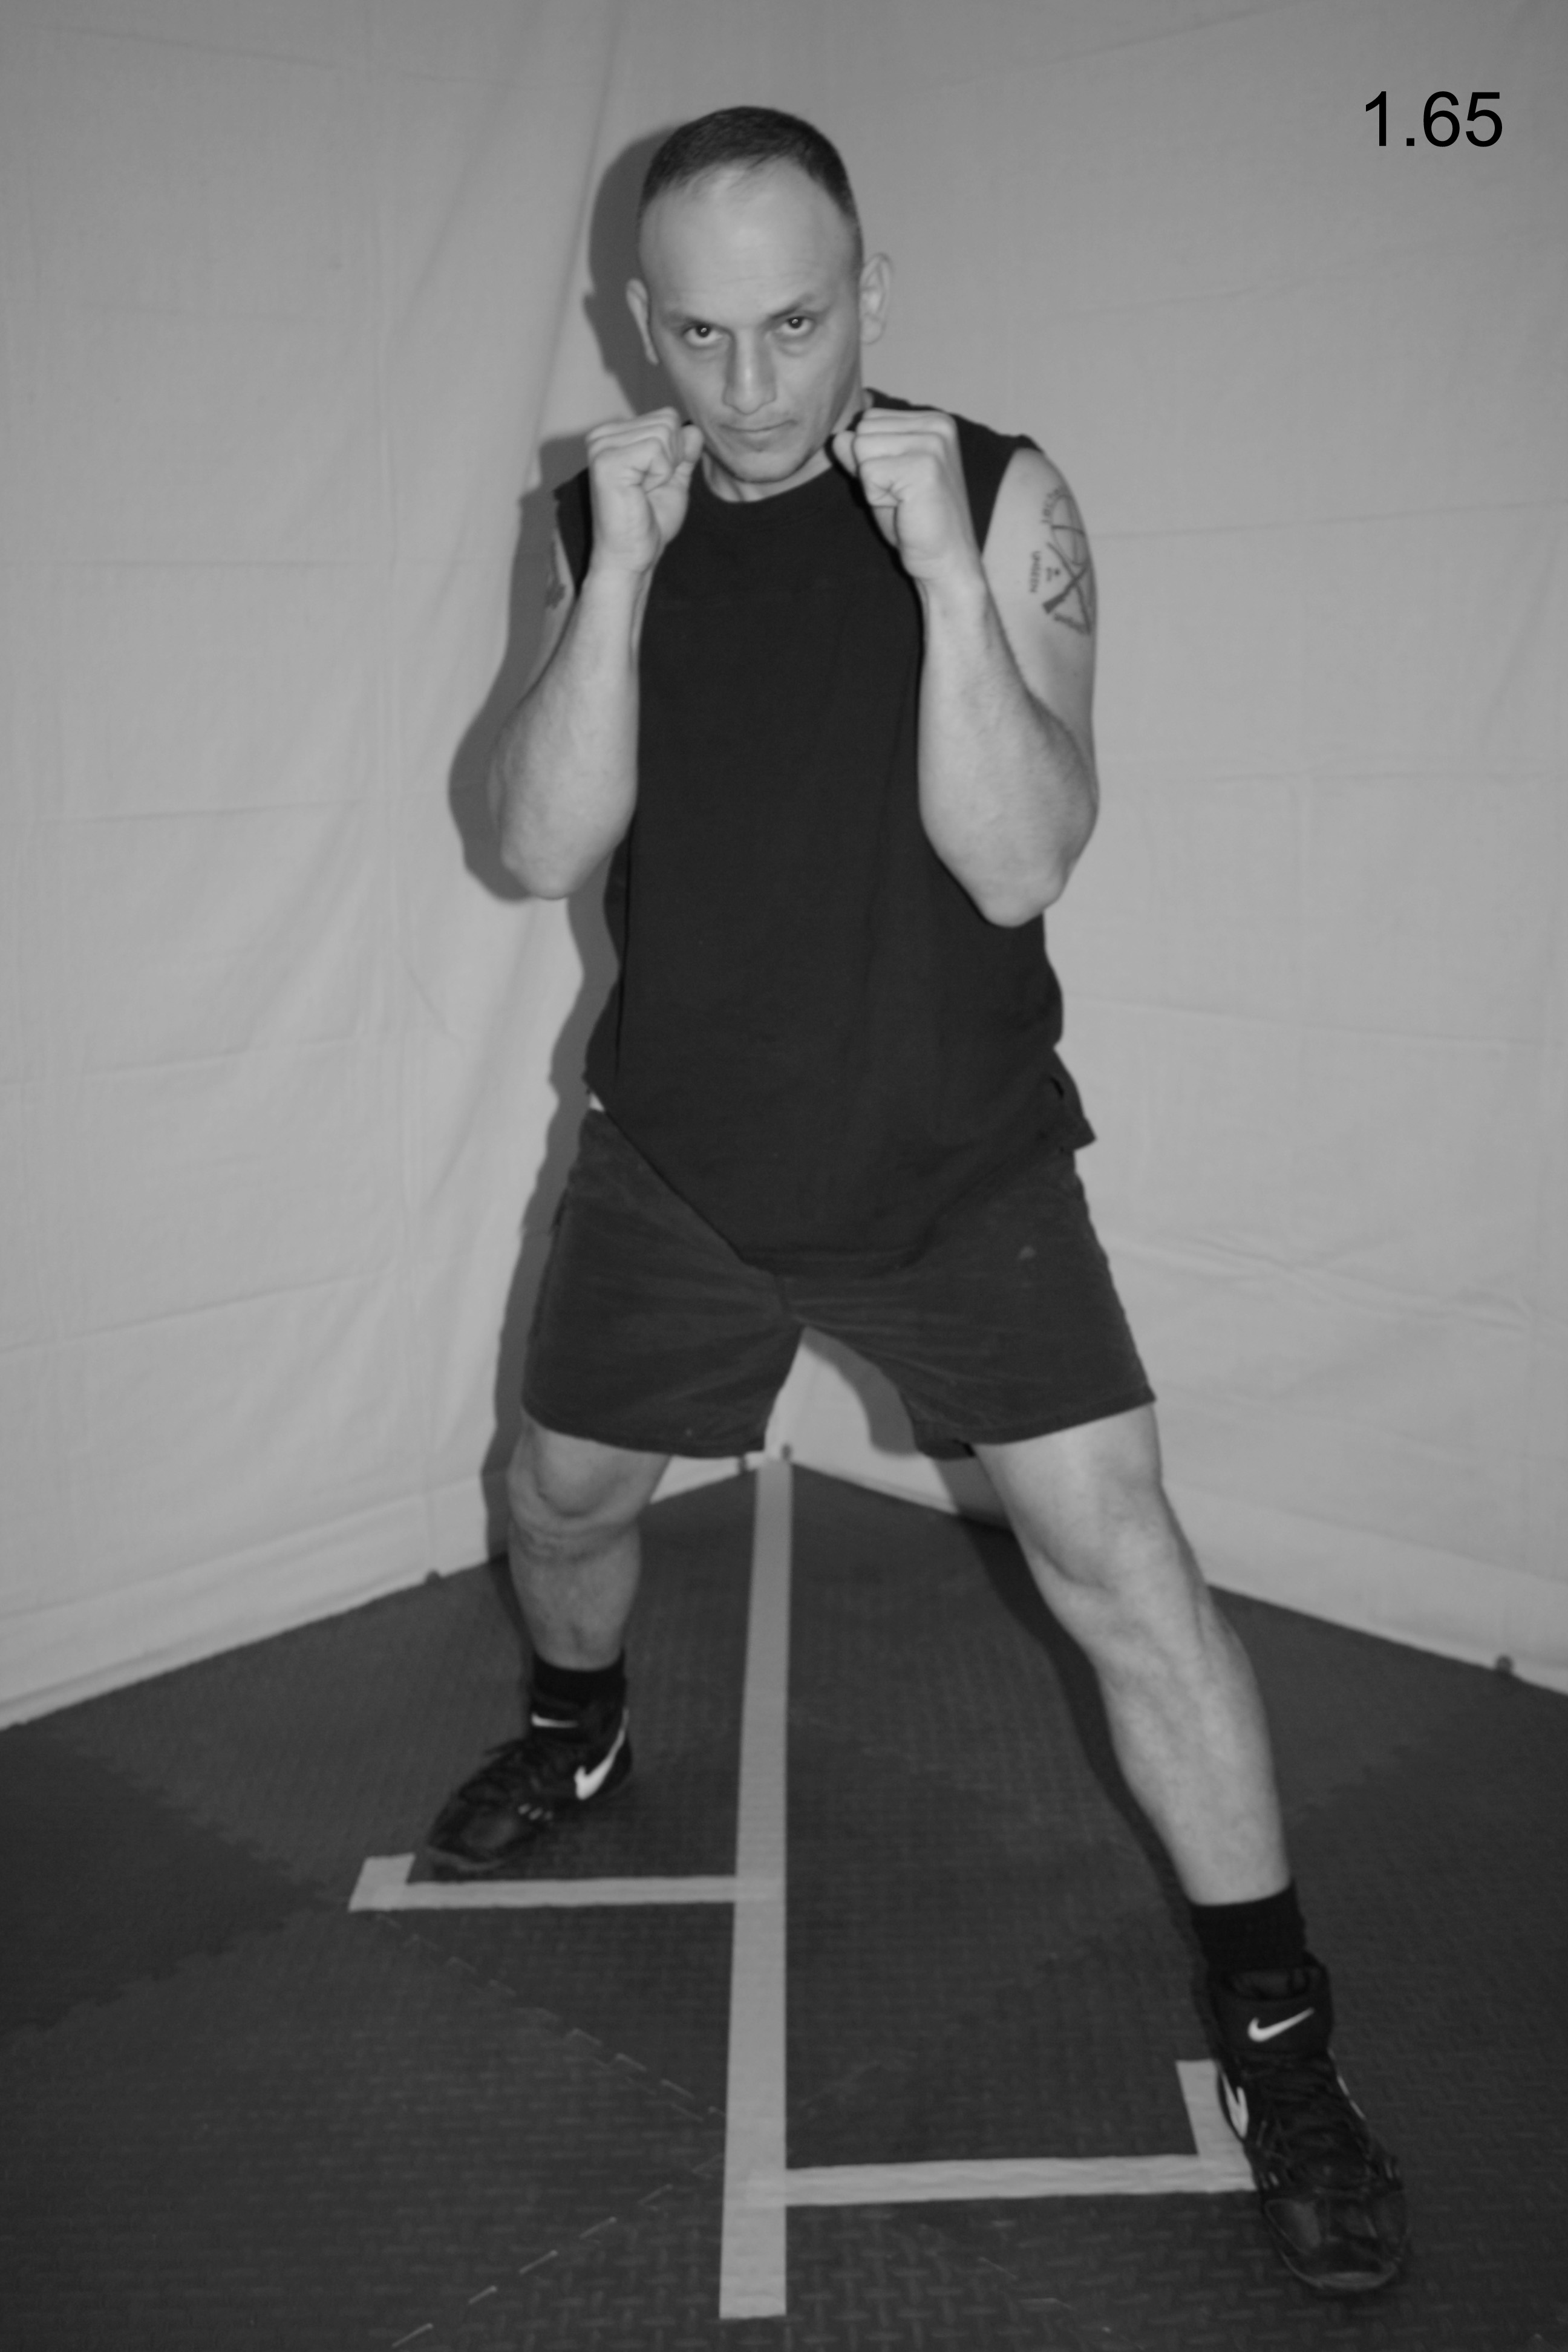
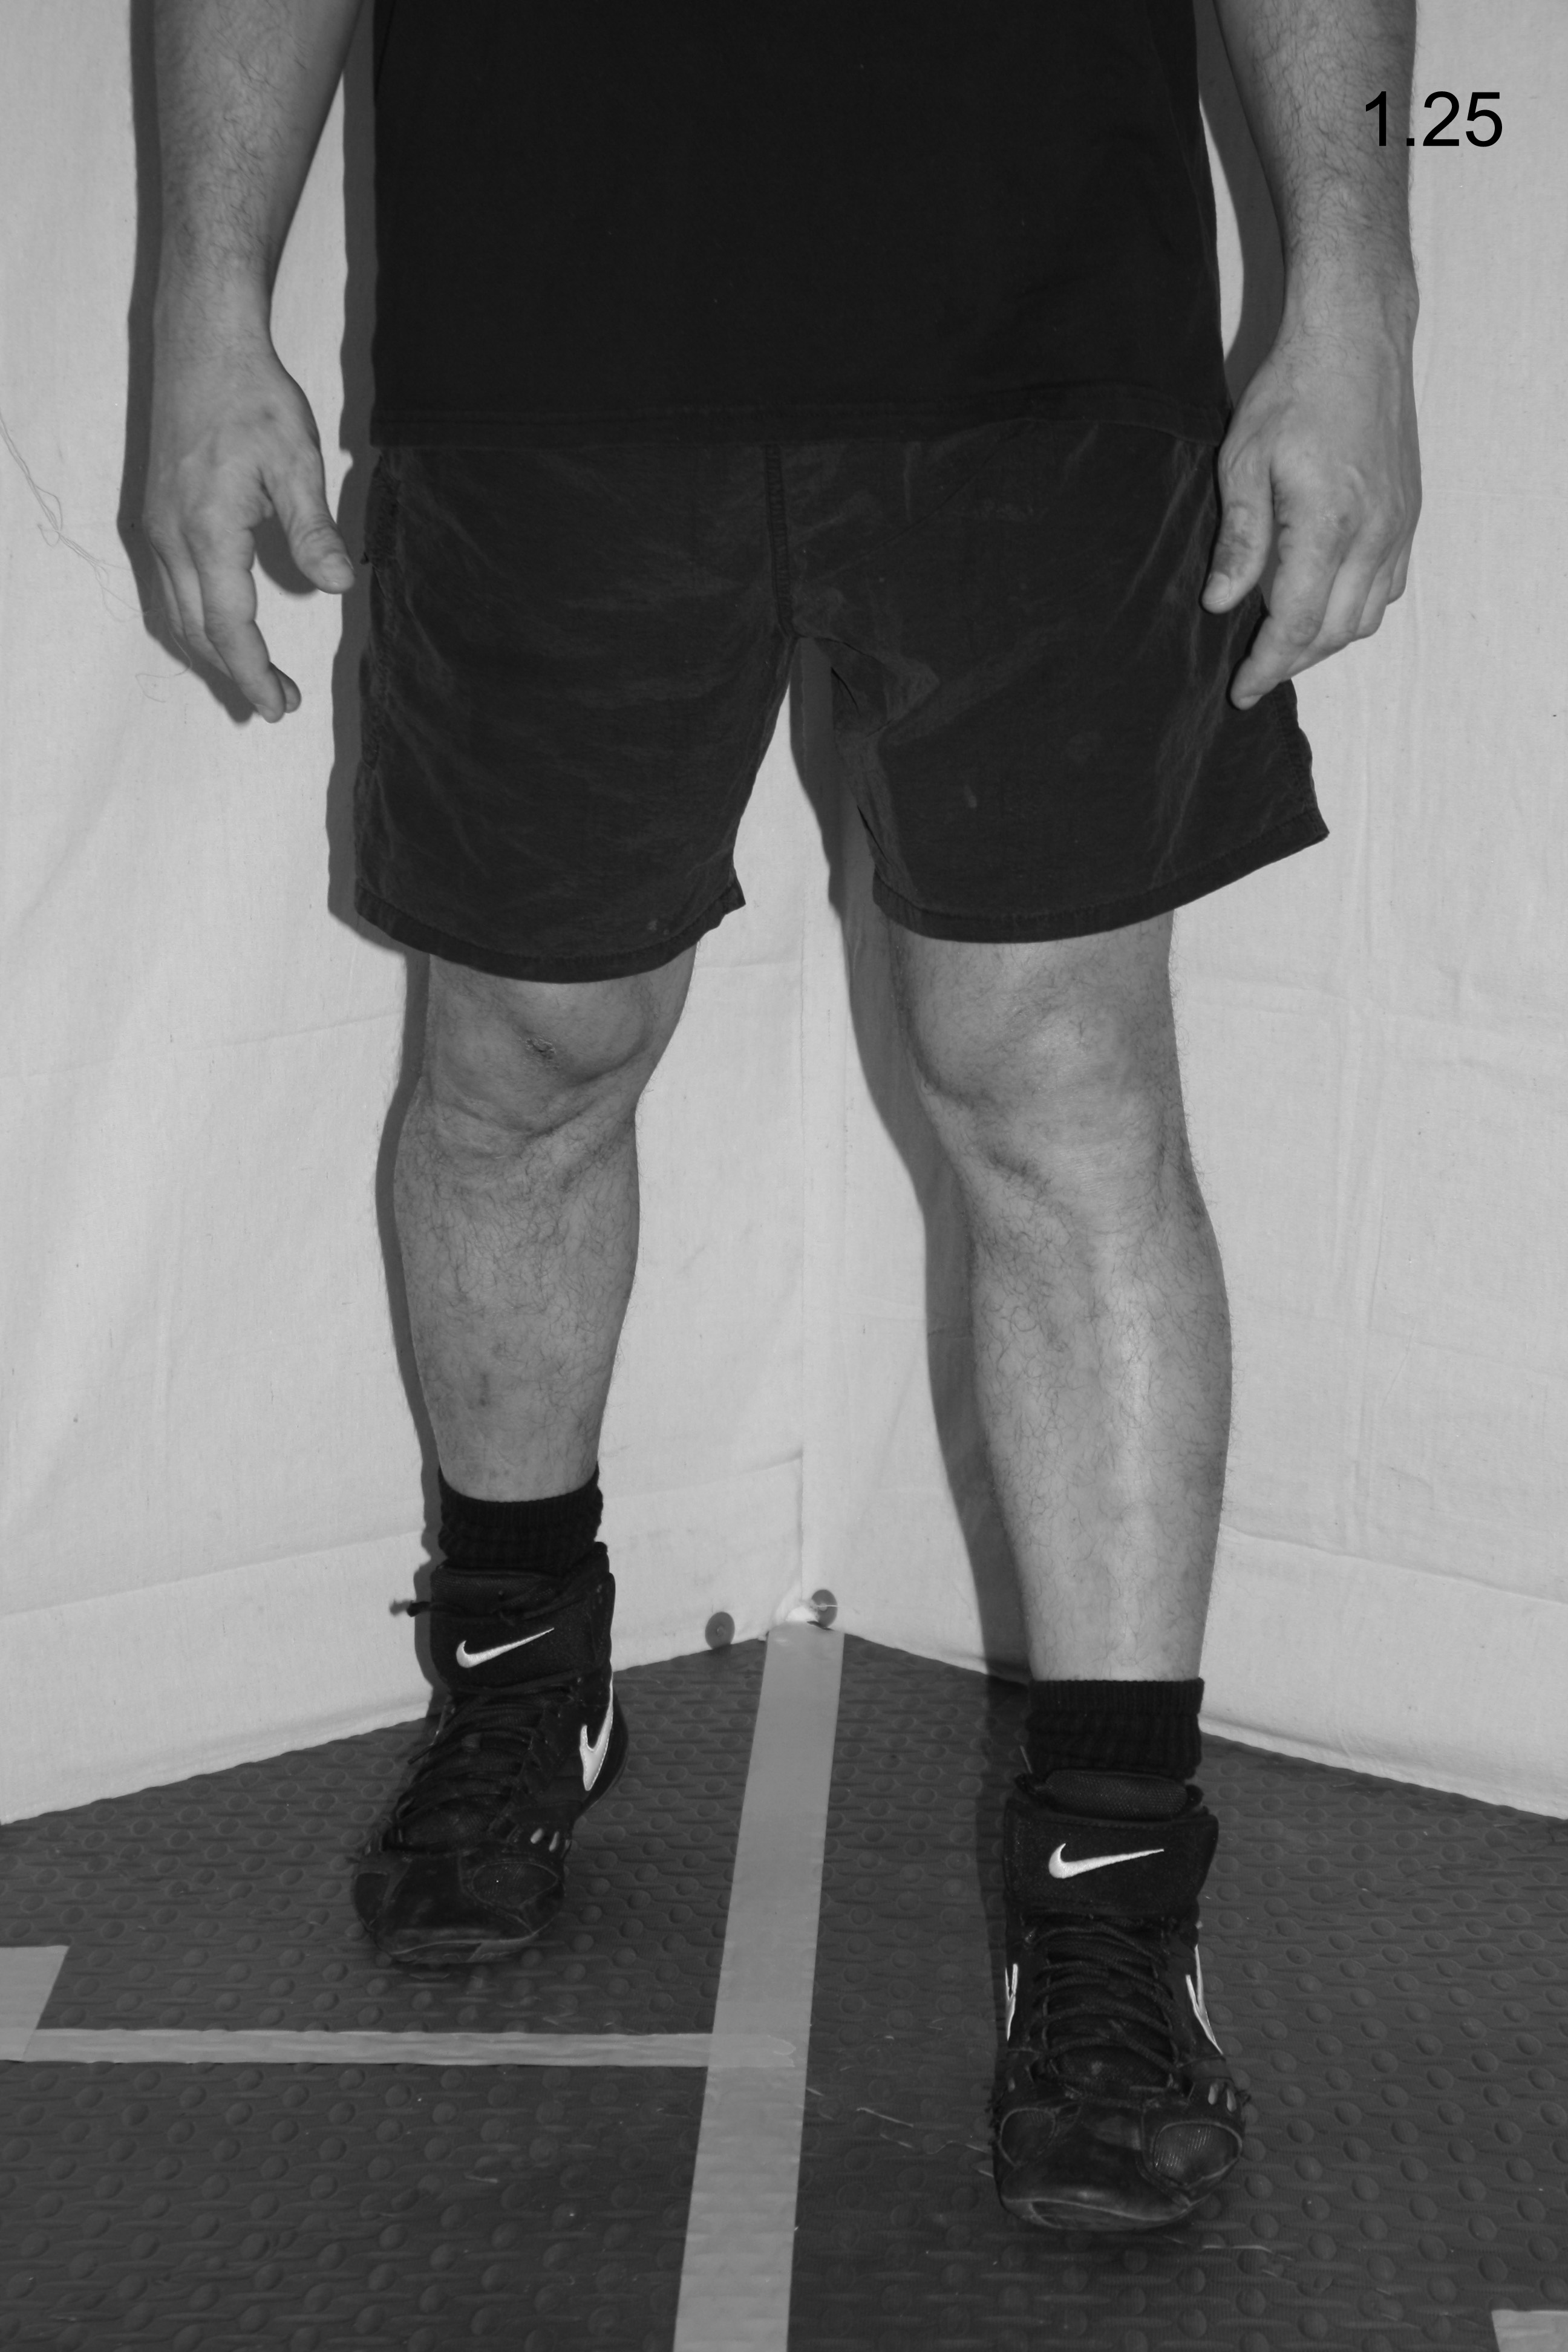
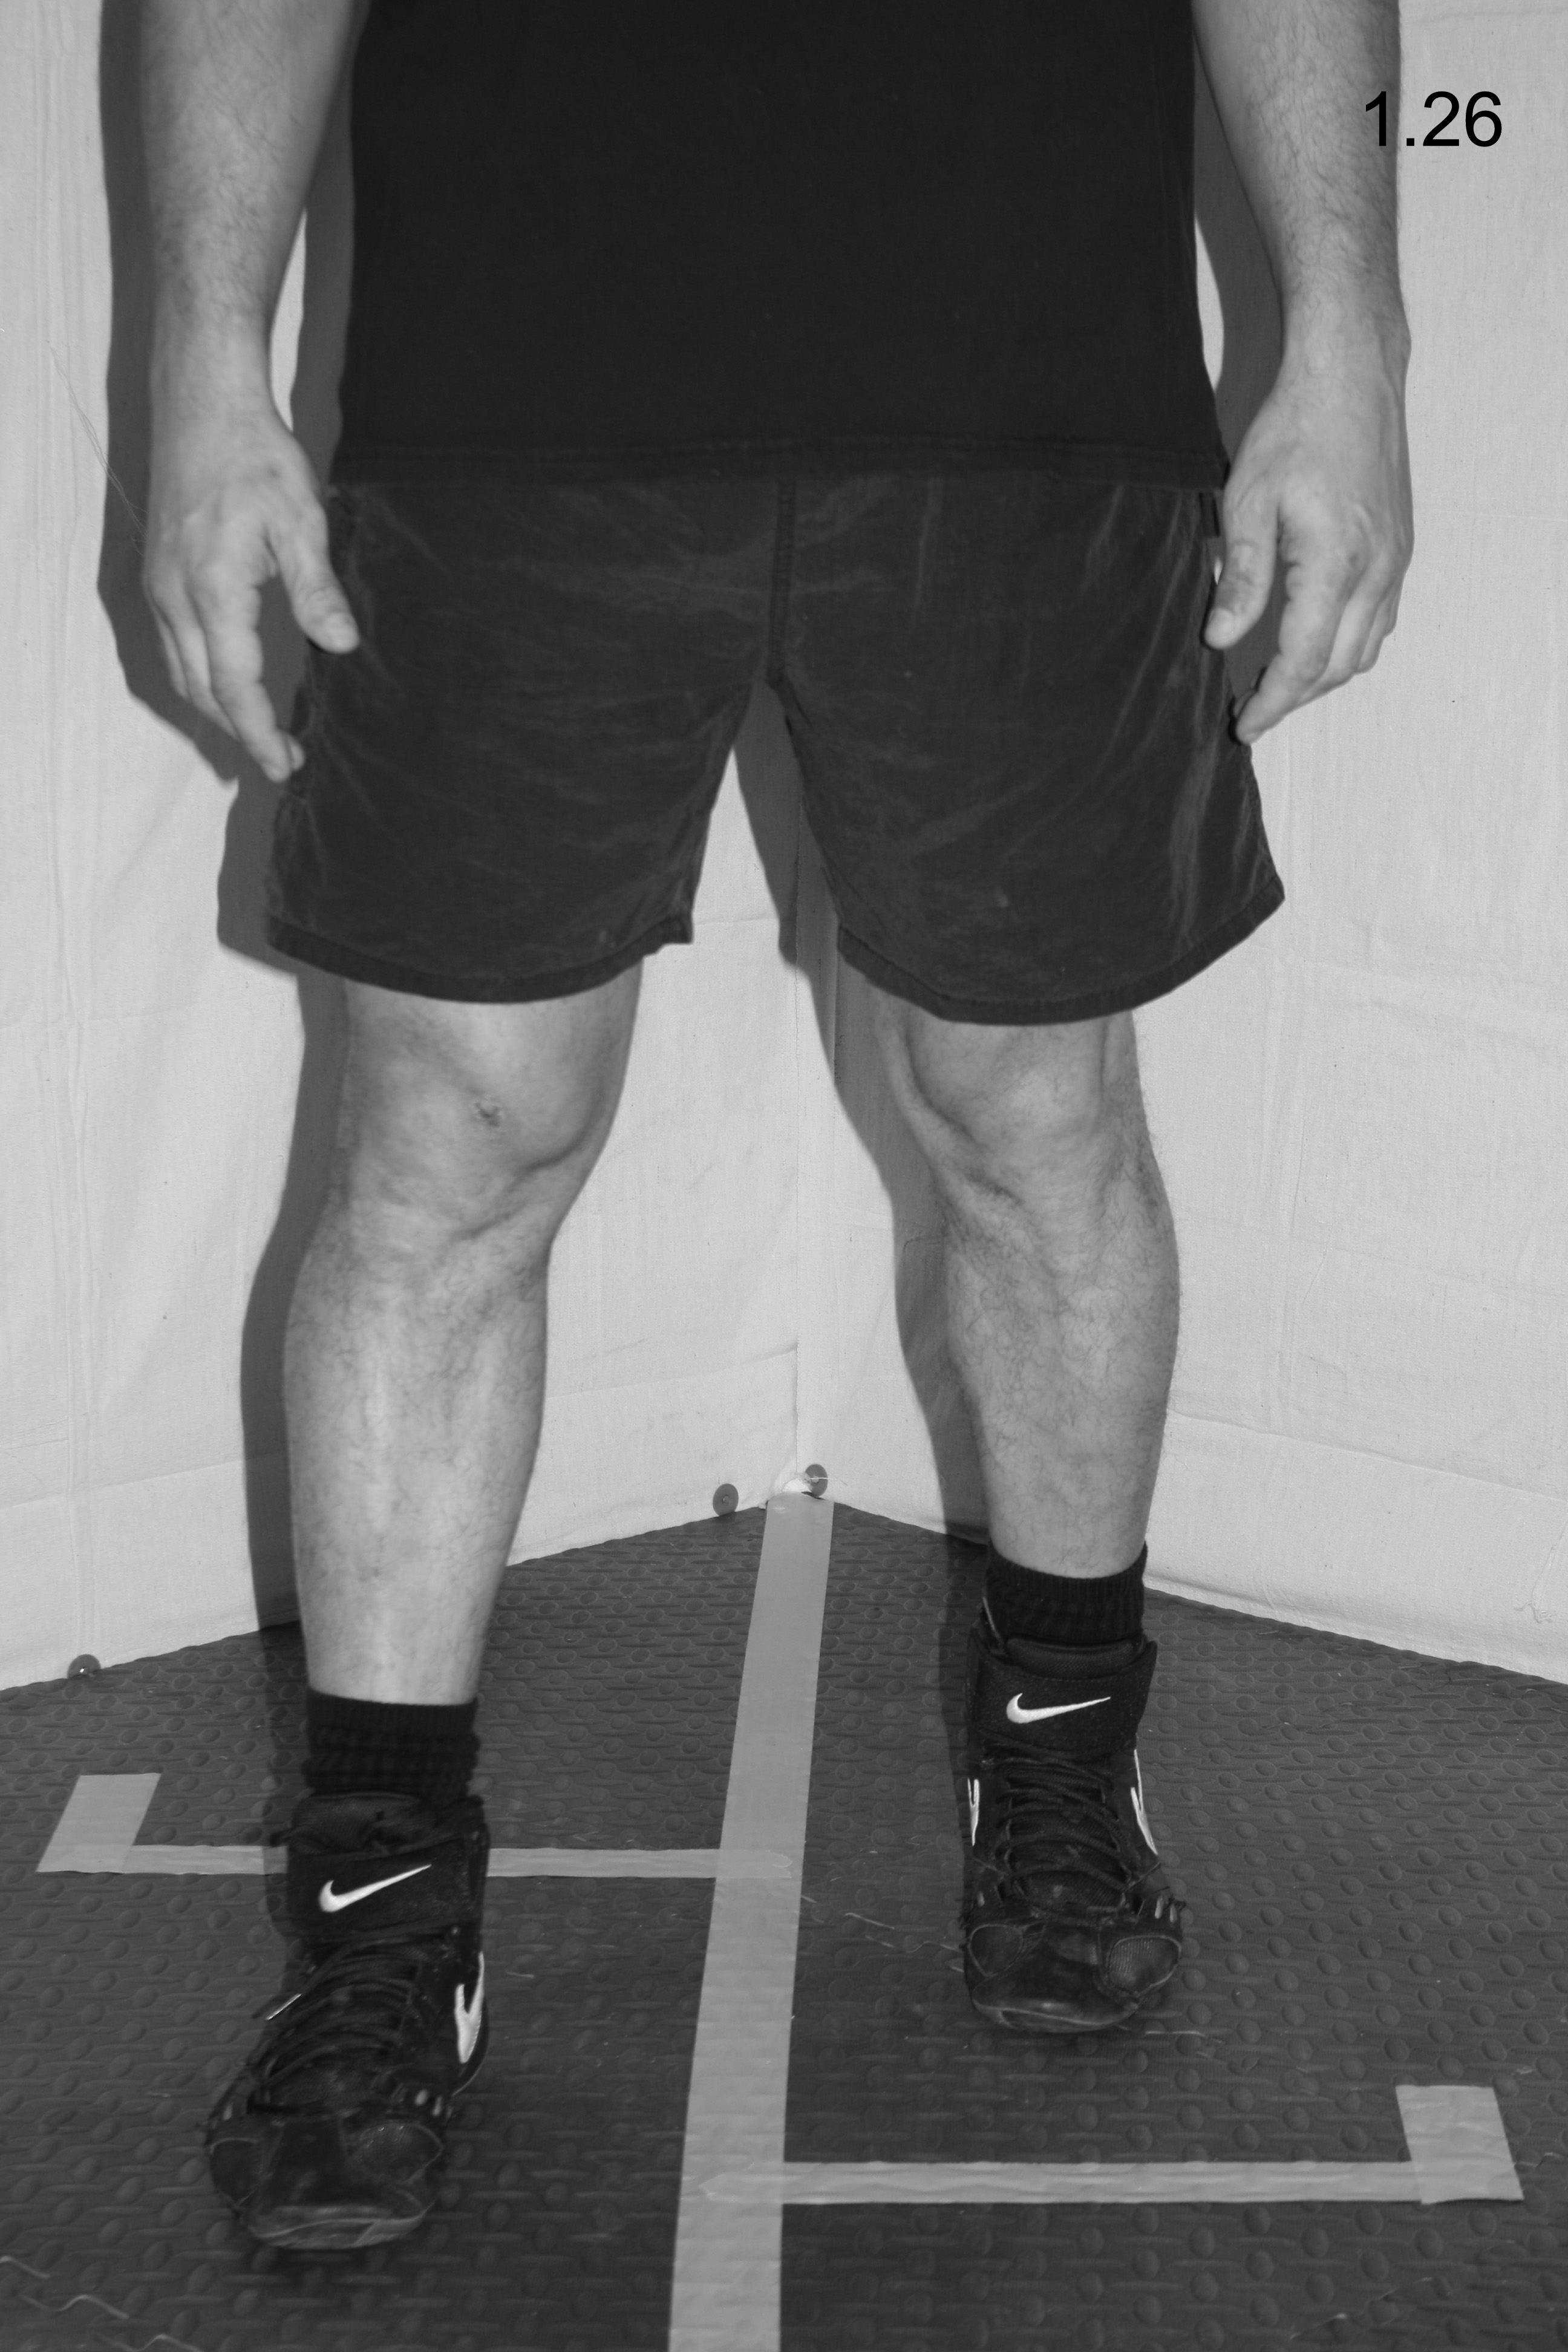
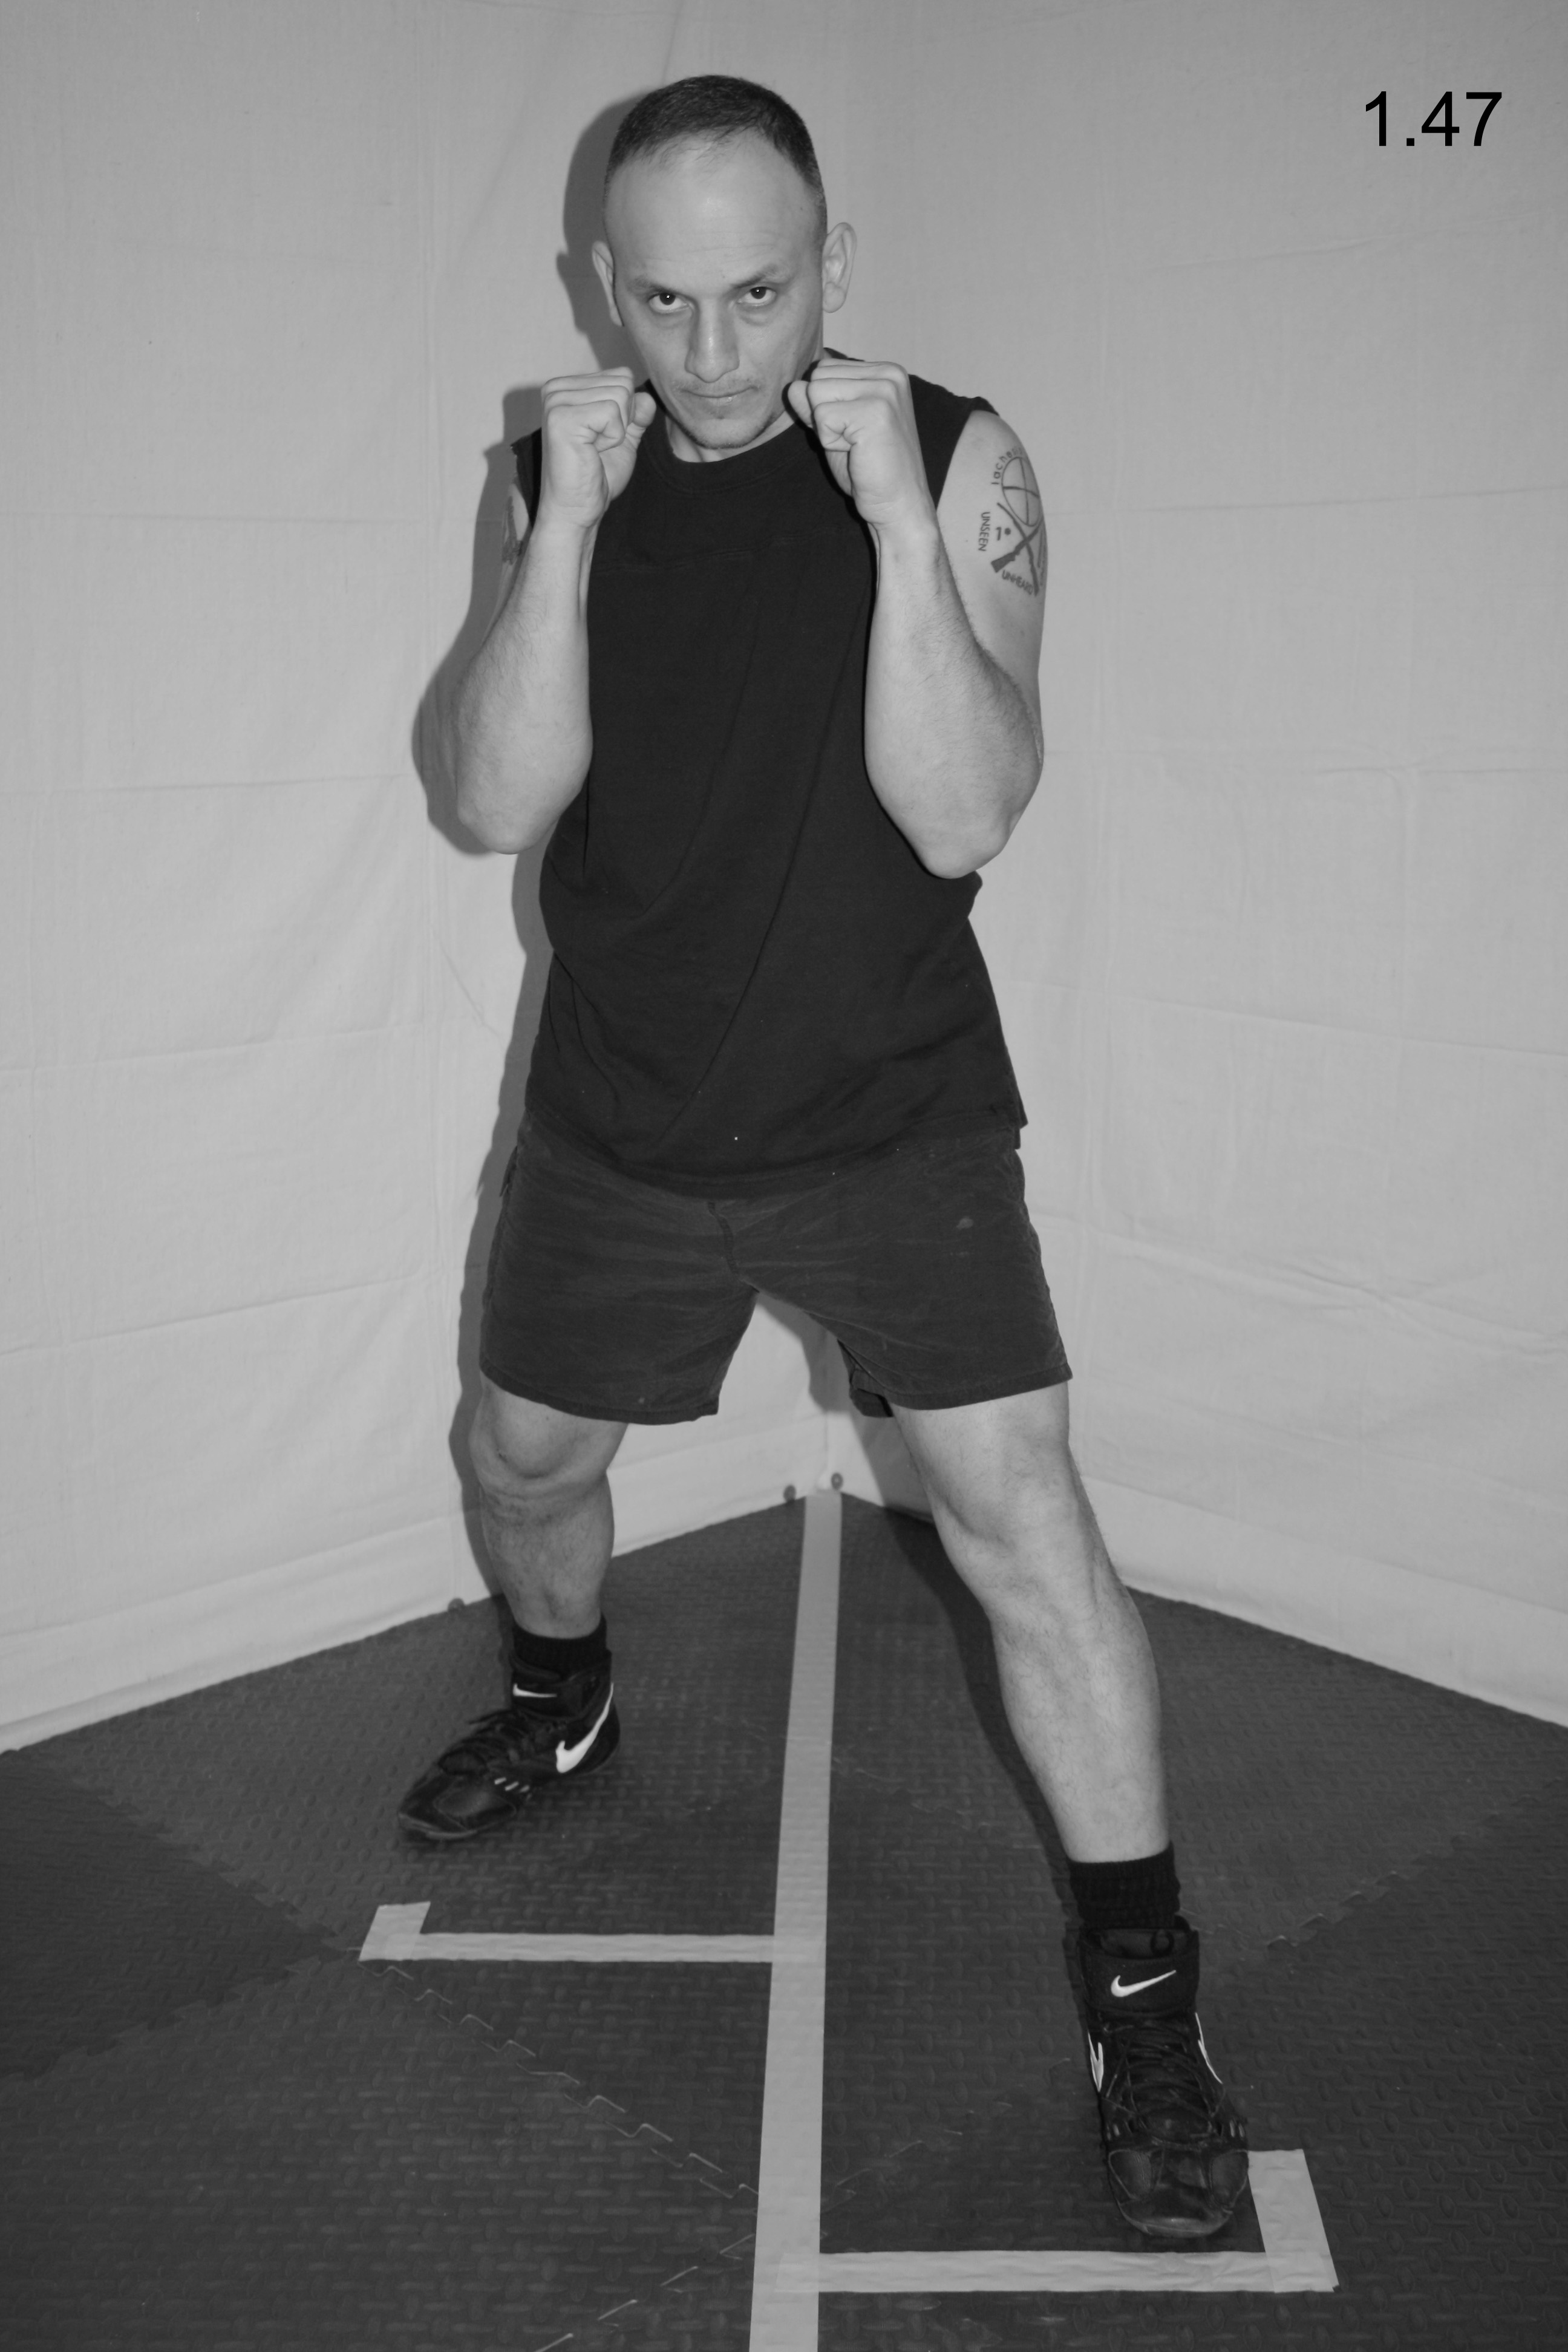
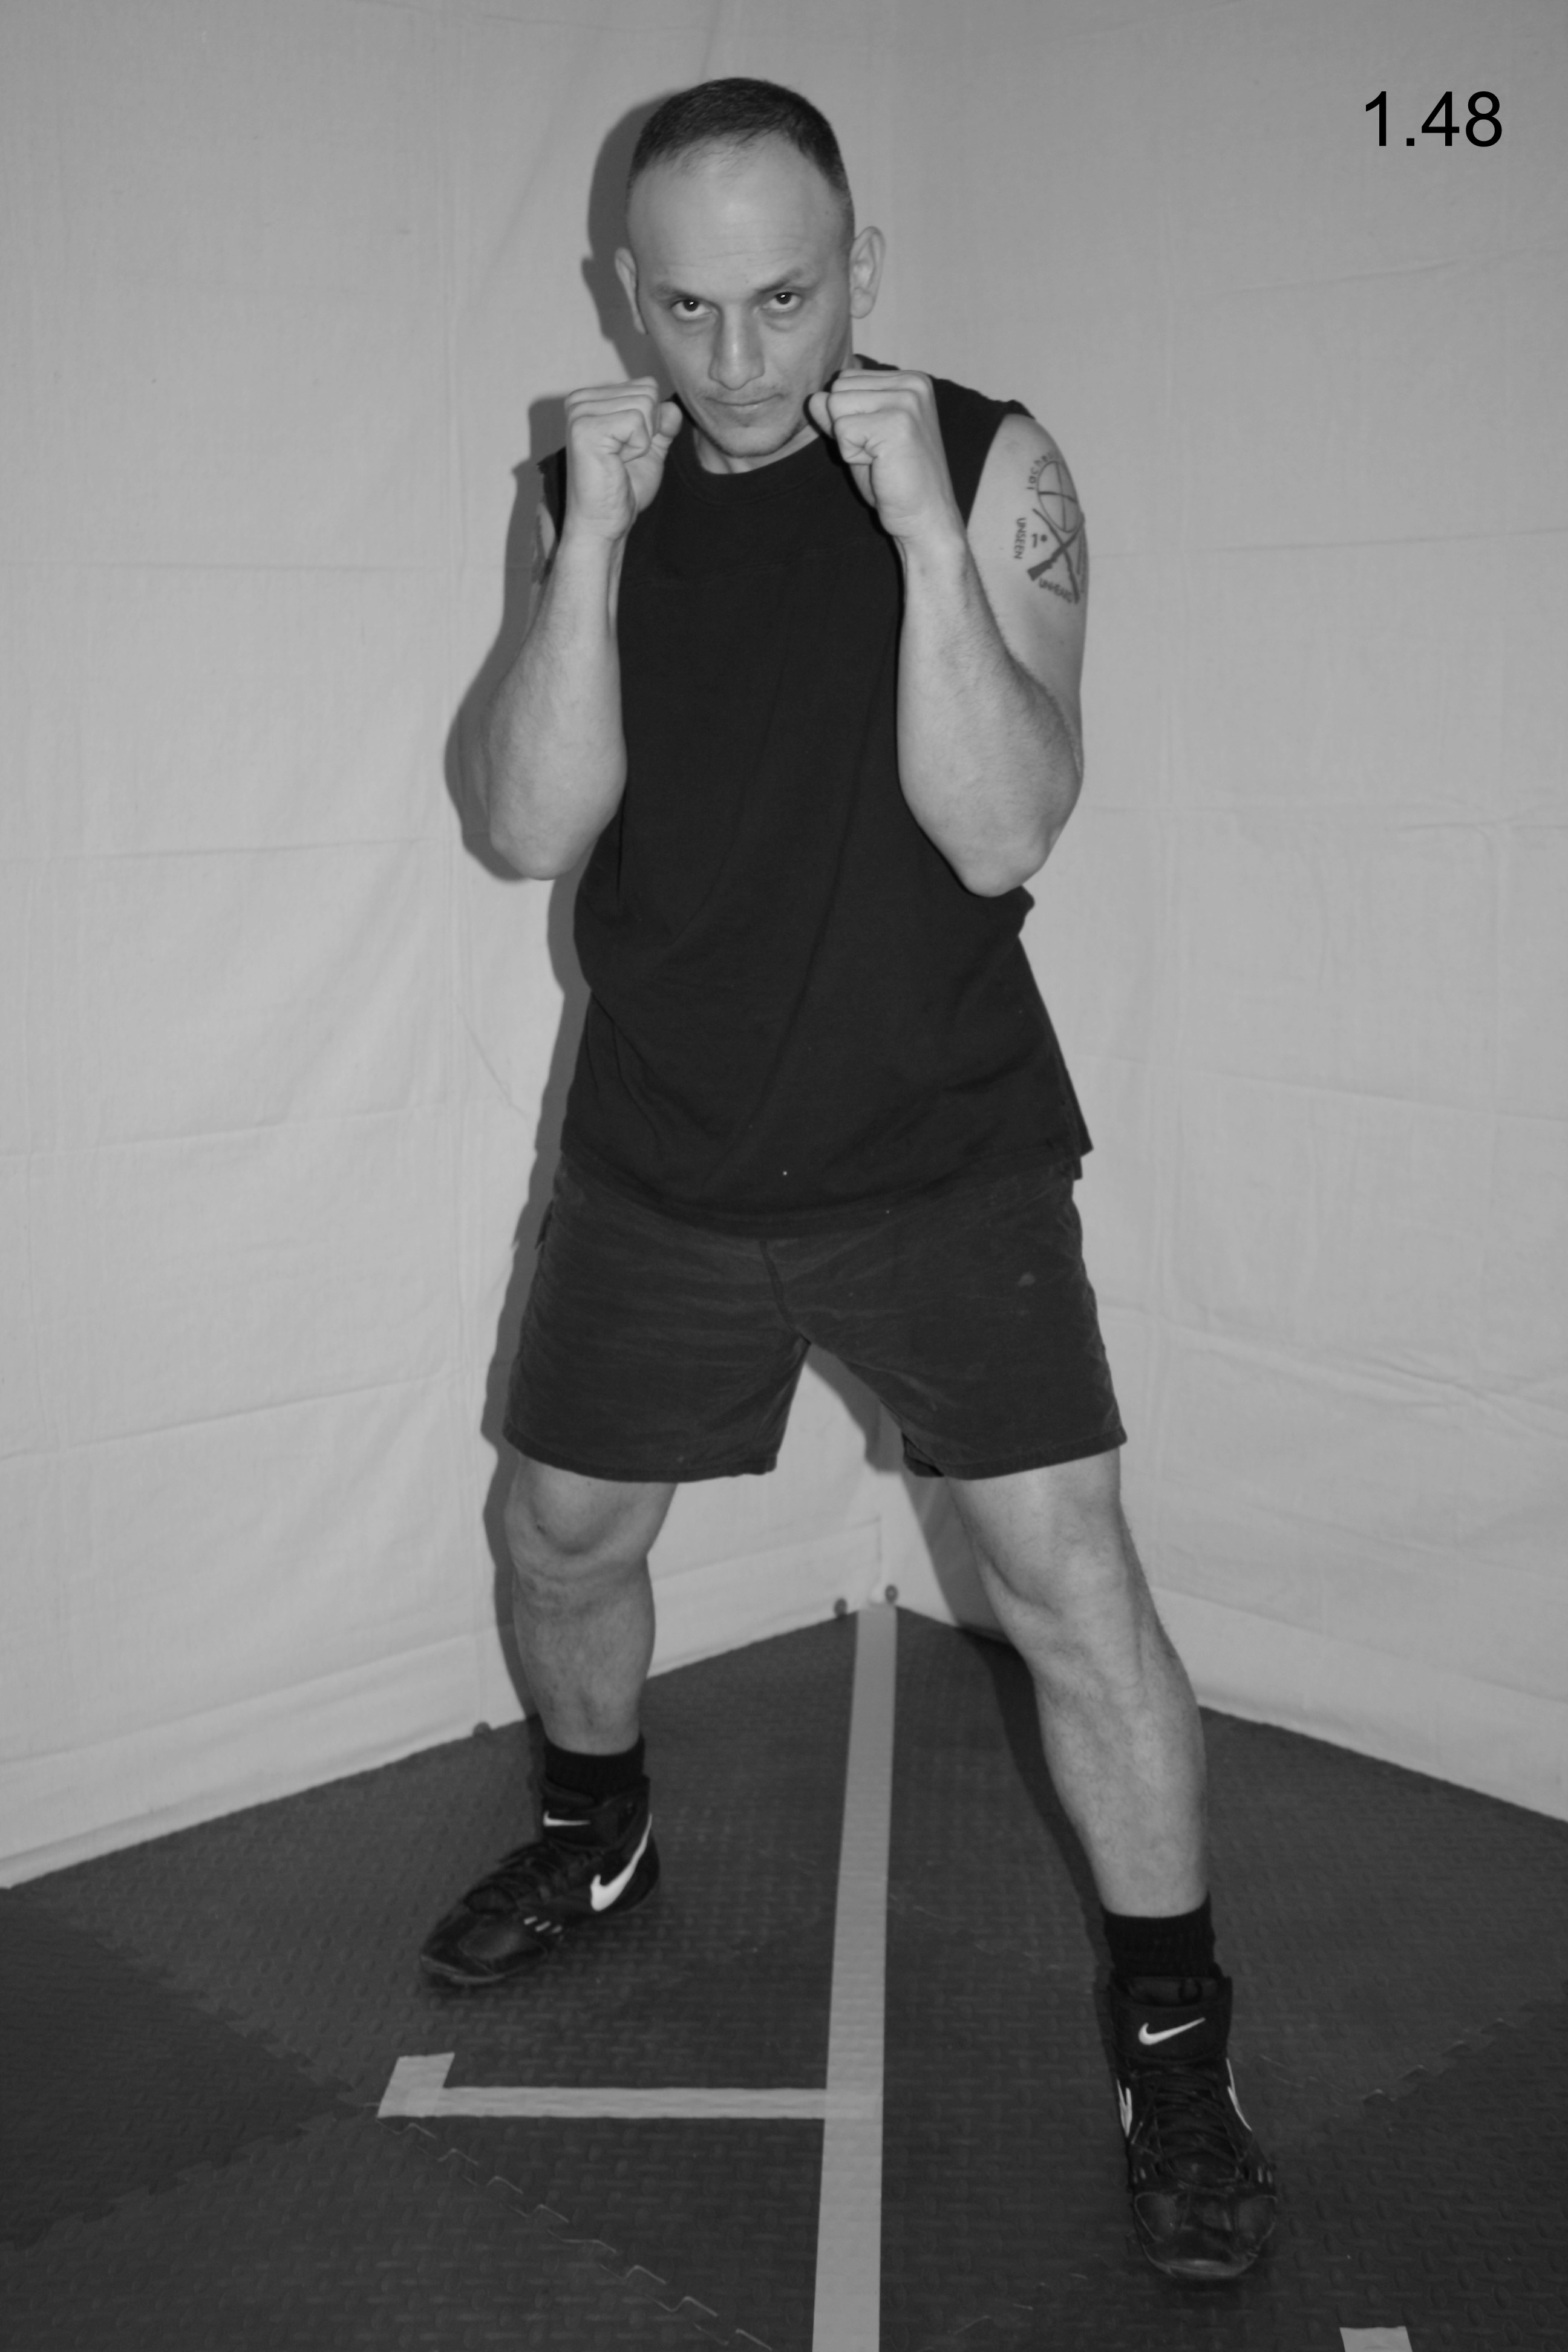
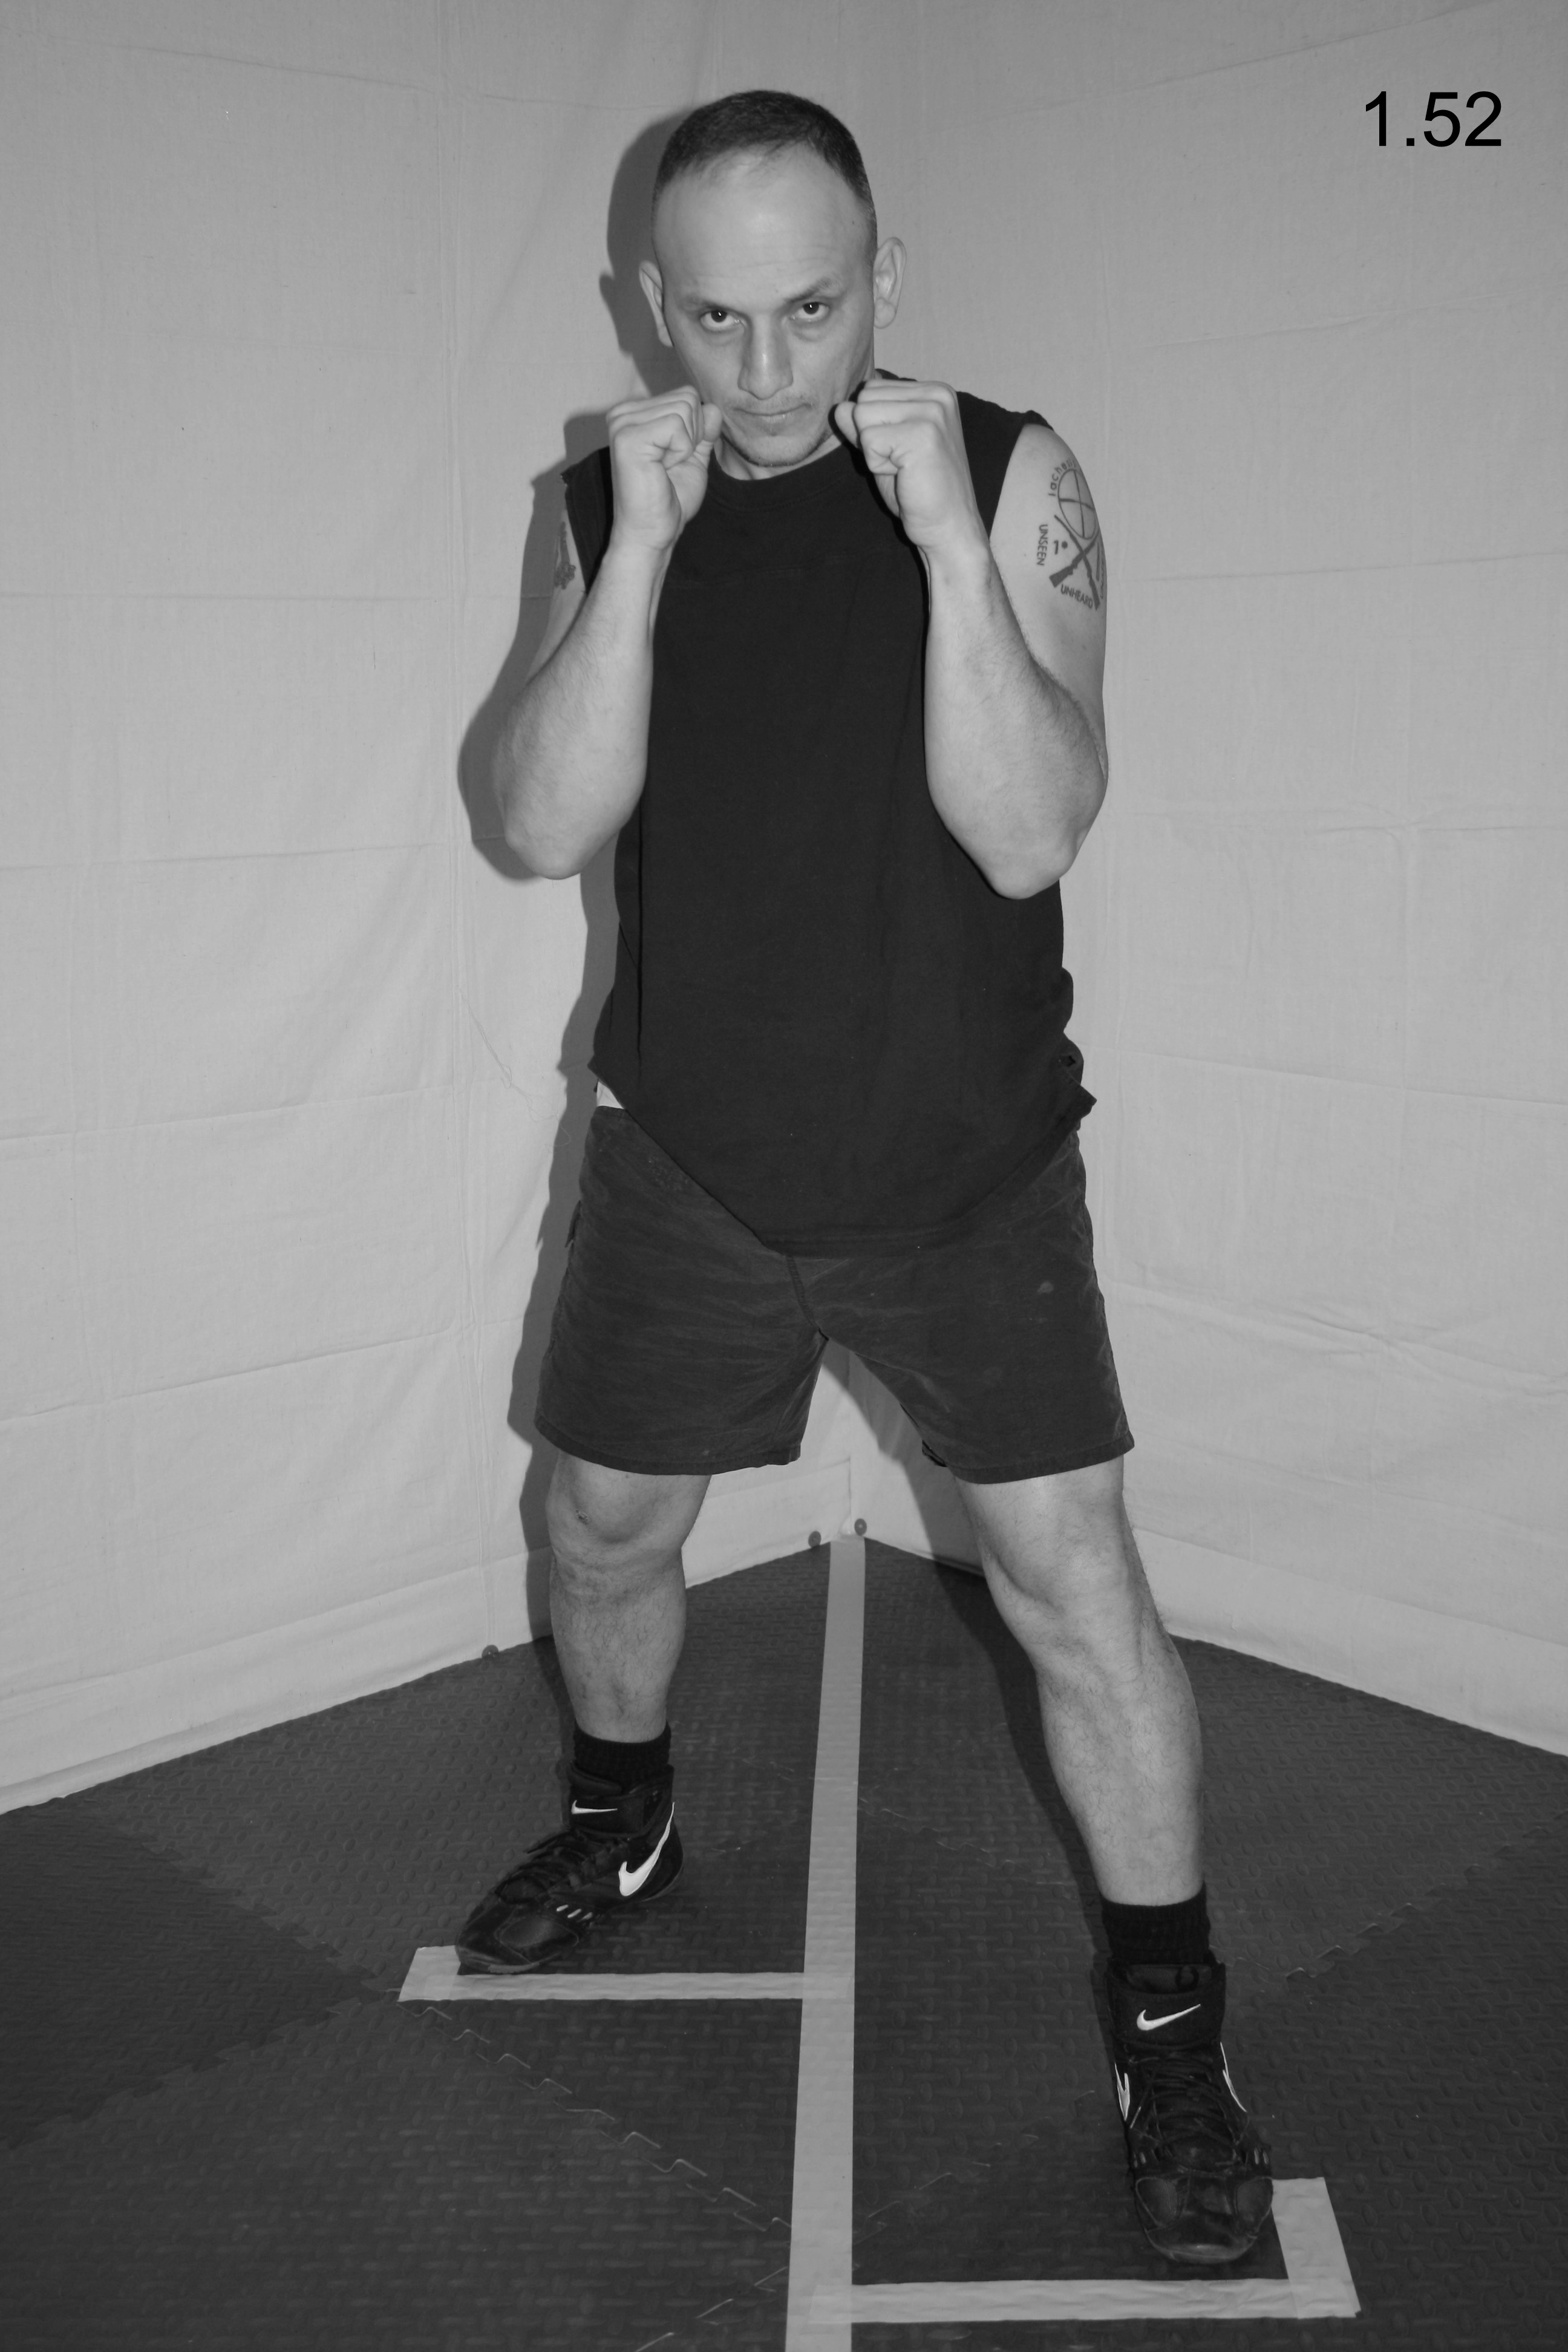
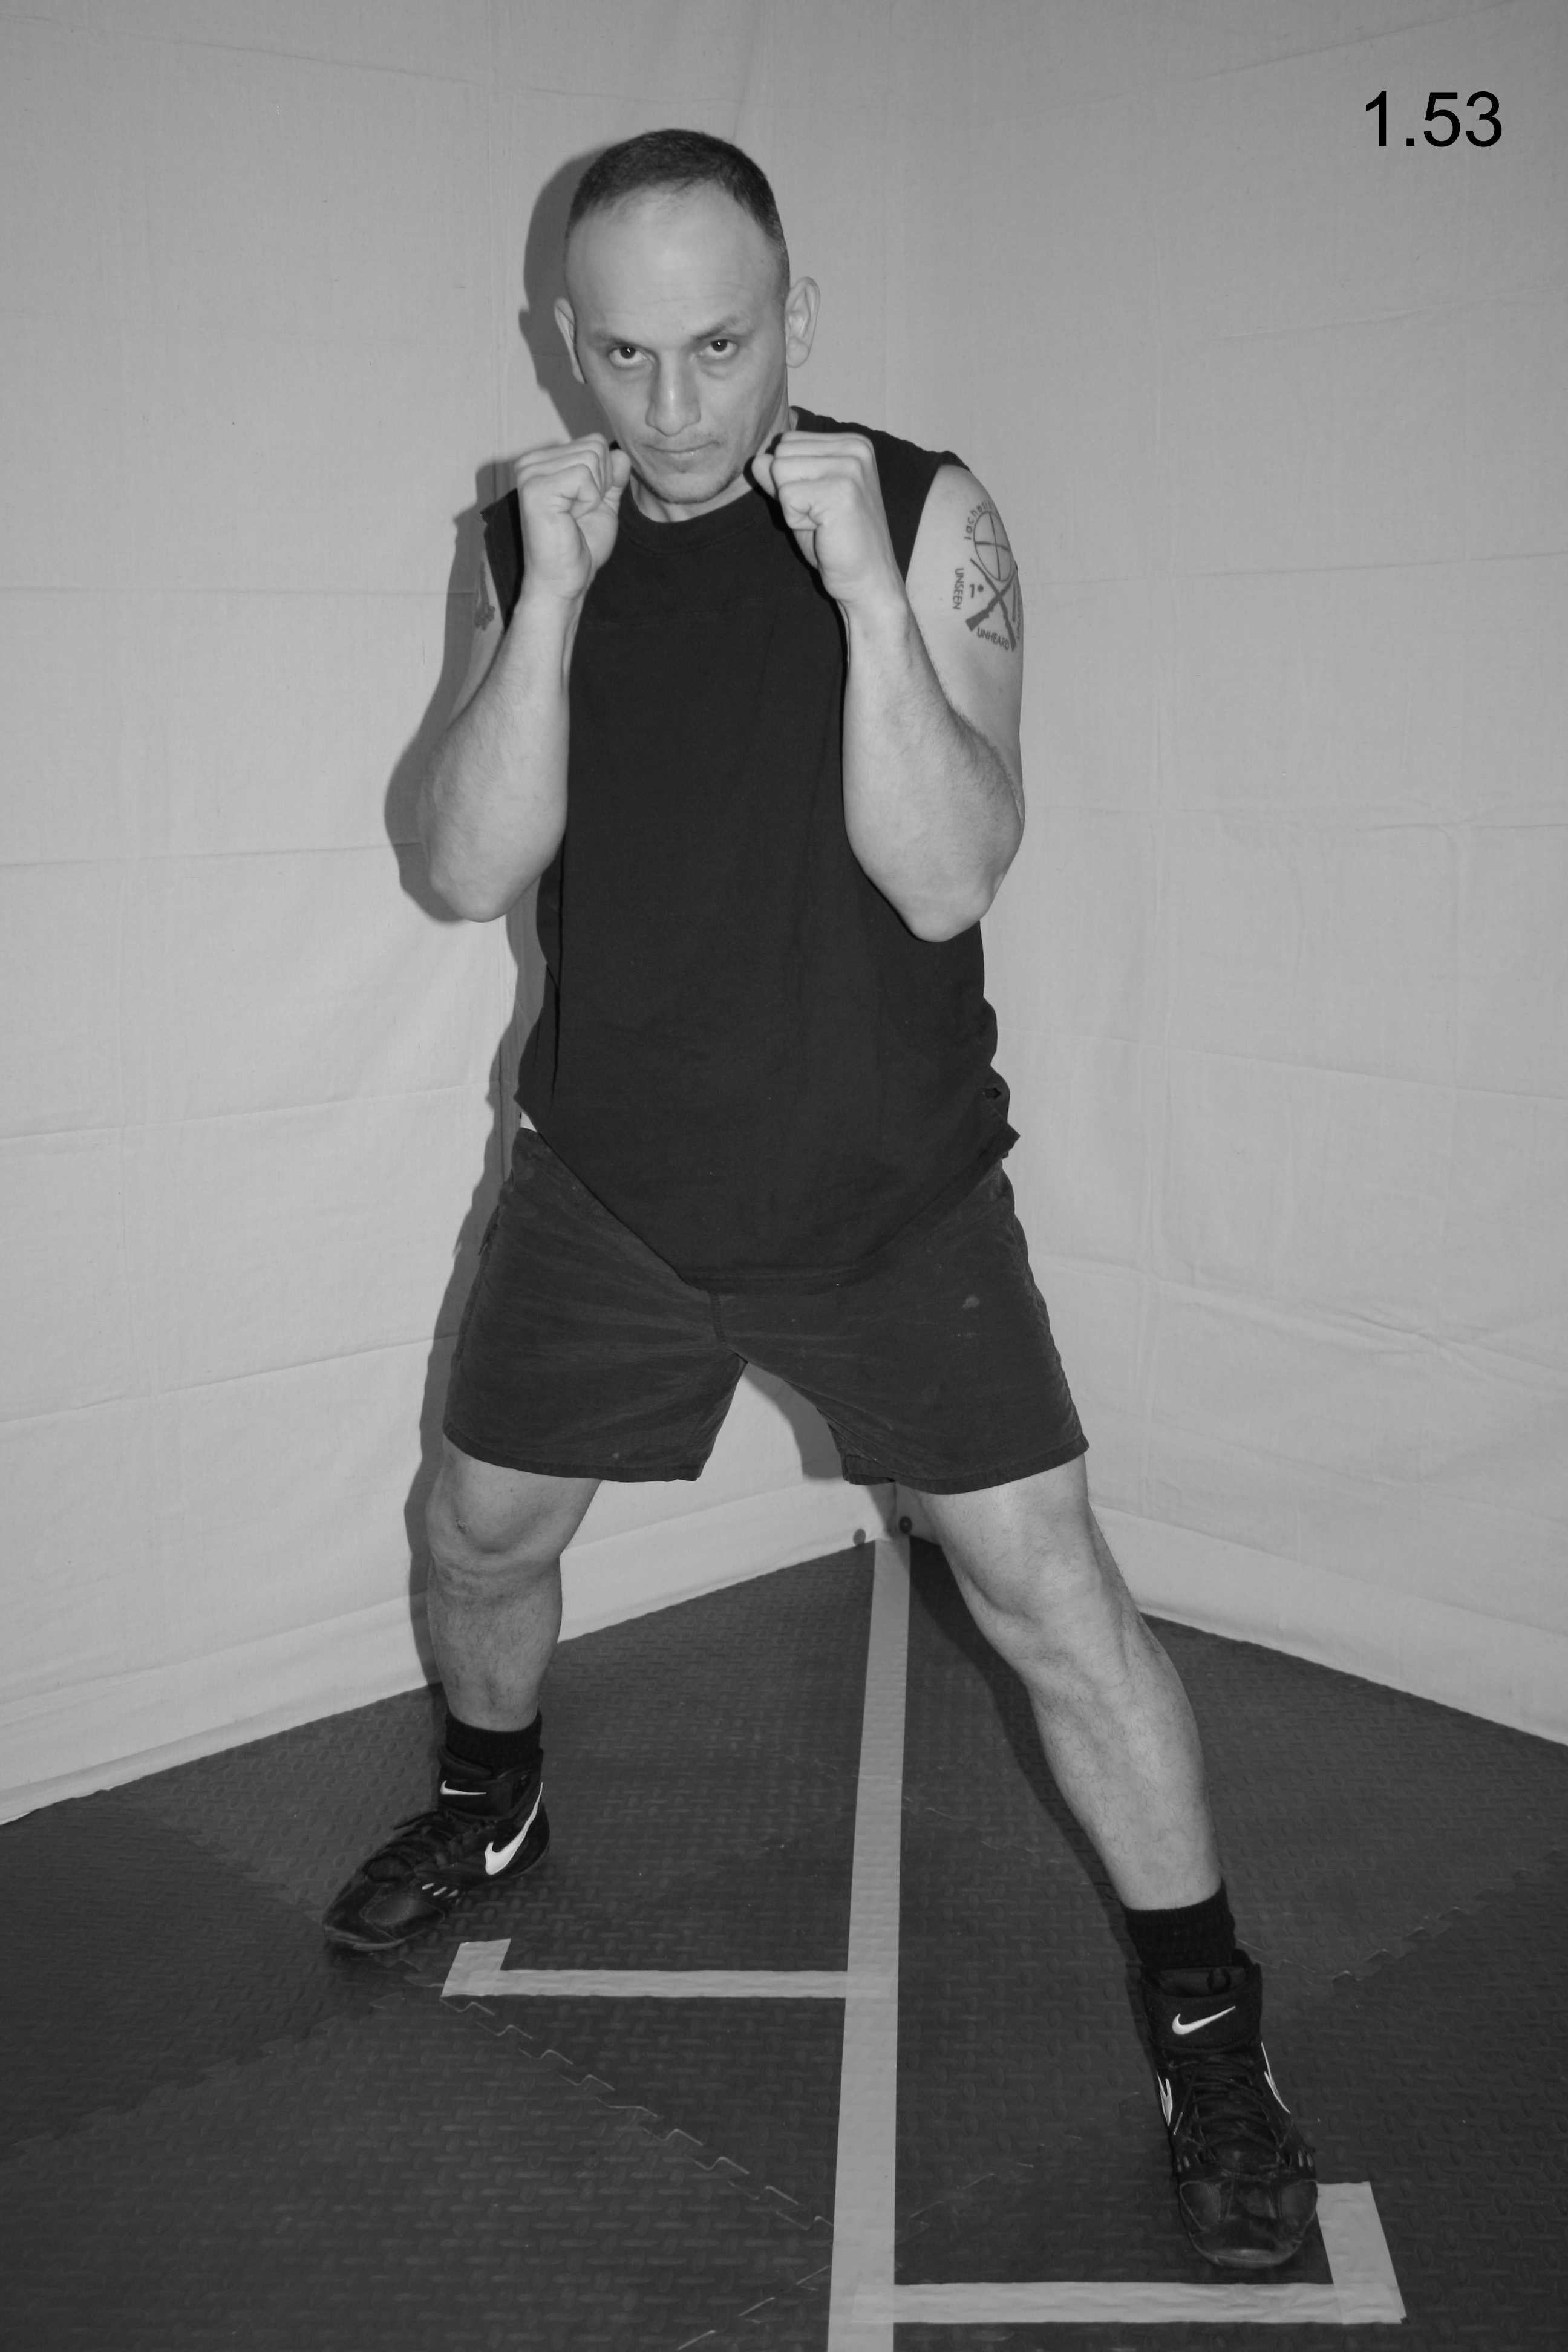
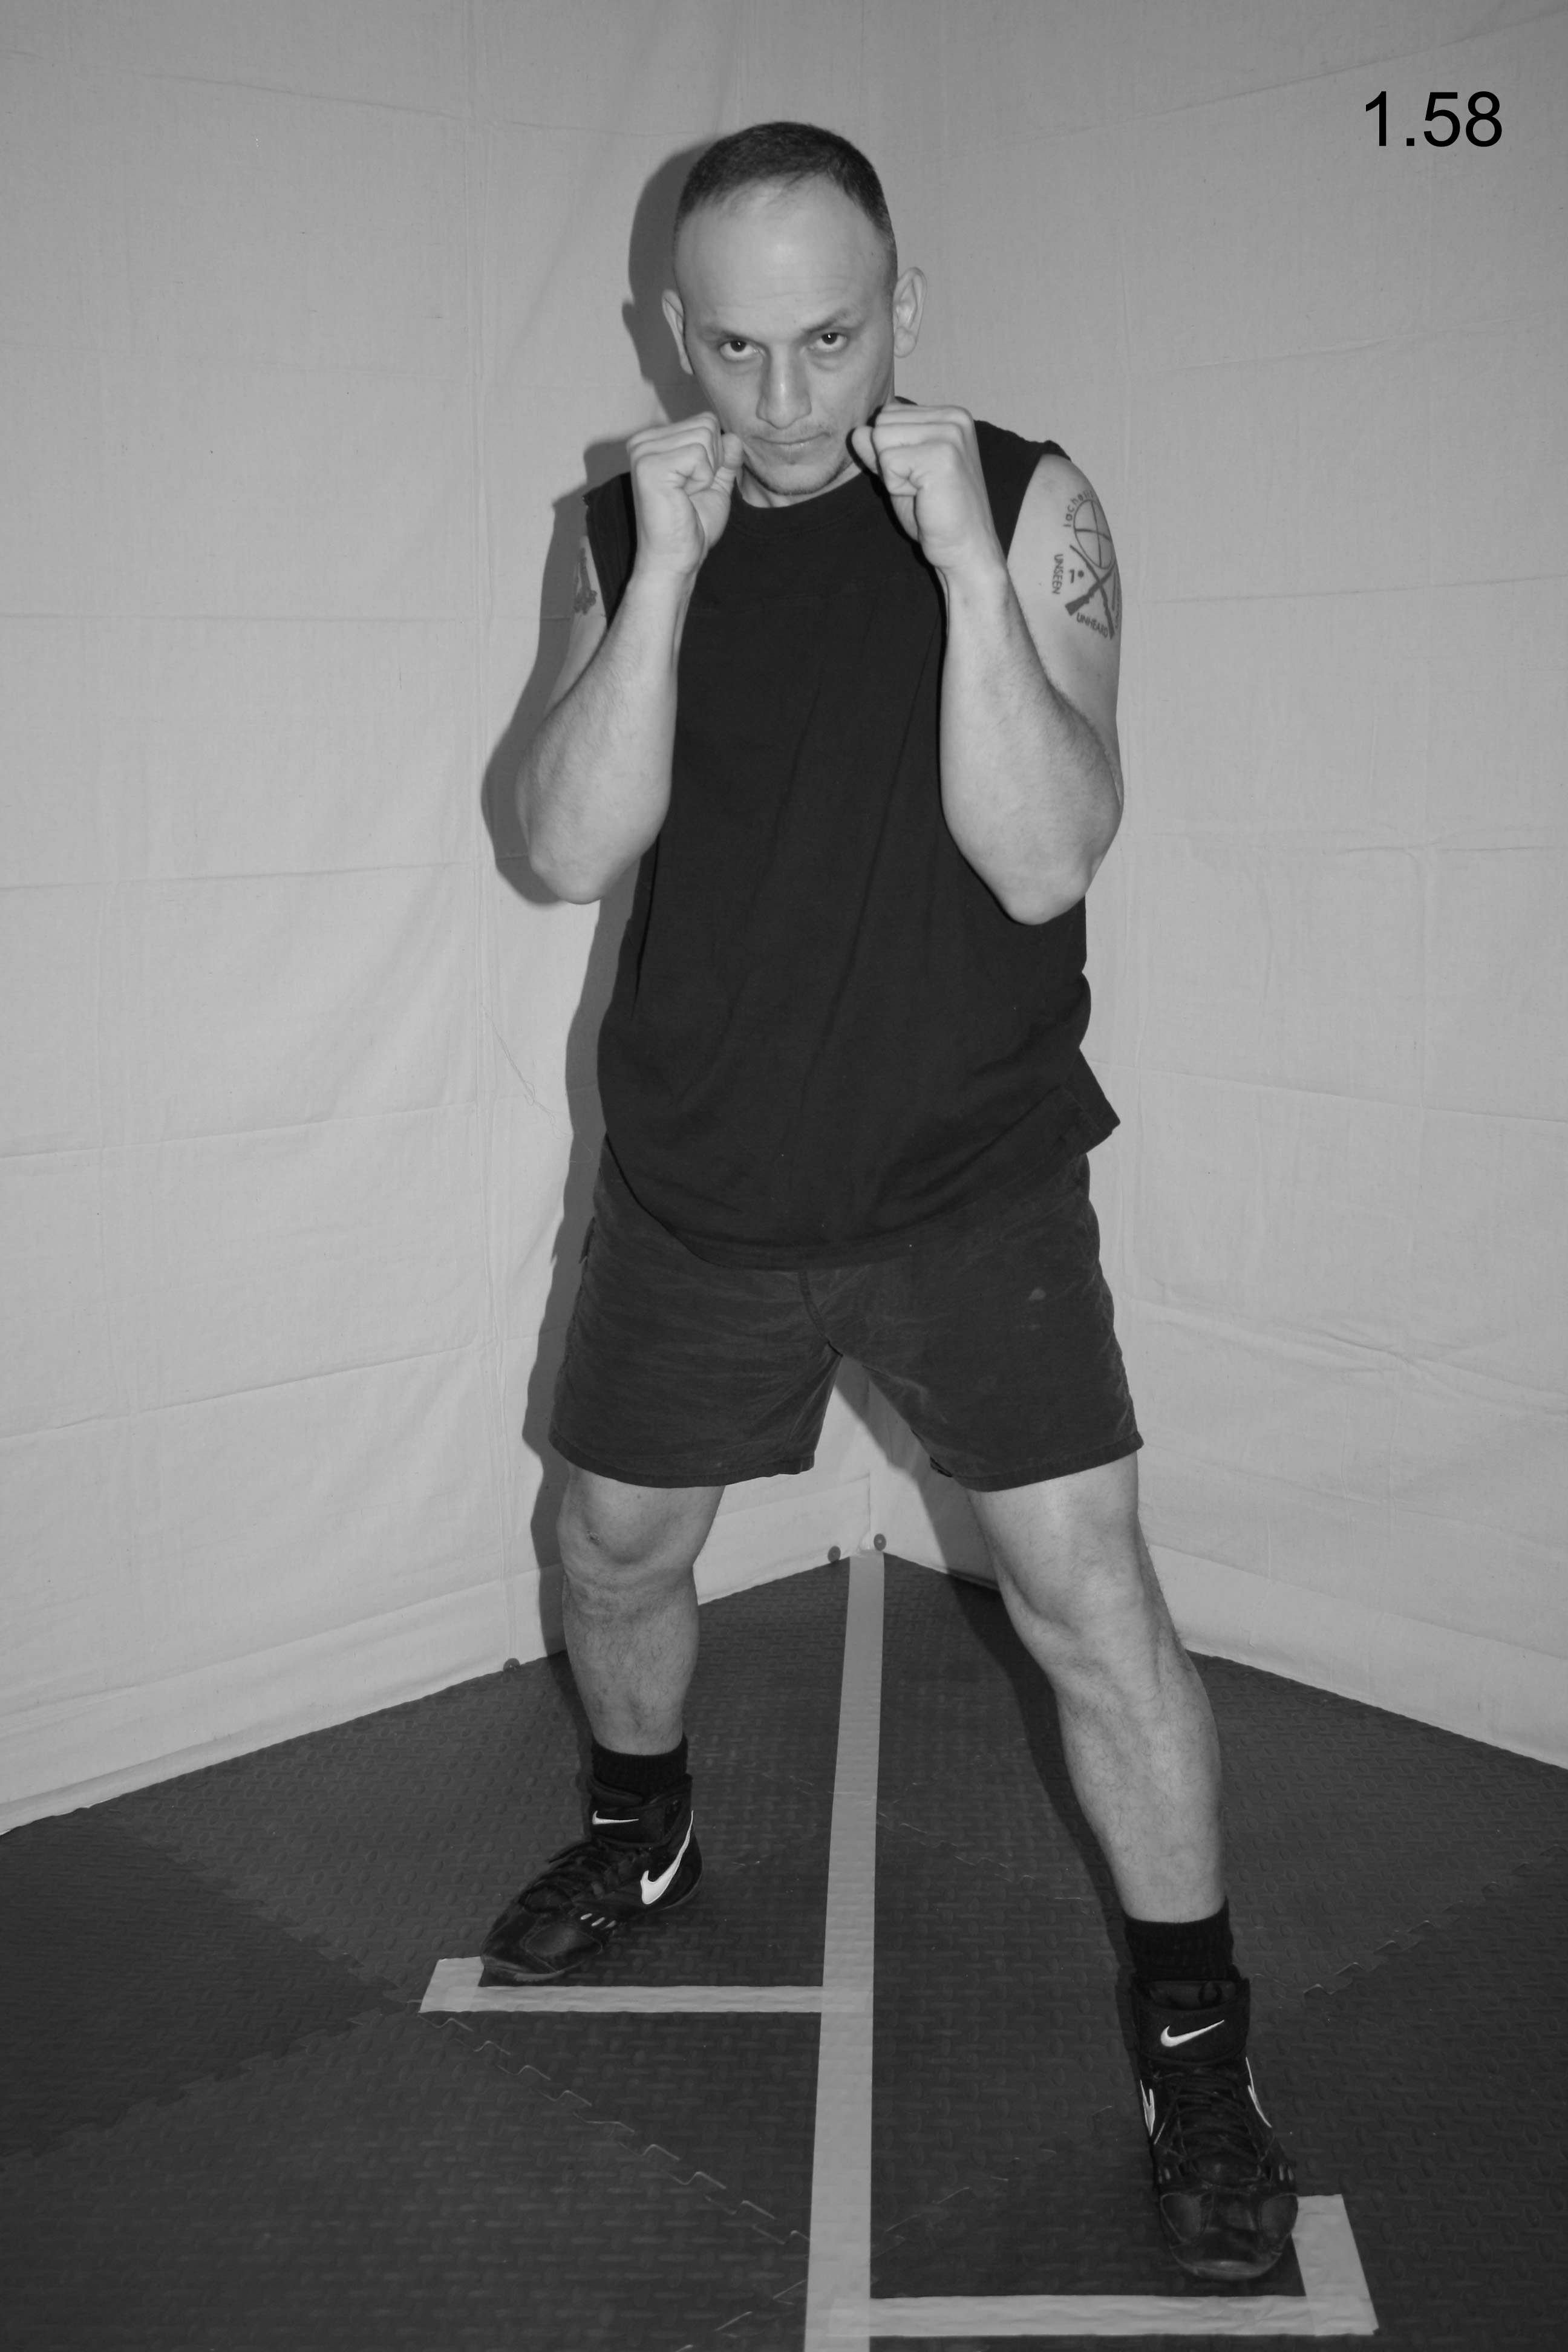
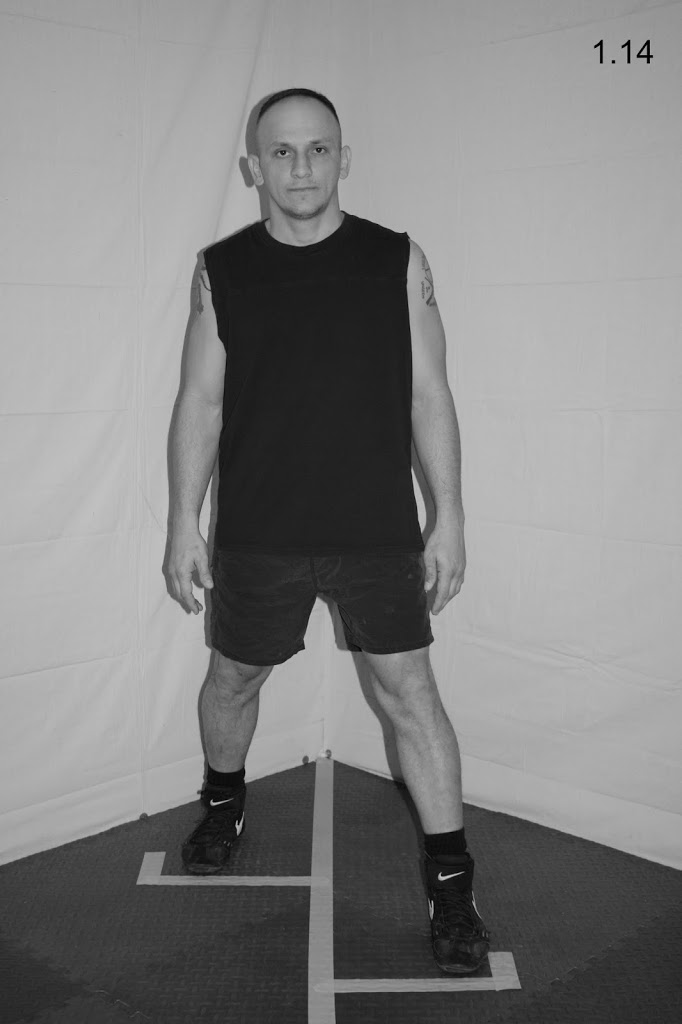
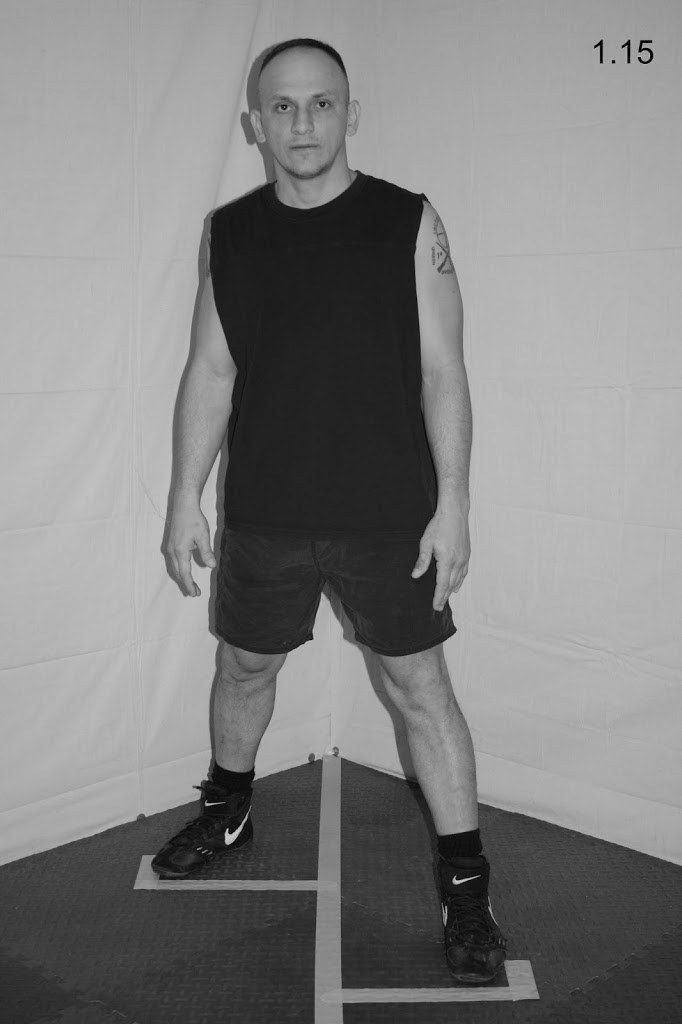
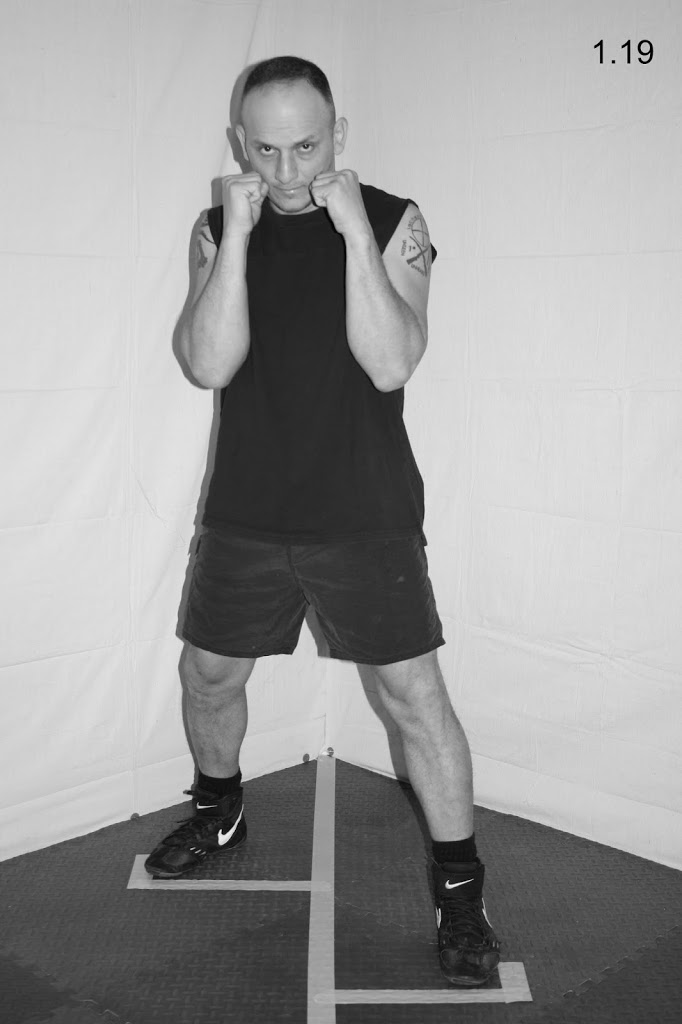
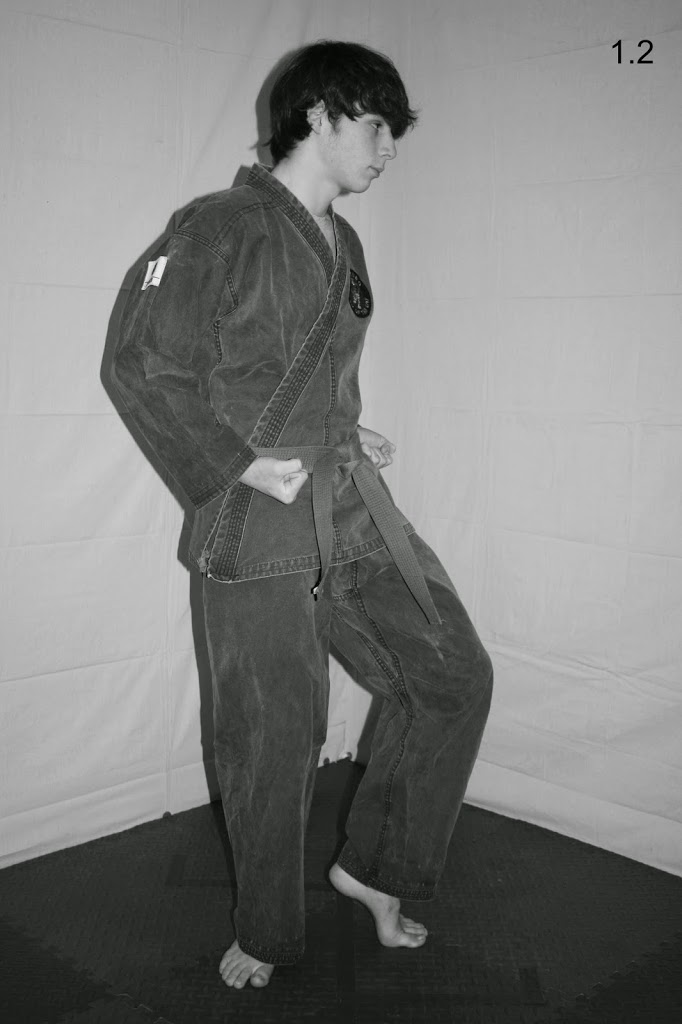
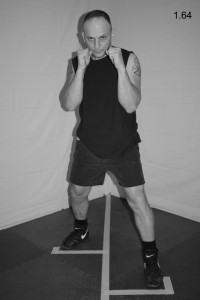
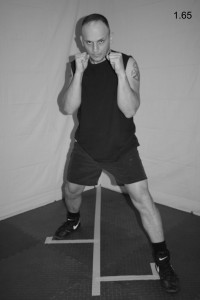
Step One:   From your fighting stance (see Fig. 1.64), push off with the ball of your right foot and slide your left foot about one half step forward and diagonally to the left, at about a forty-five degree angle (see Fig. 1.65).

1.64  1.65

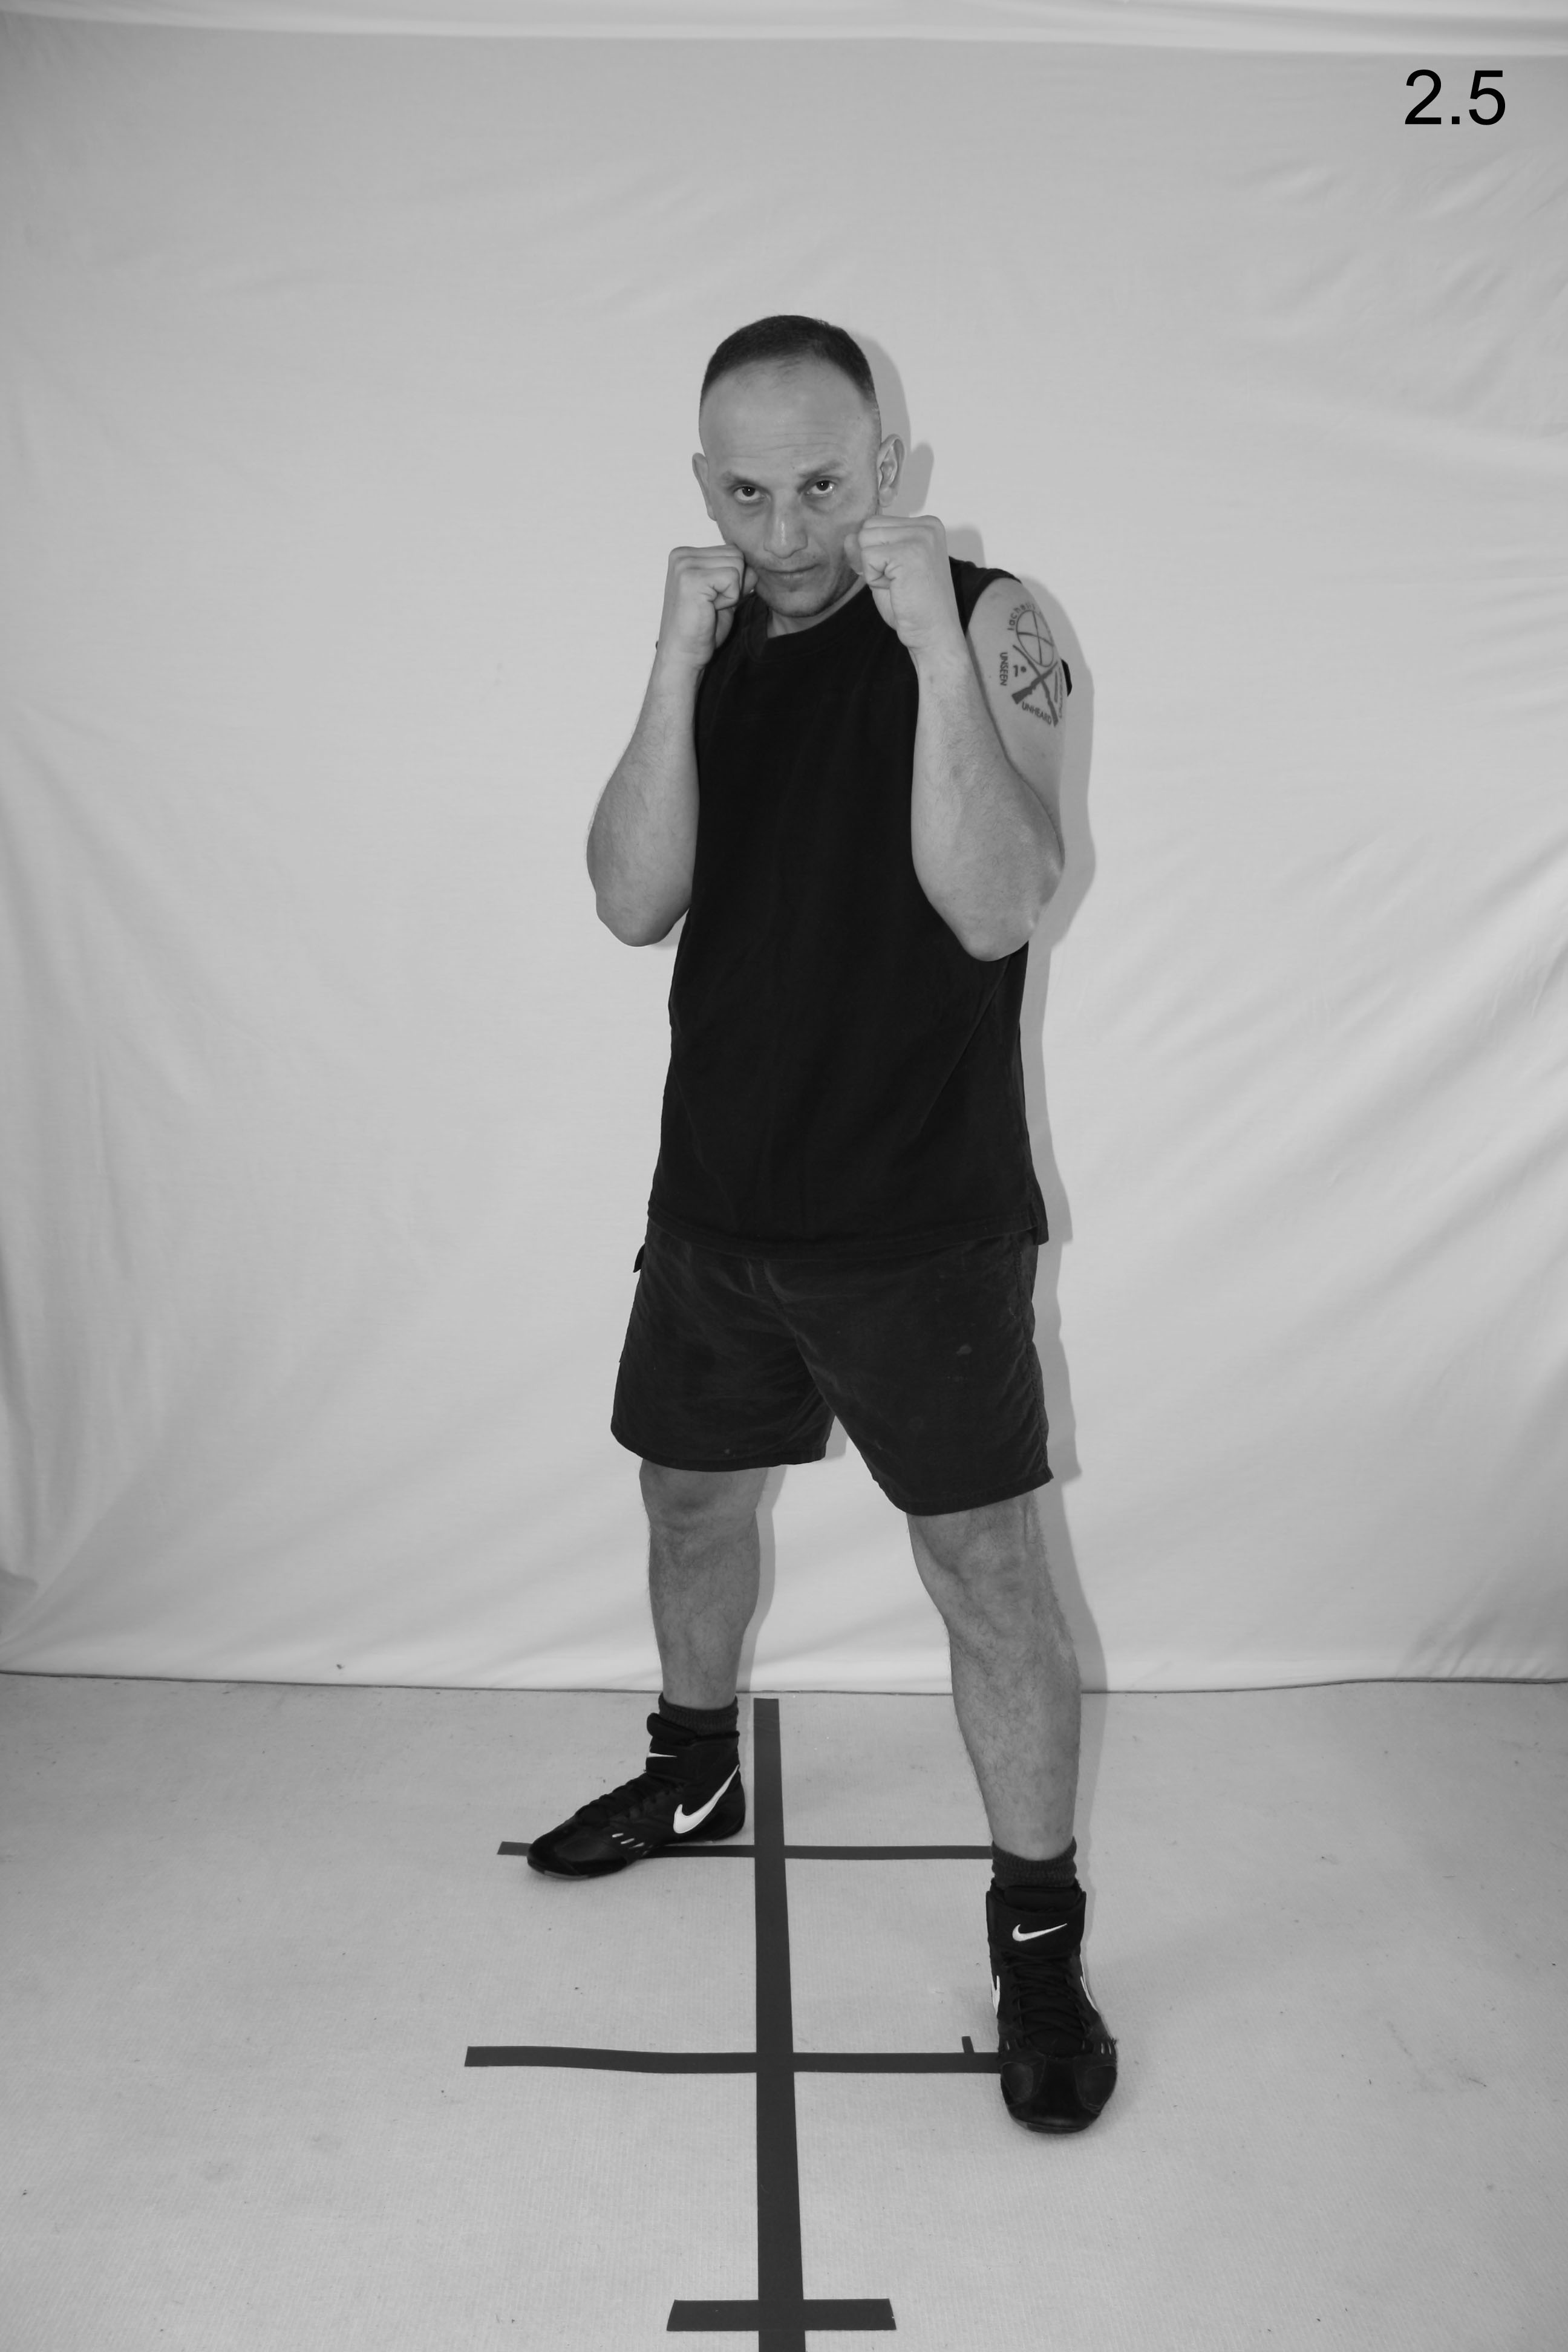
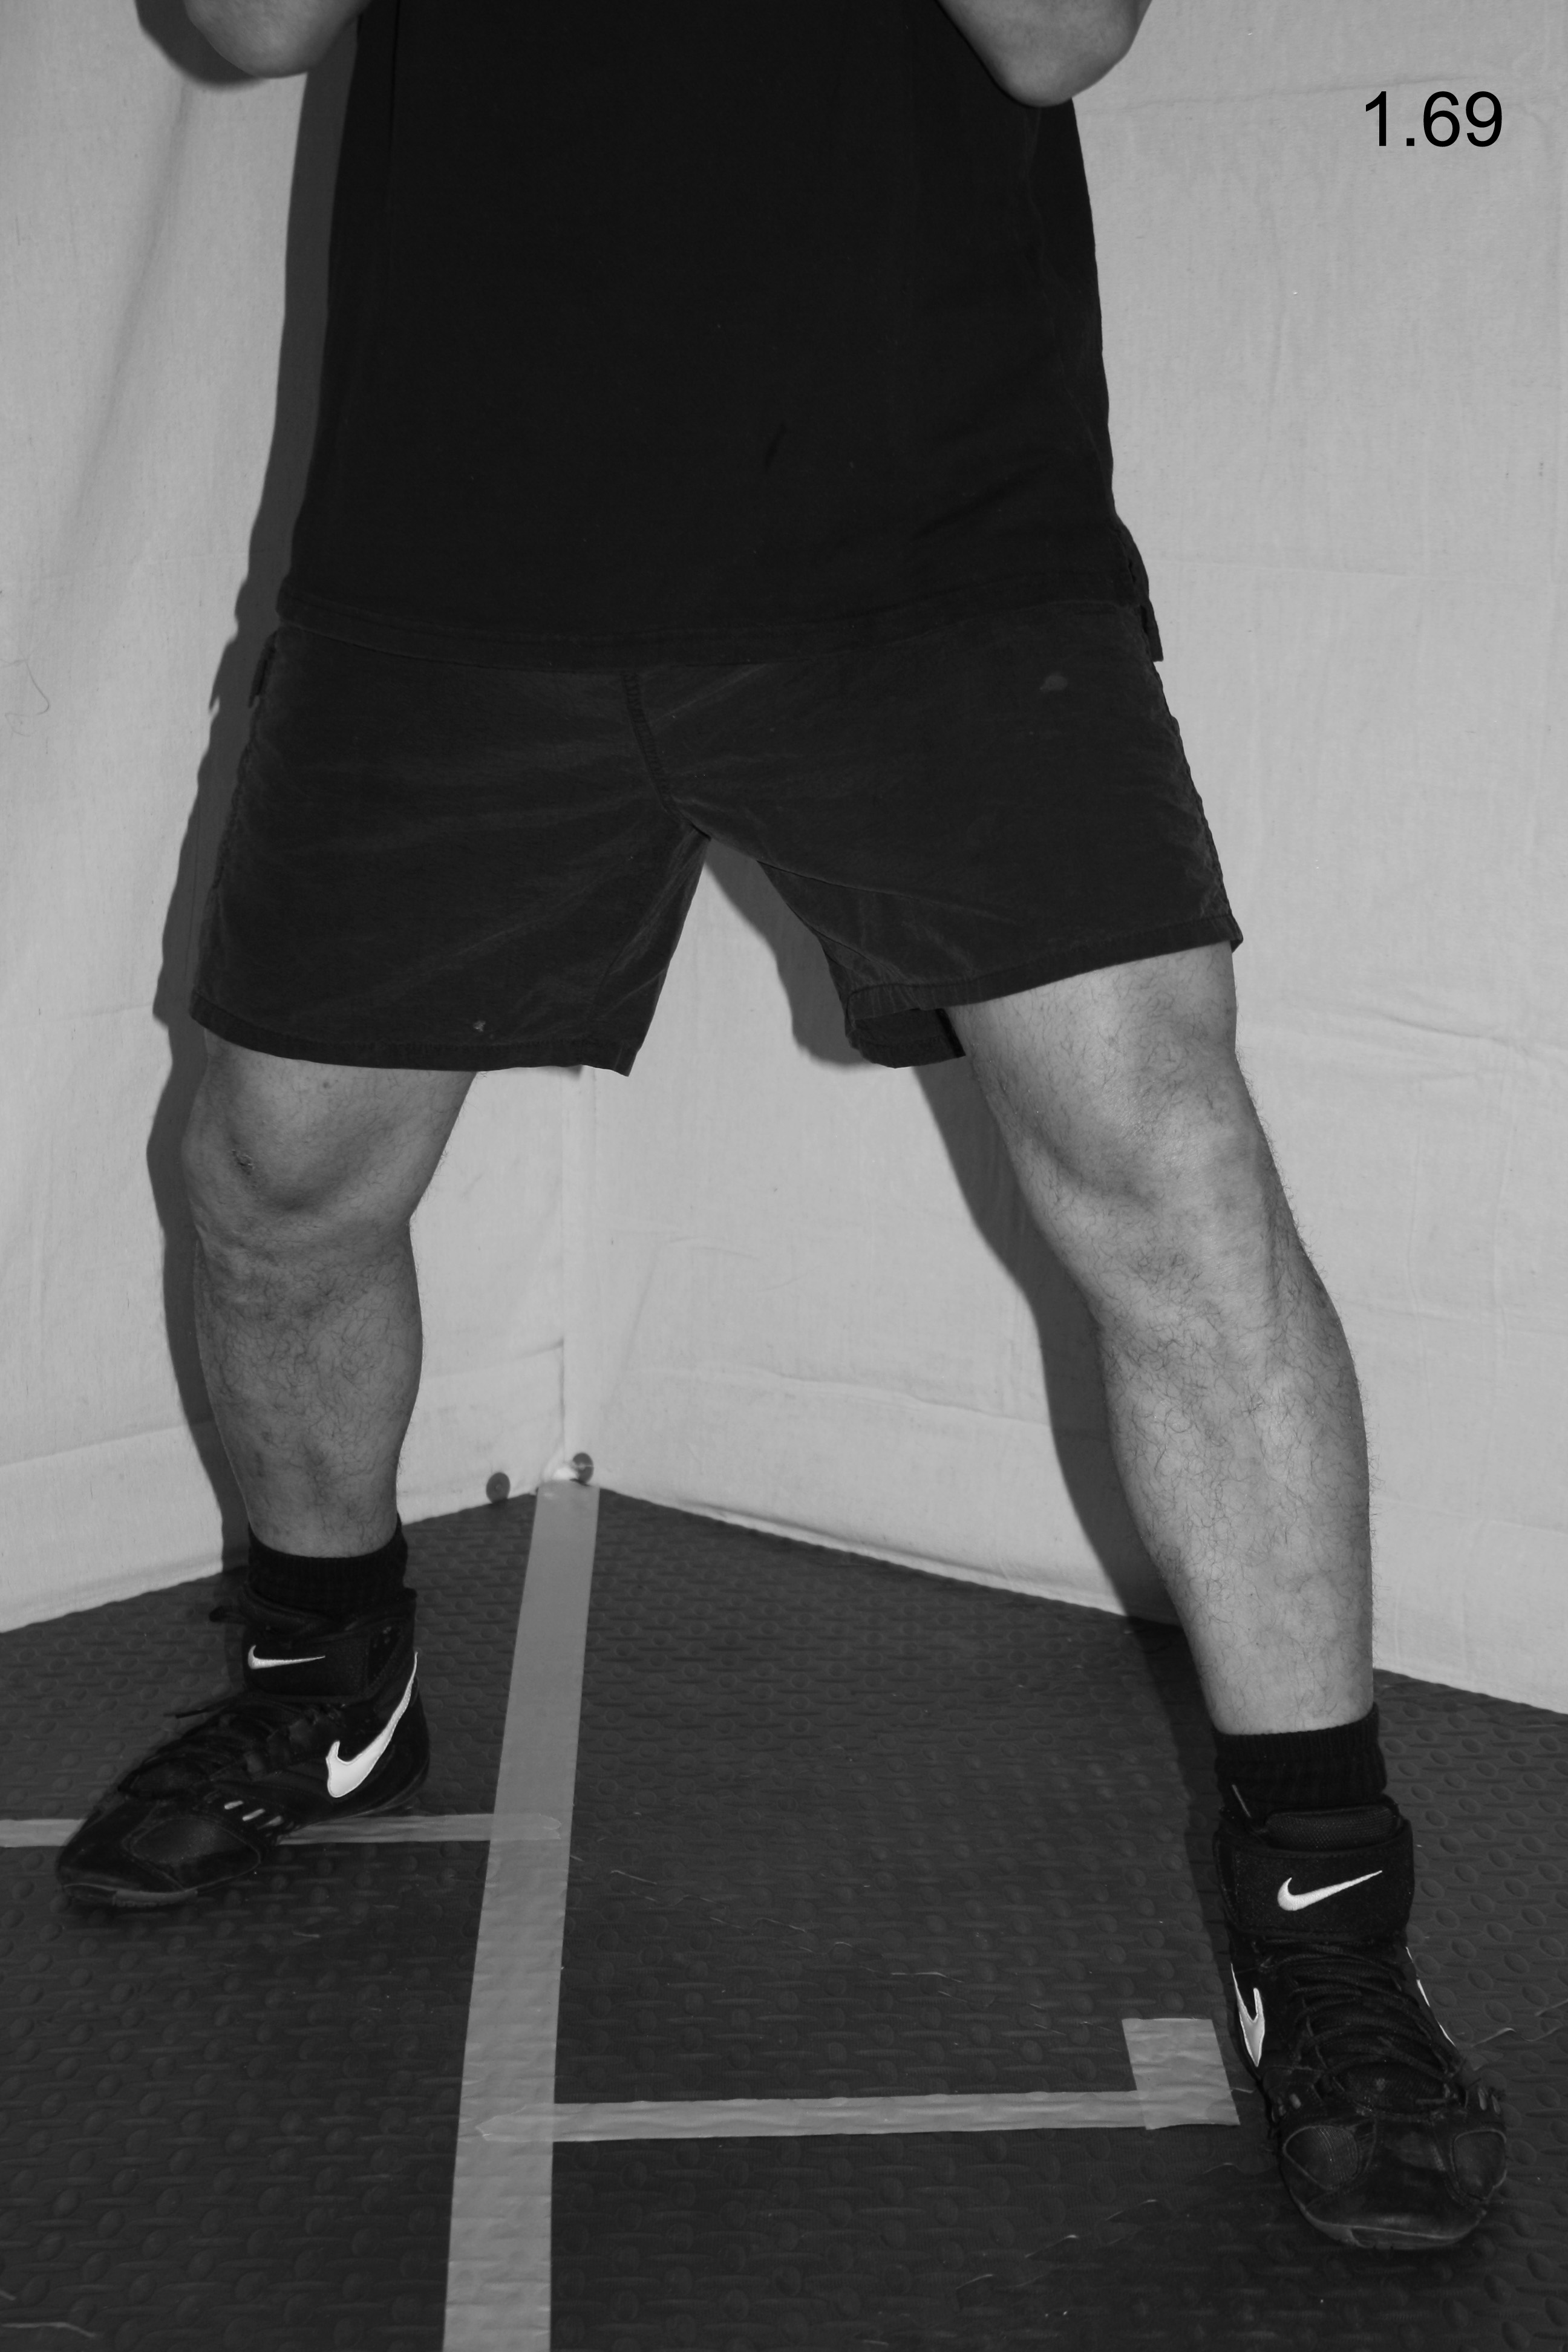
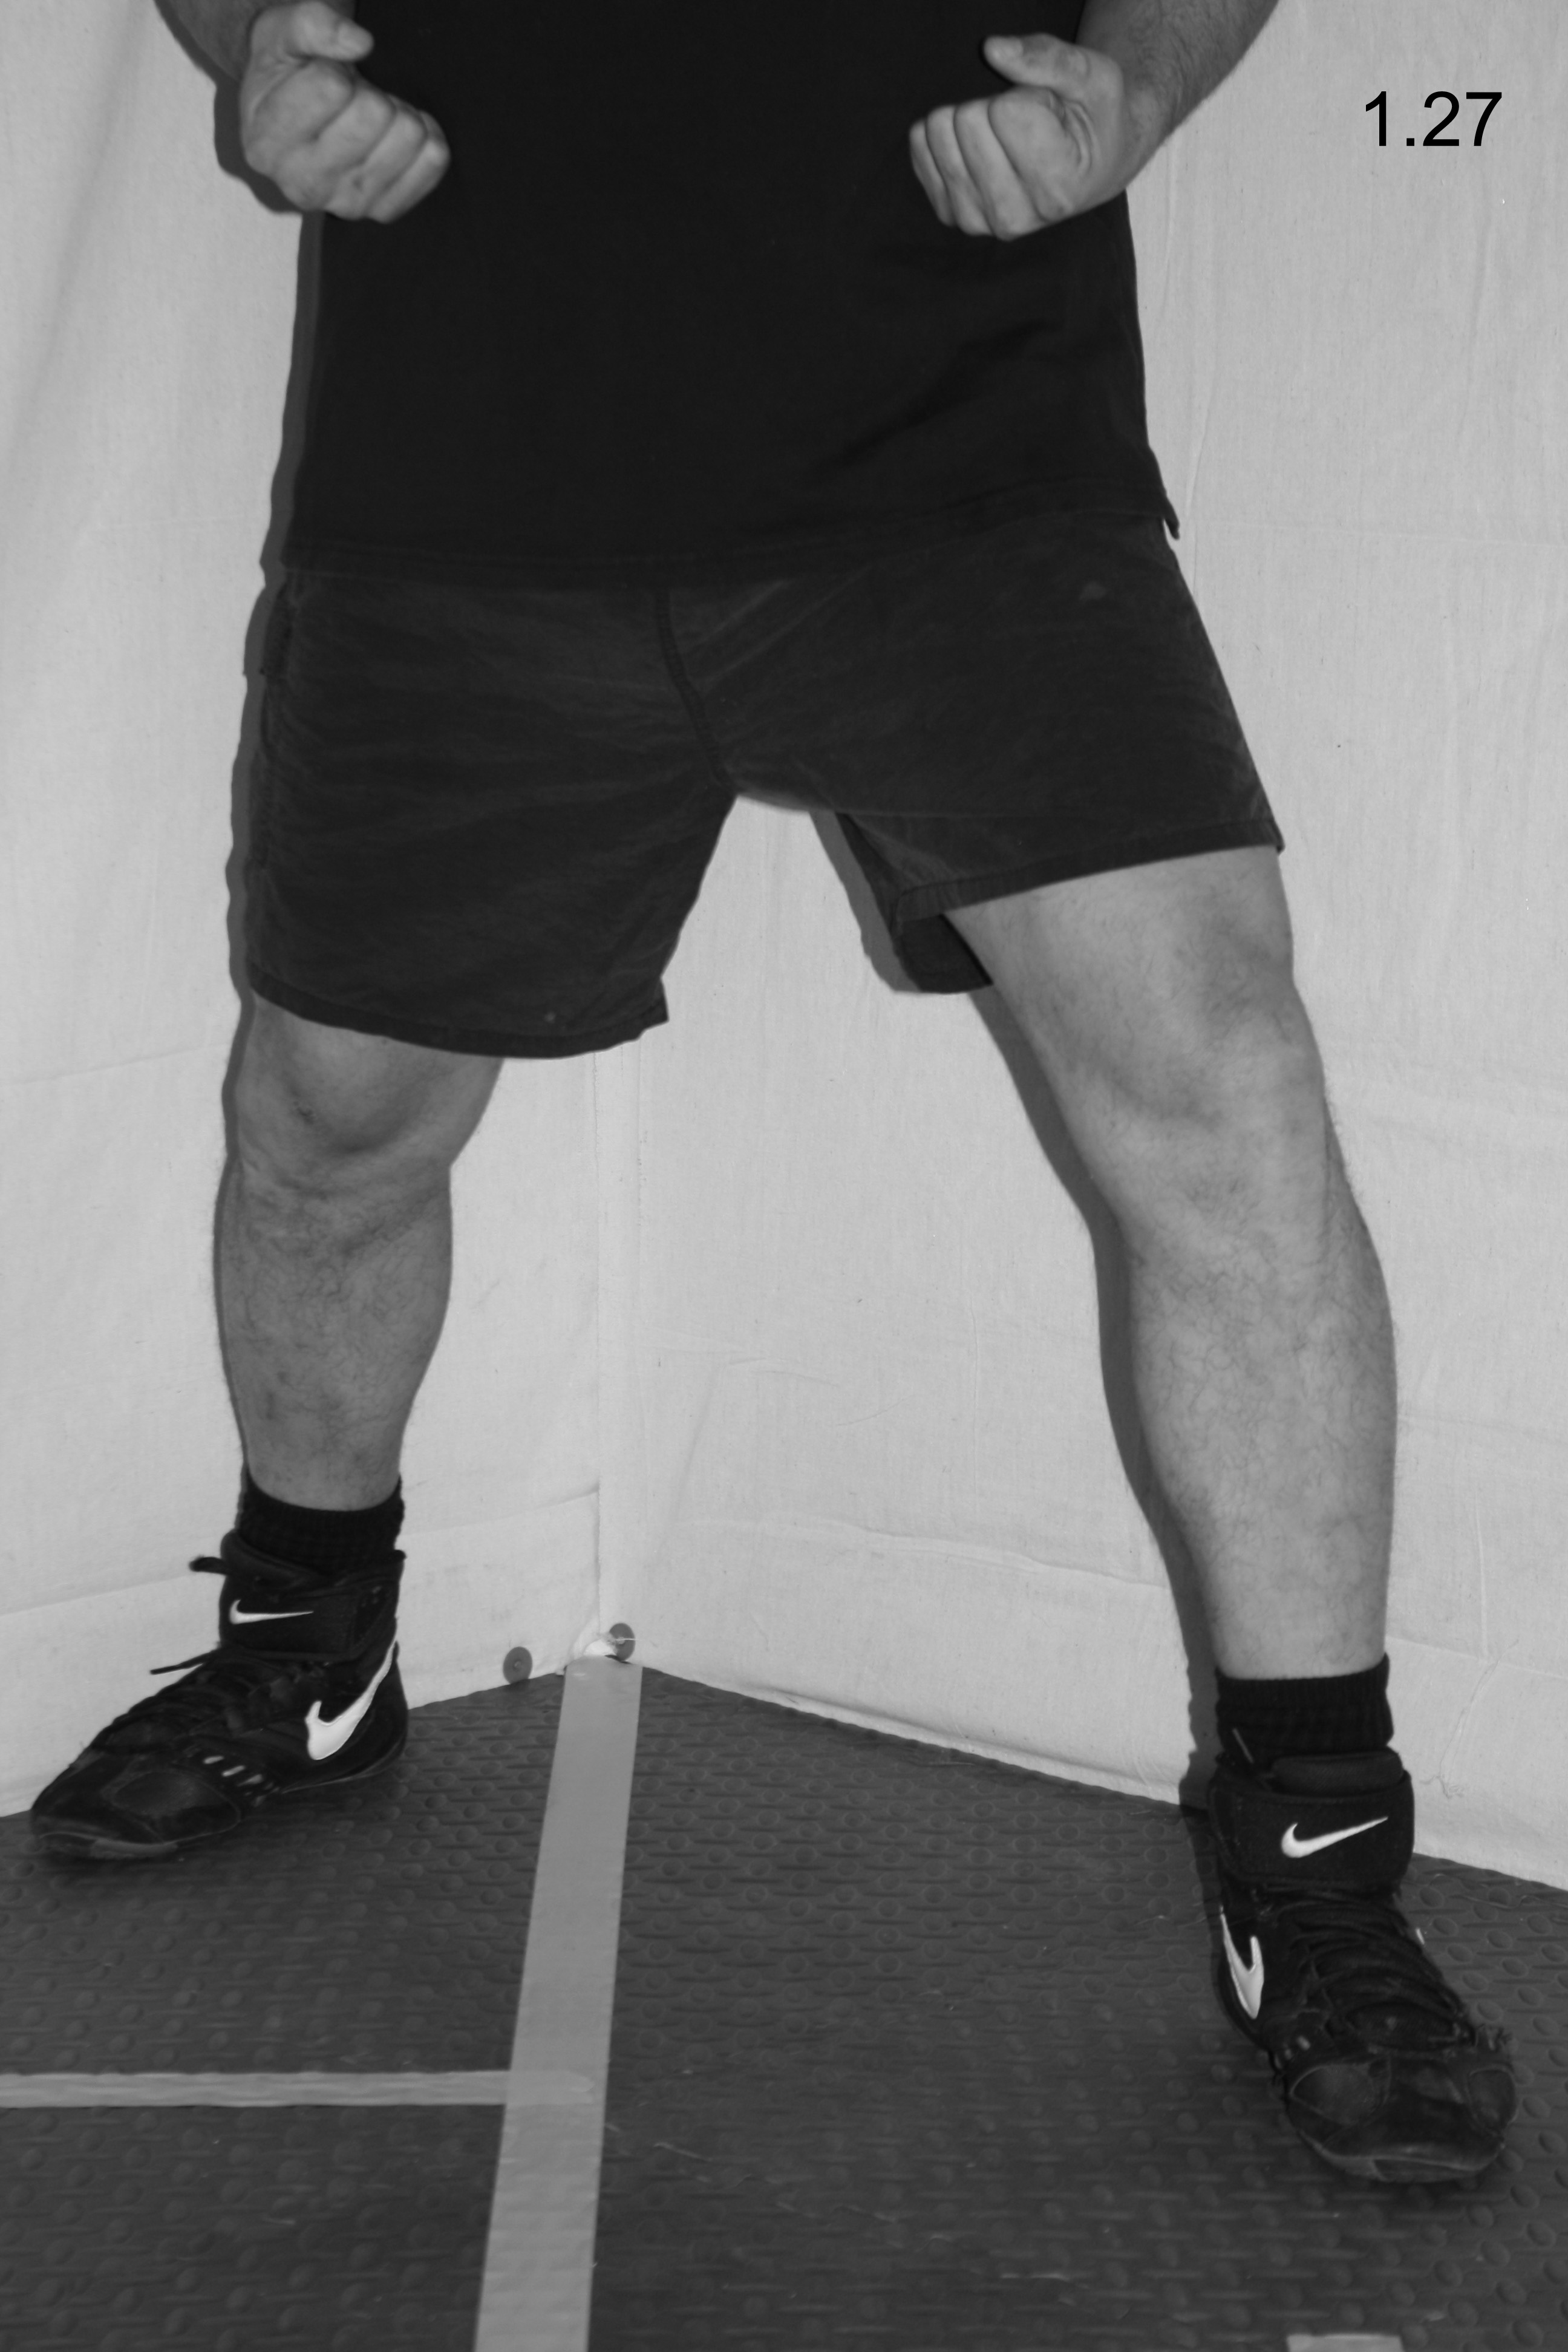
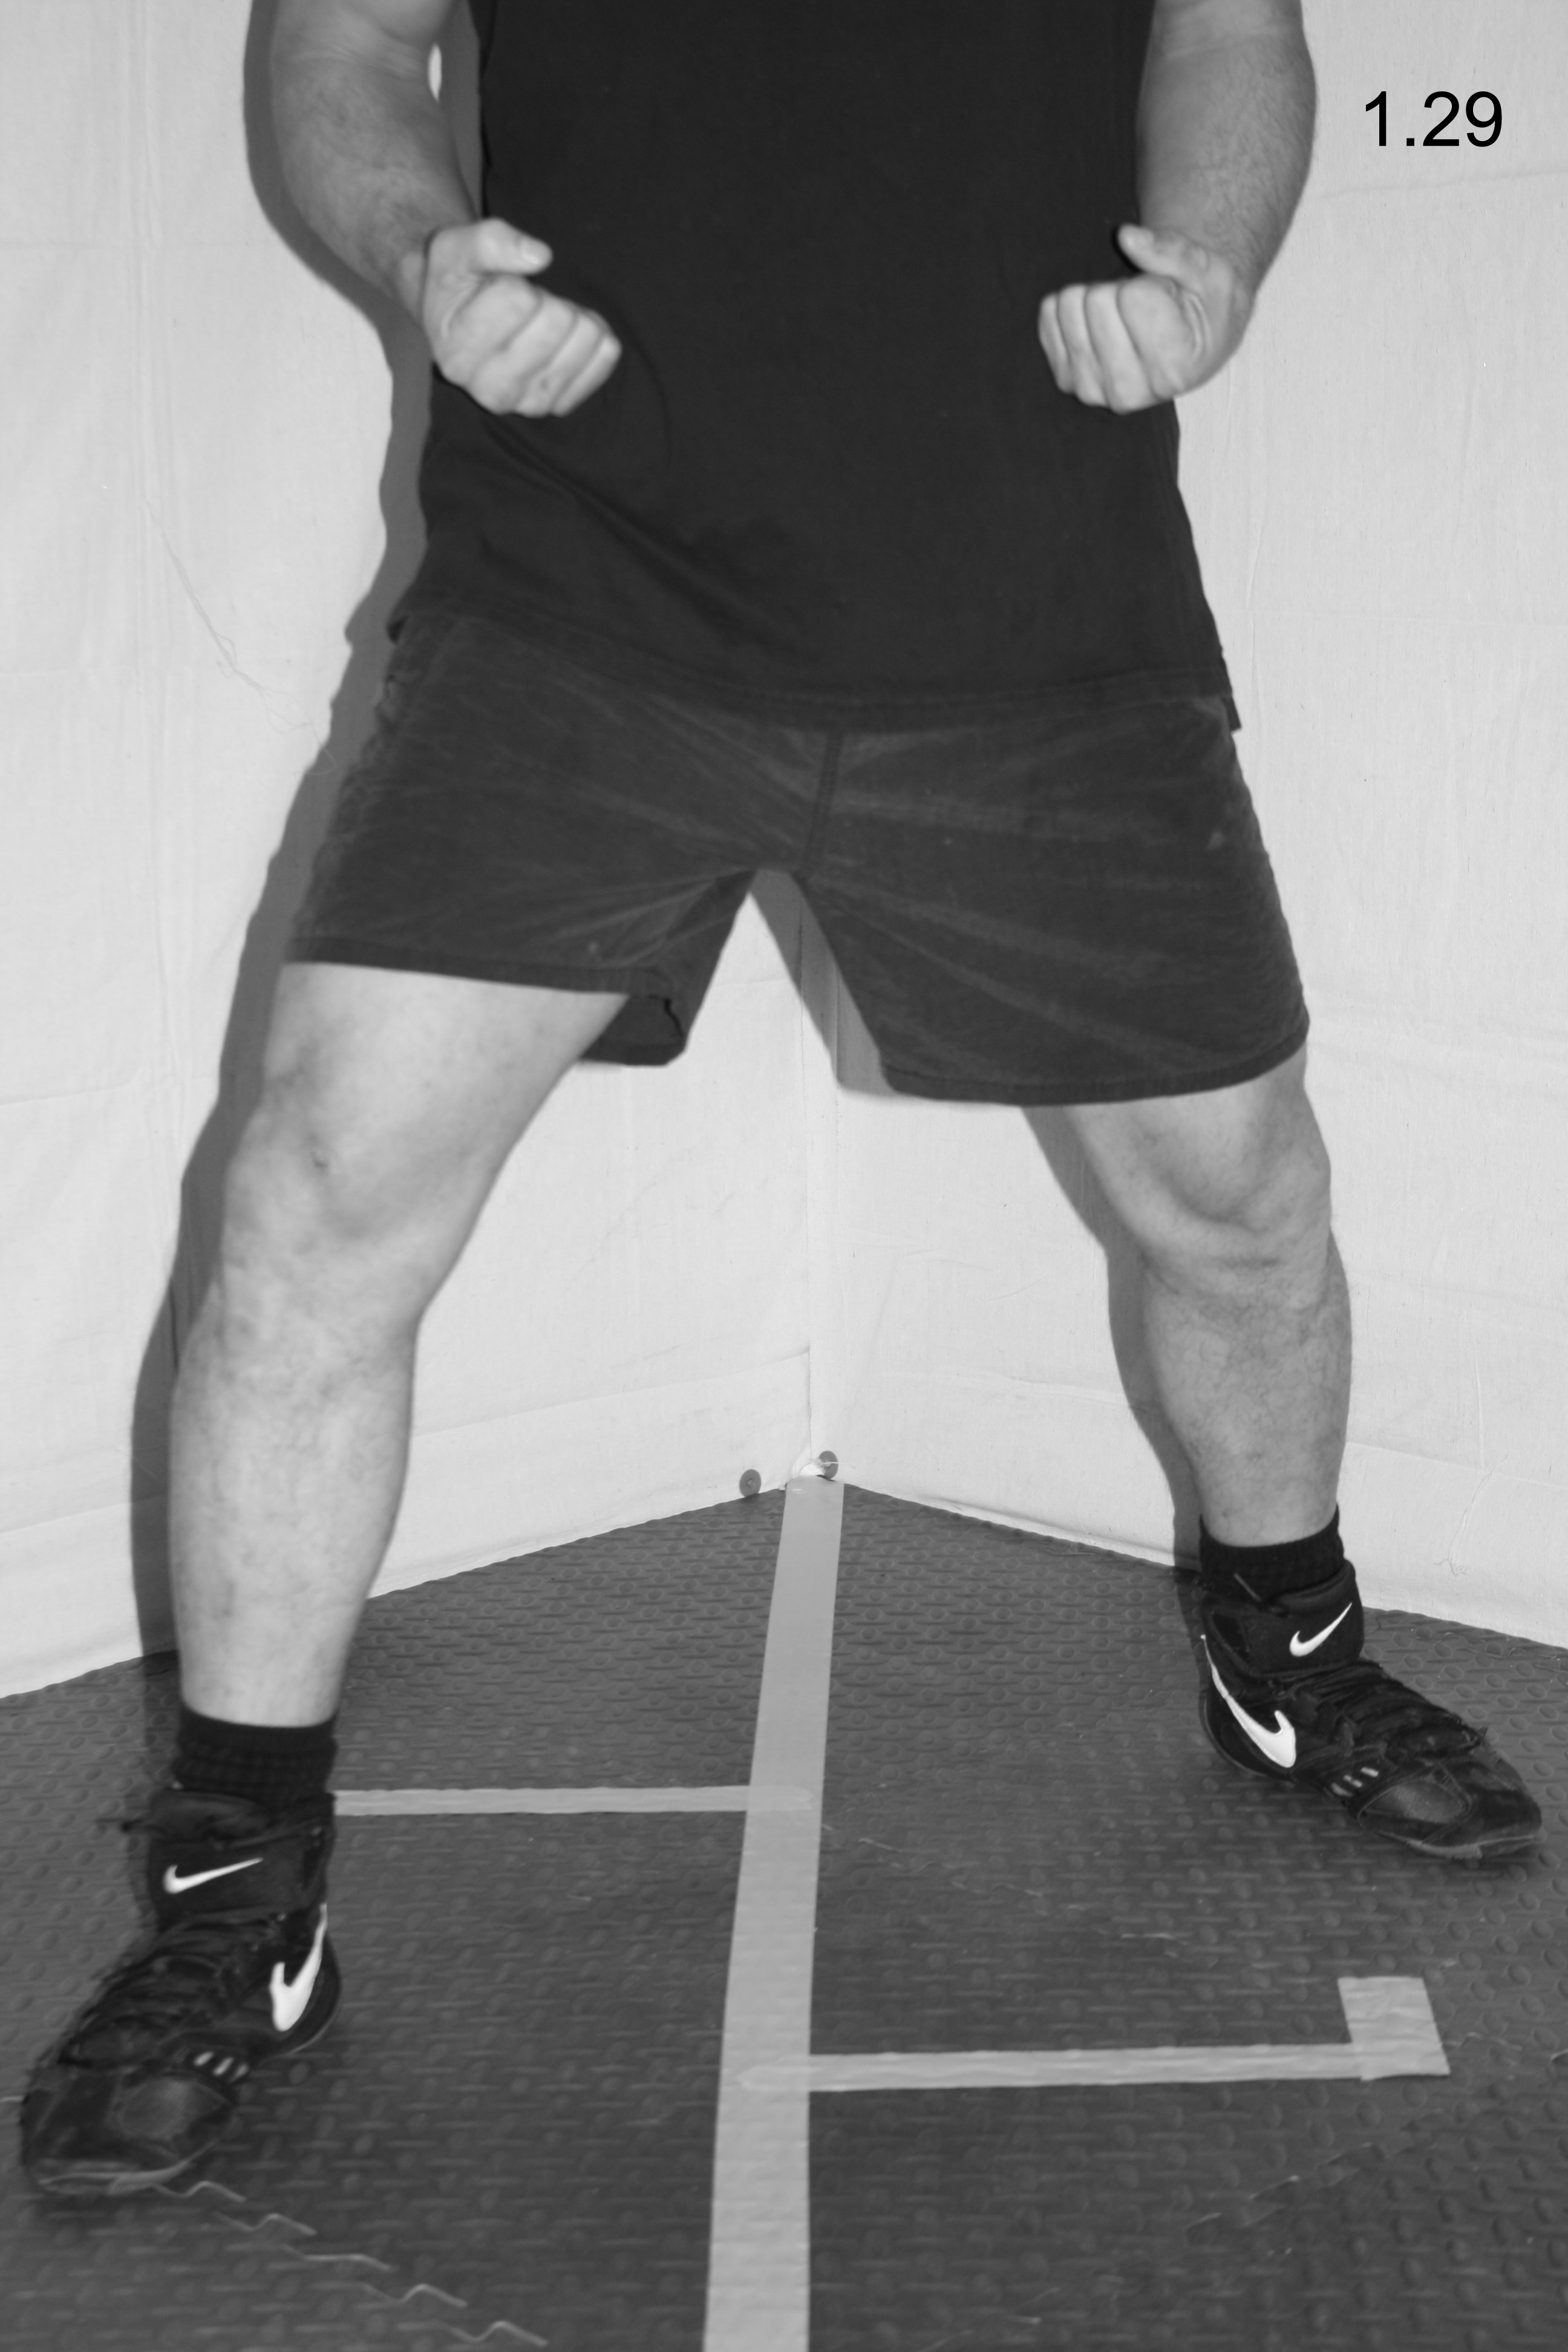
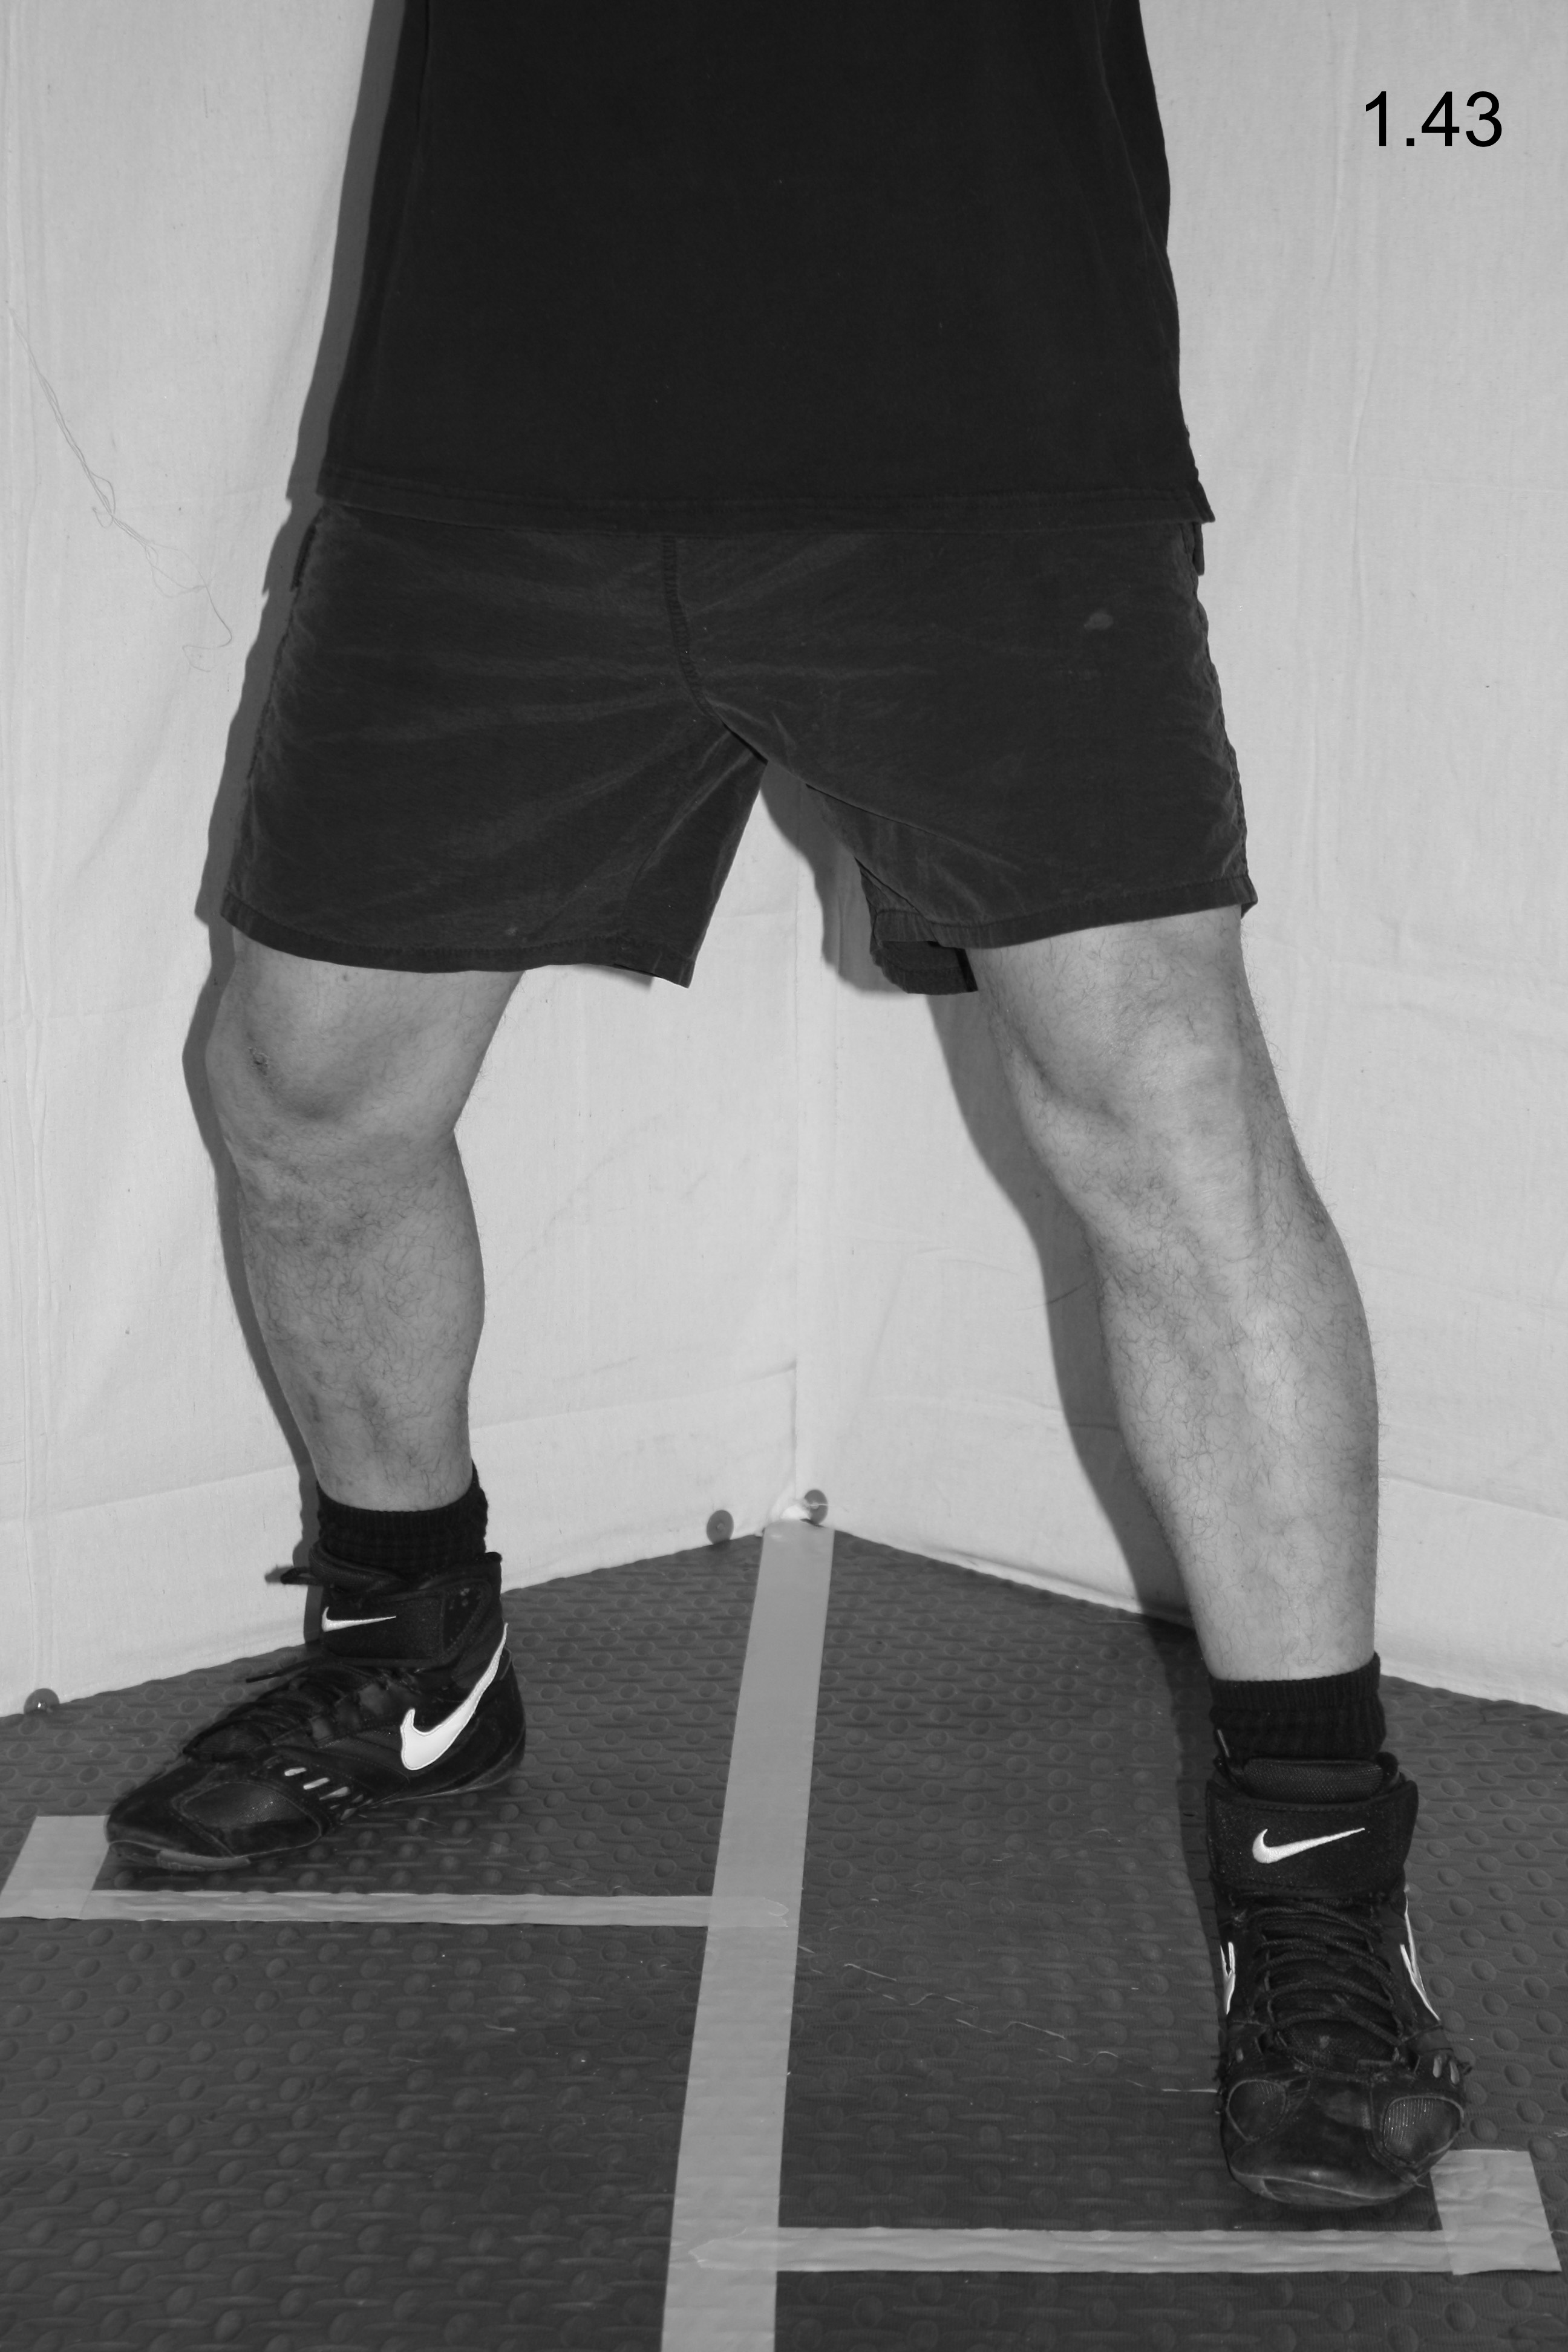
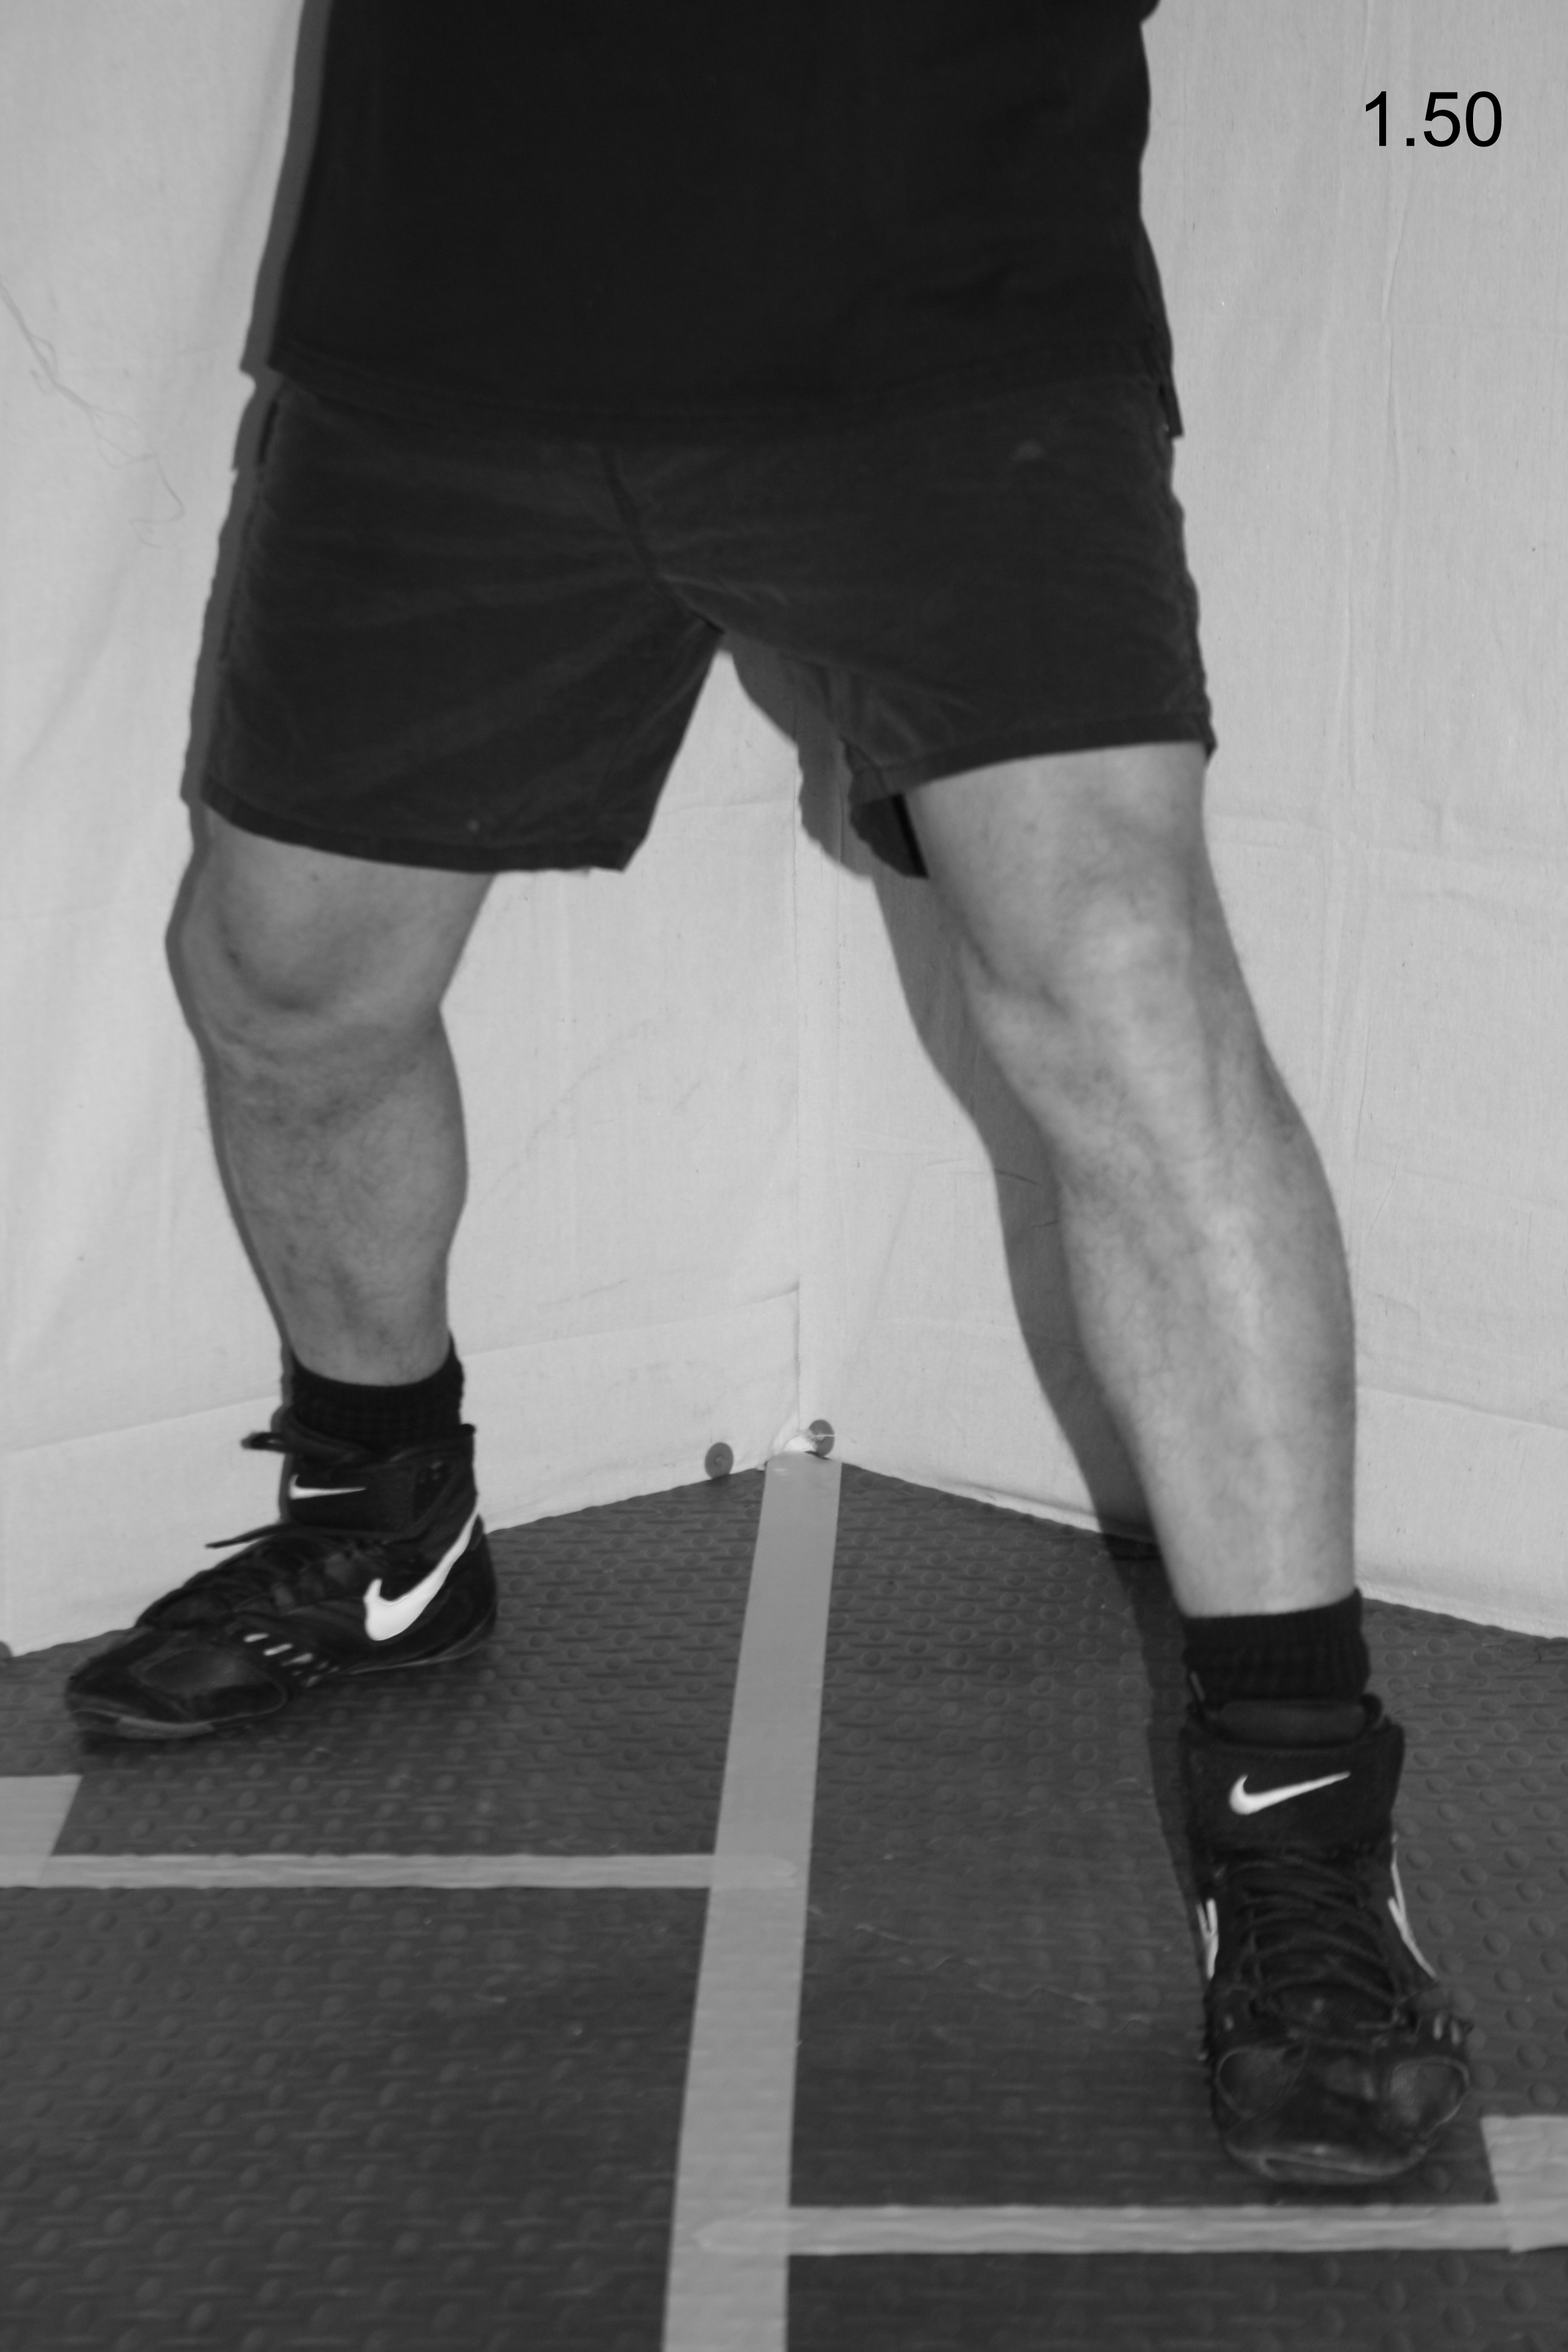
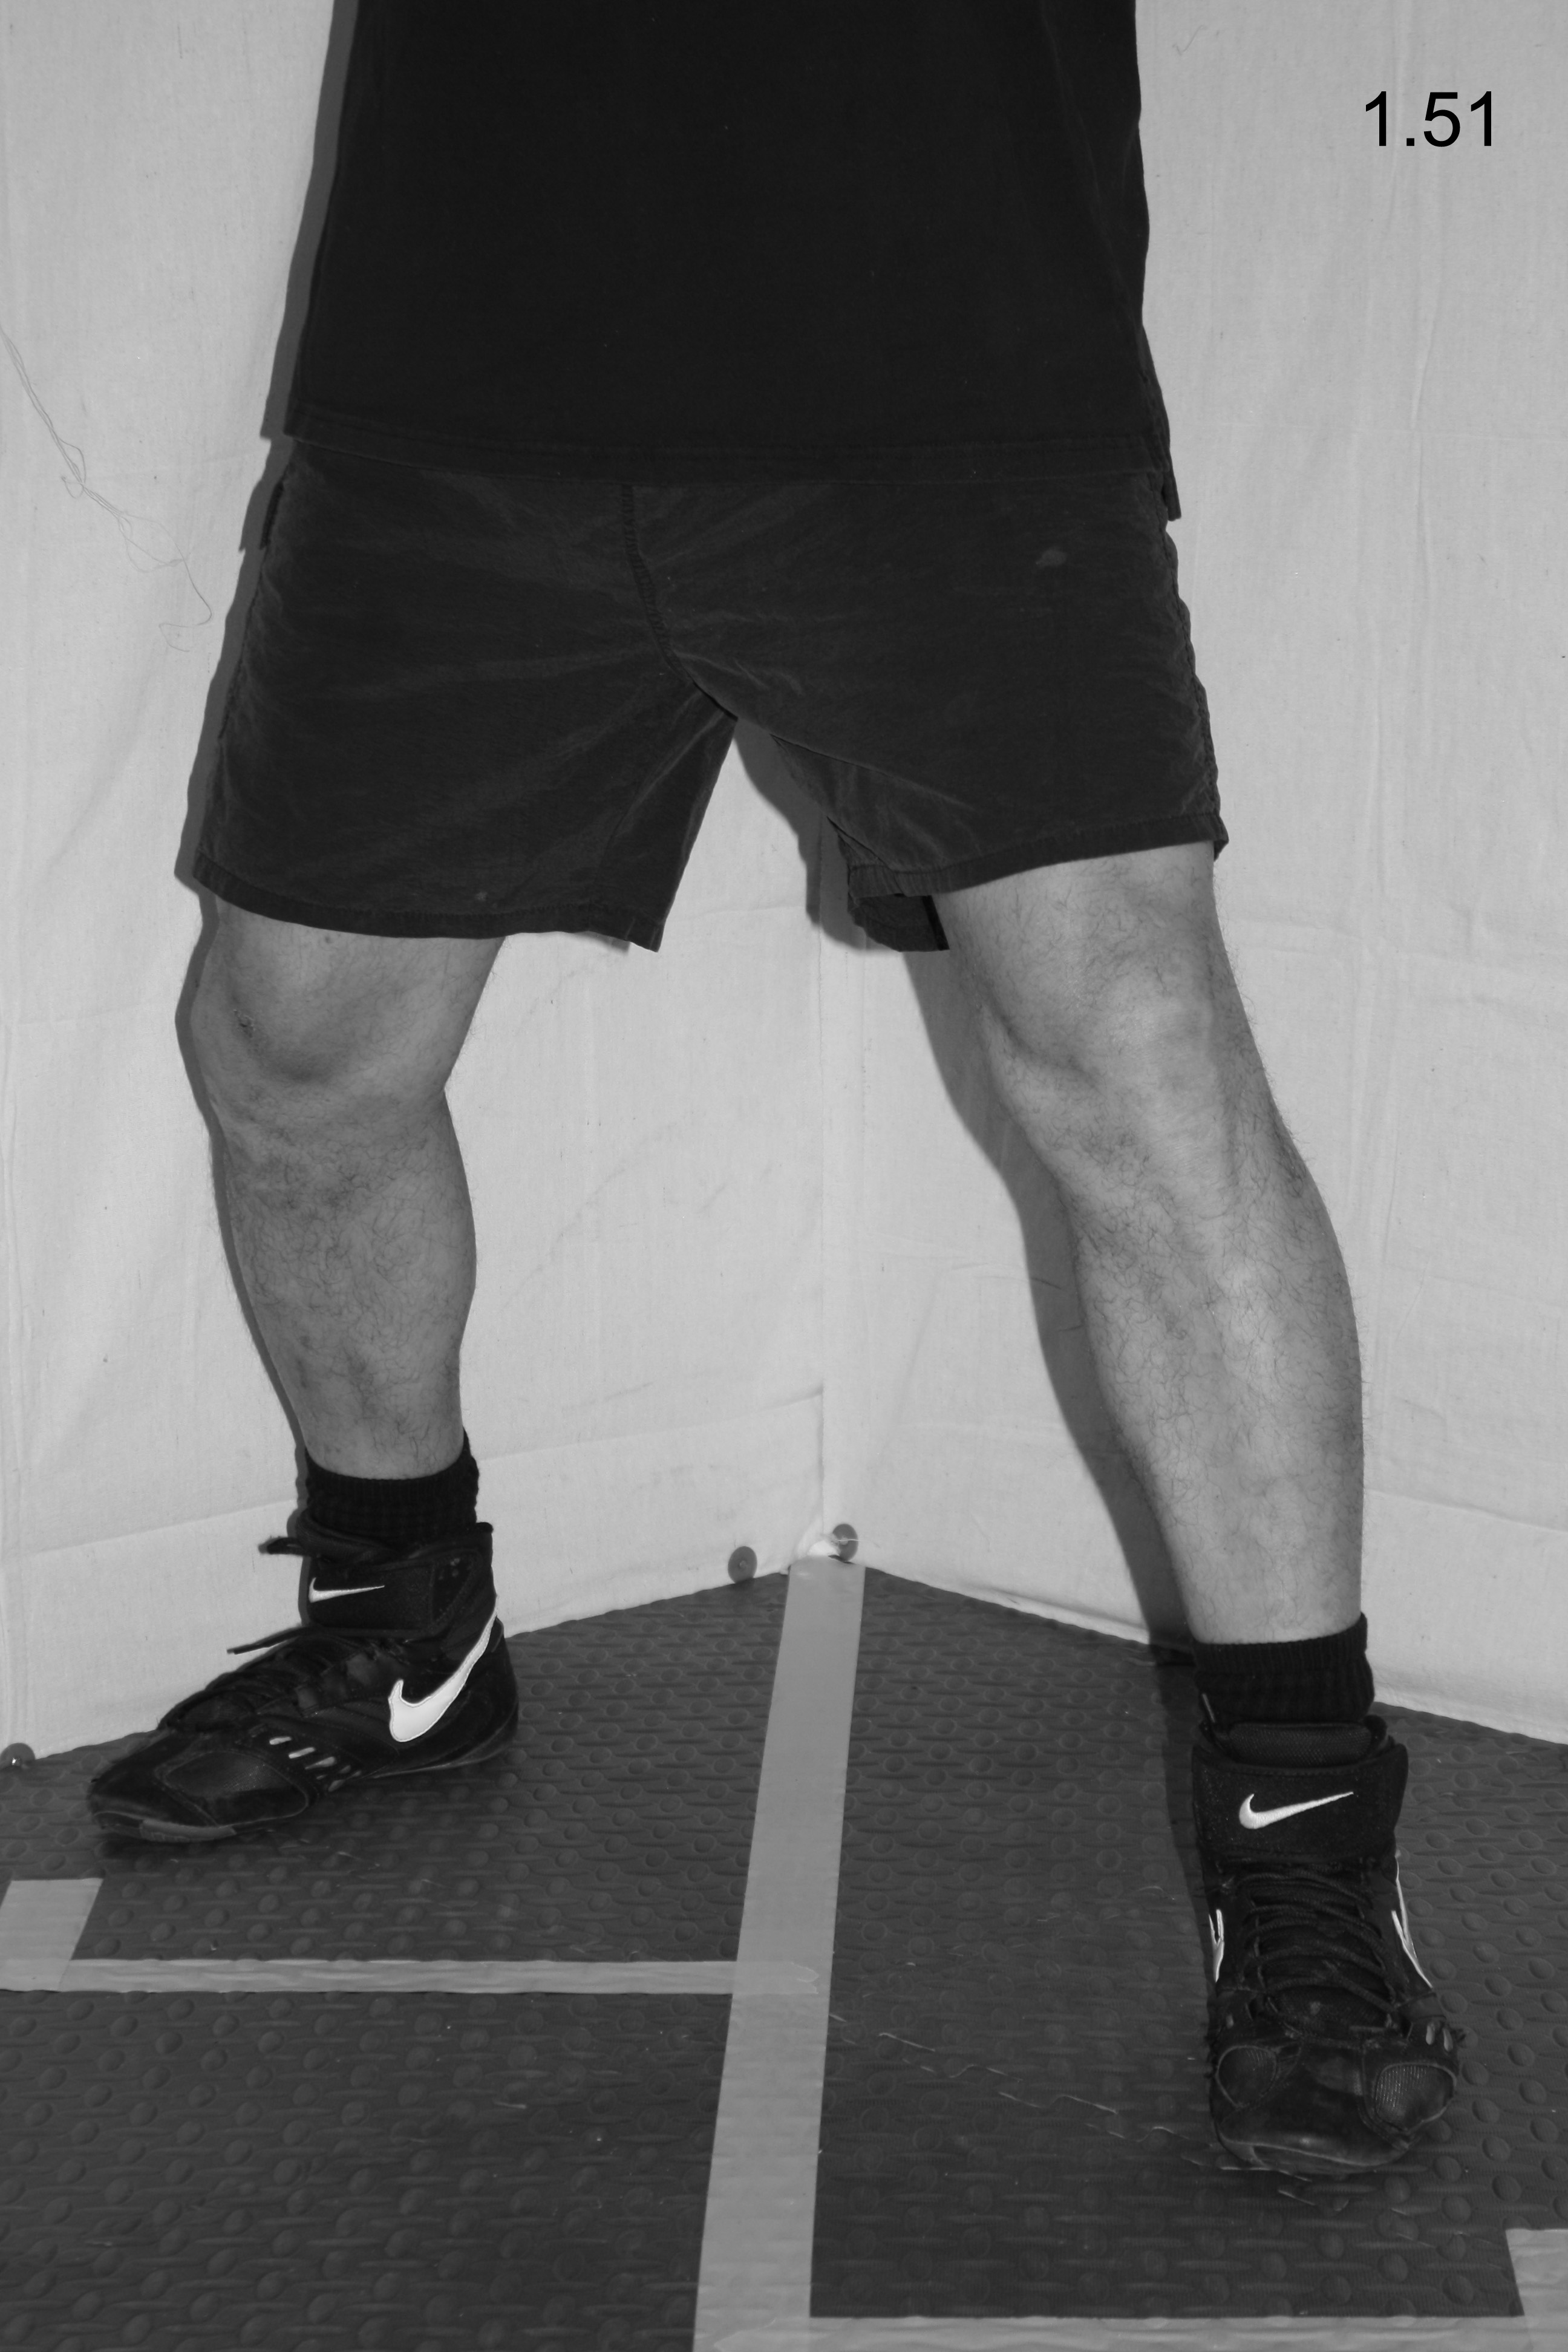
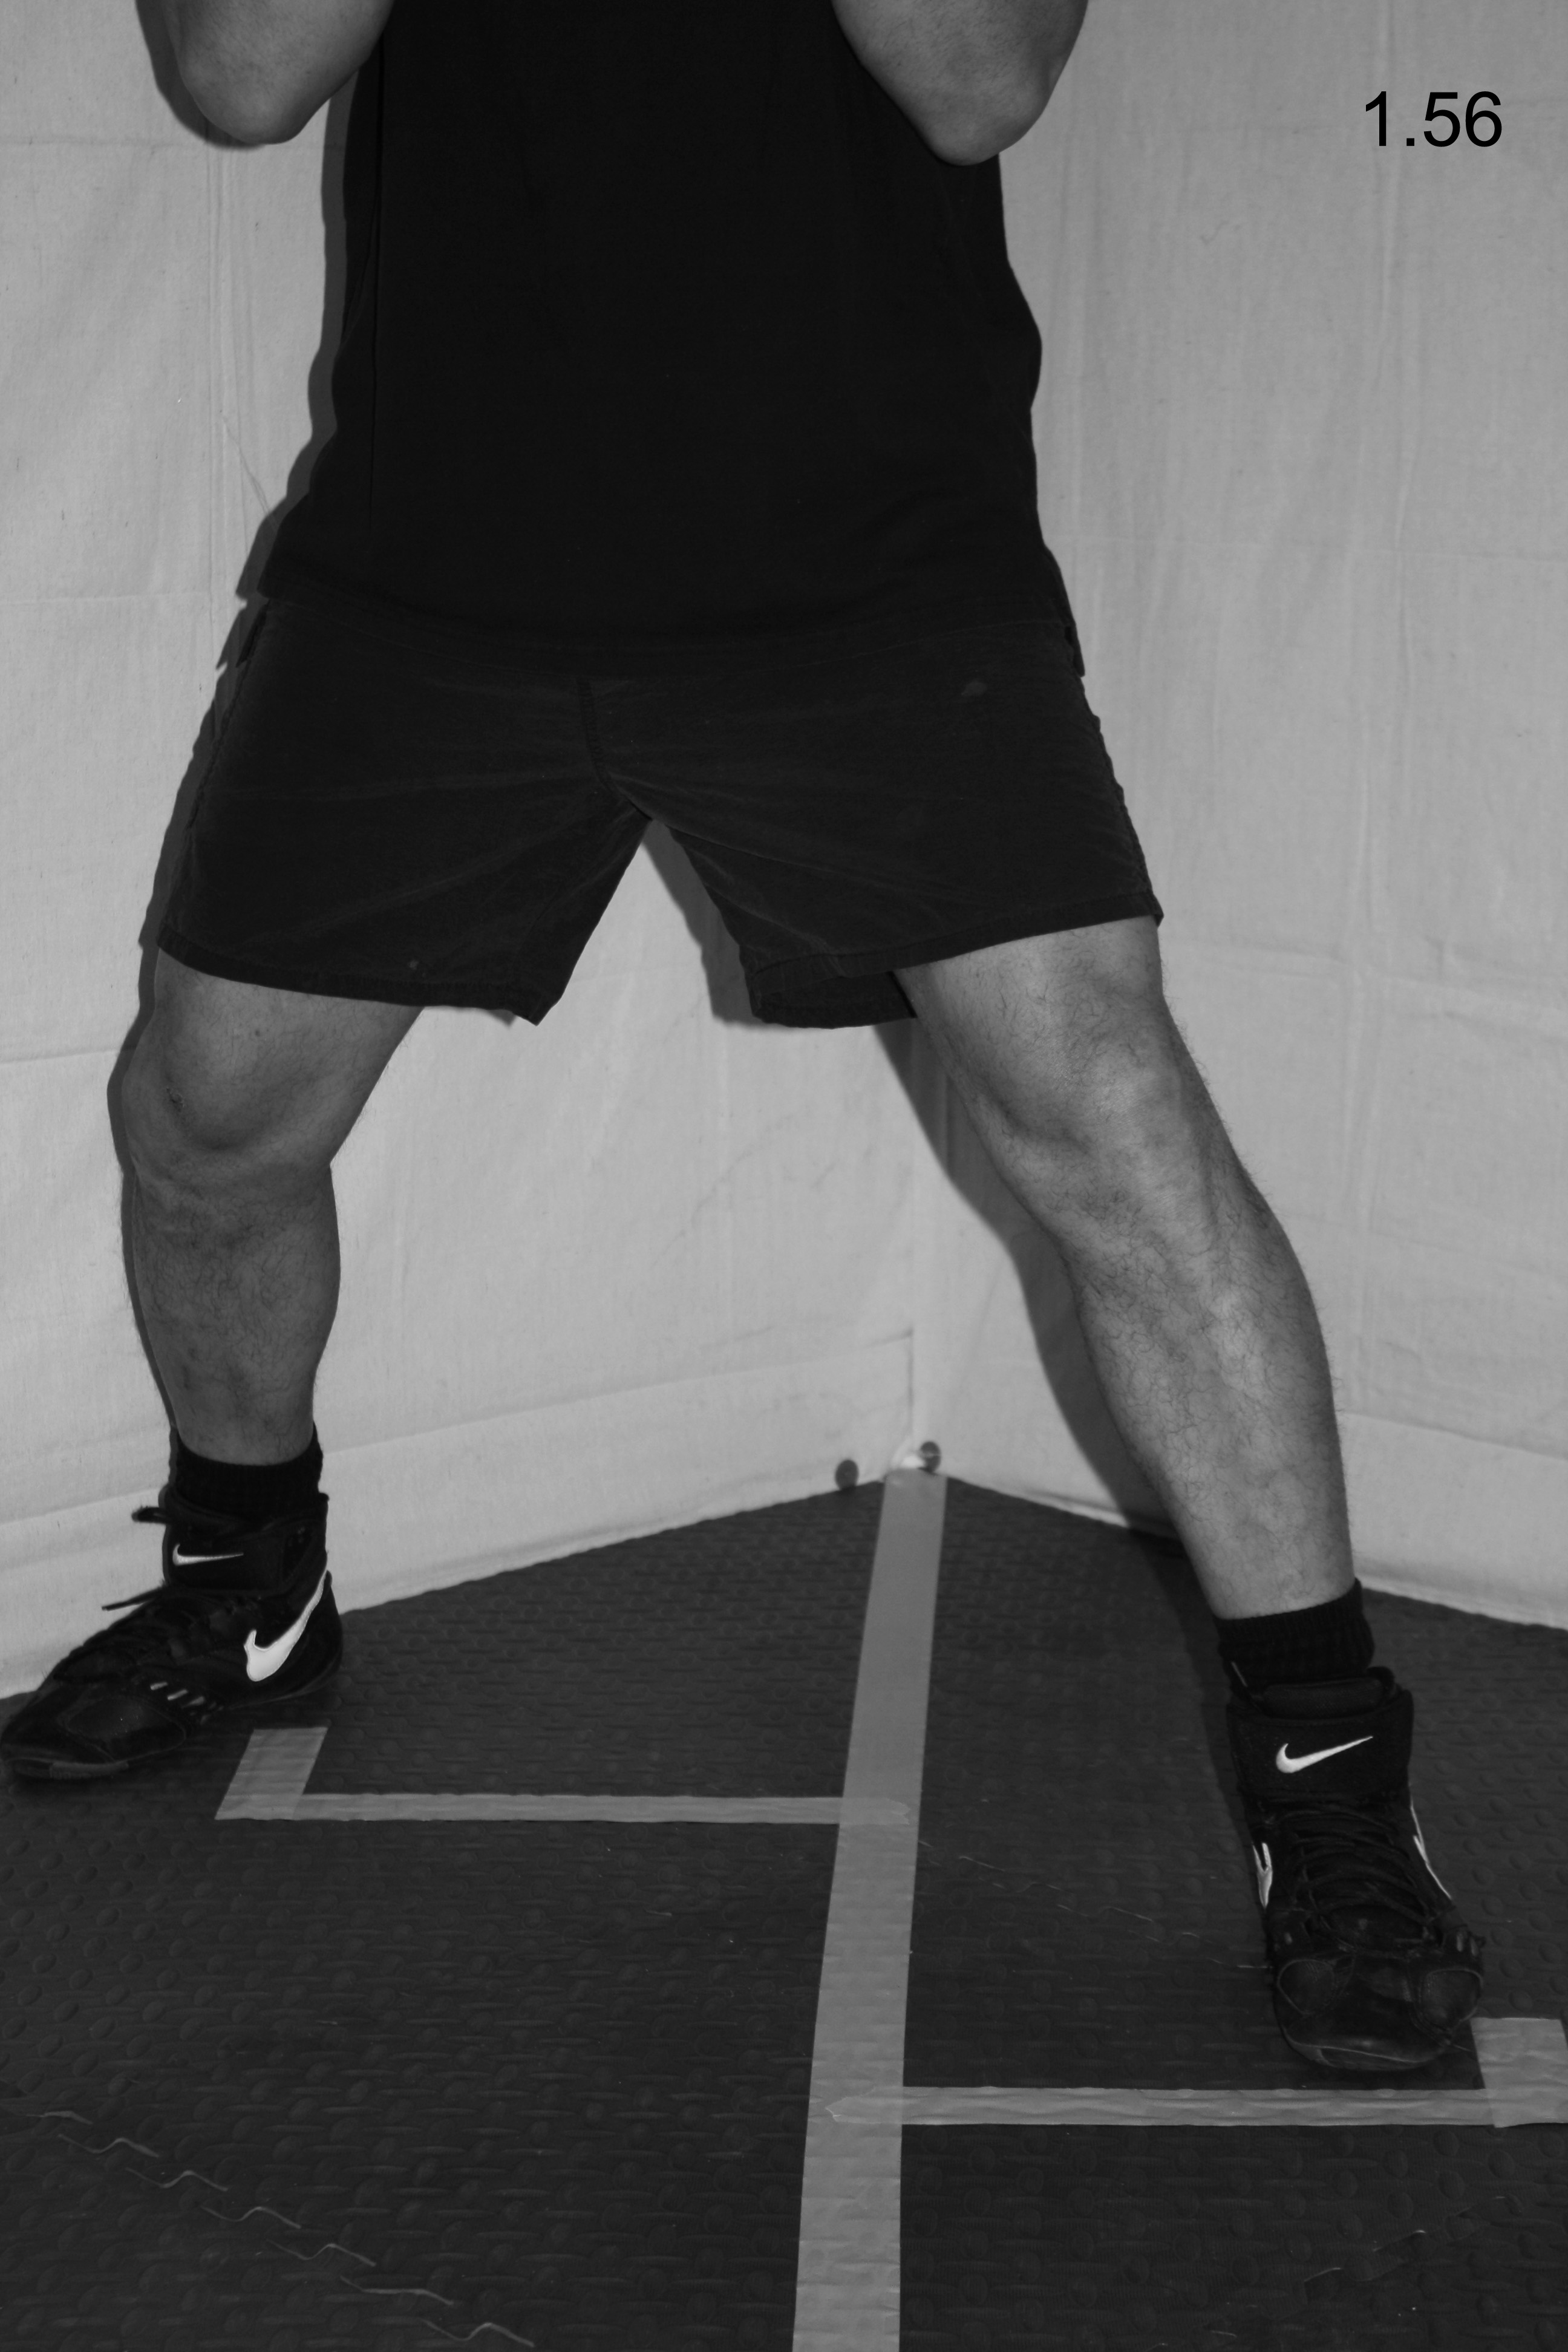
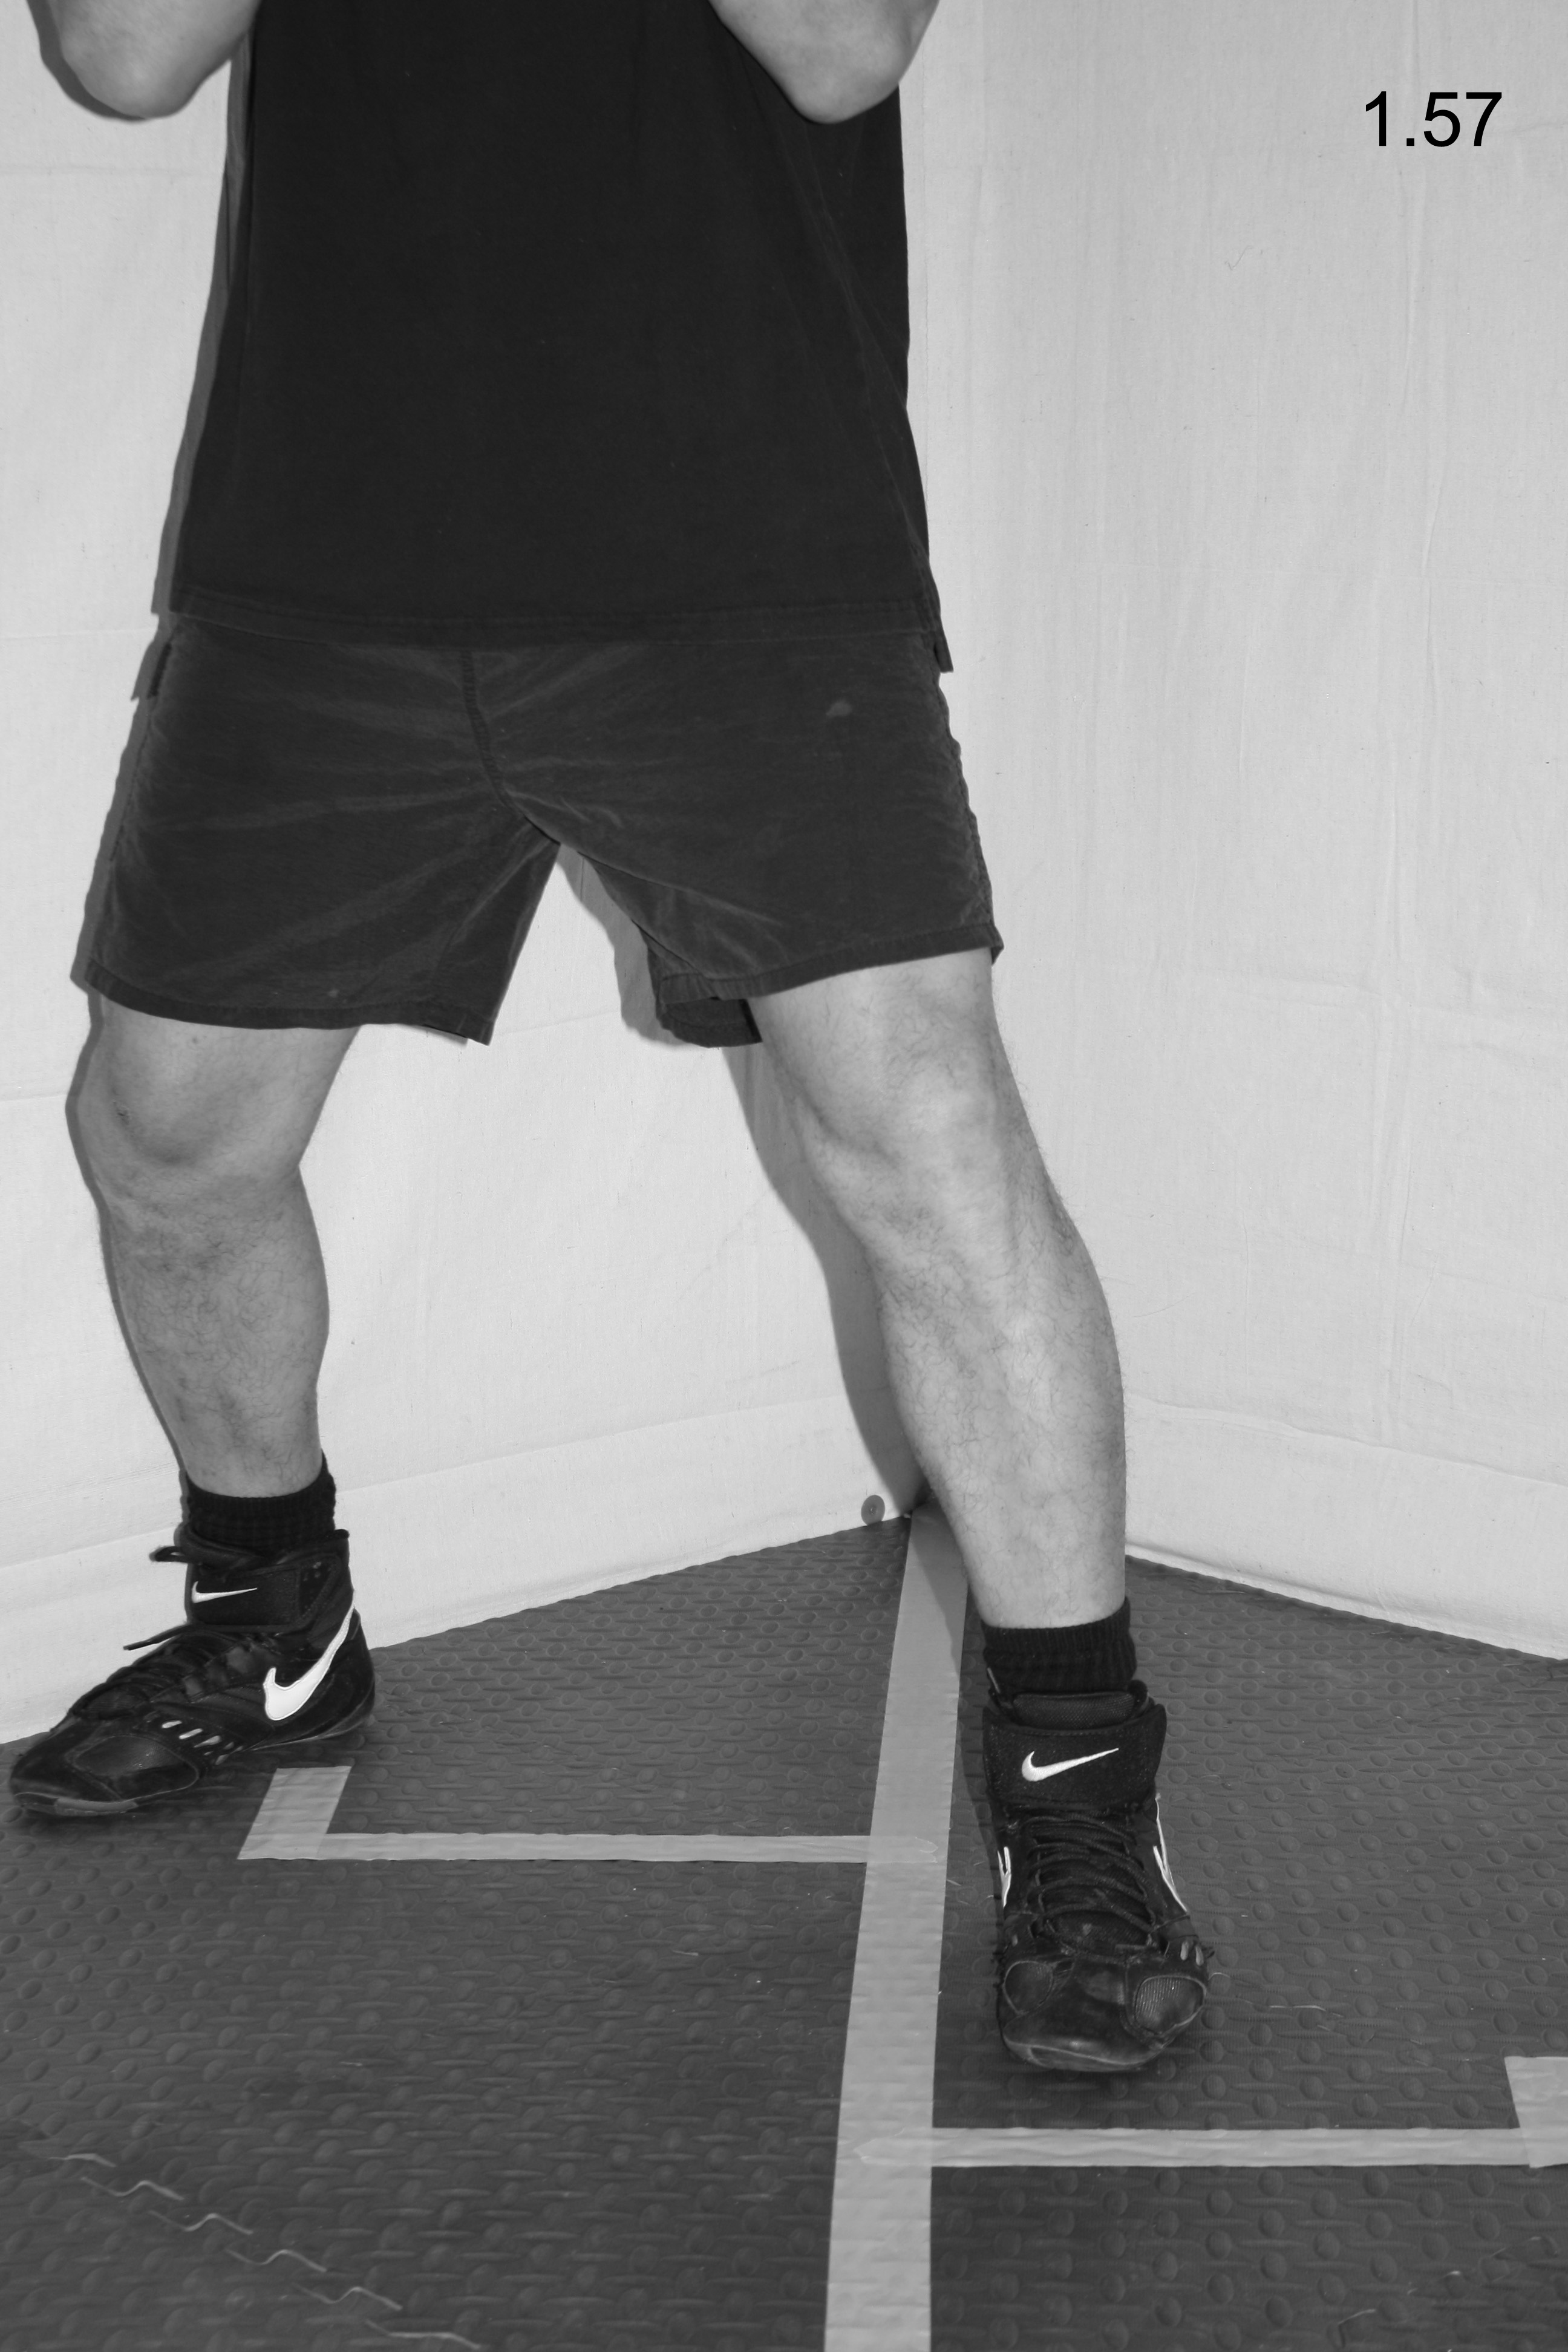
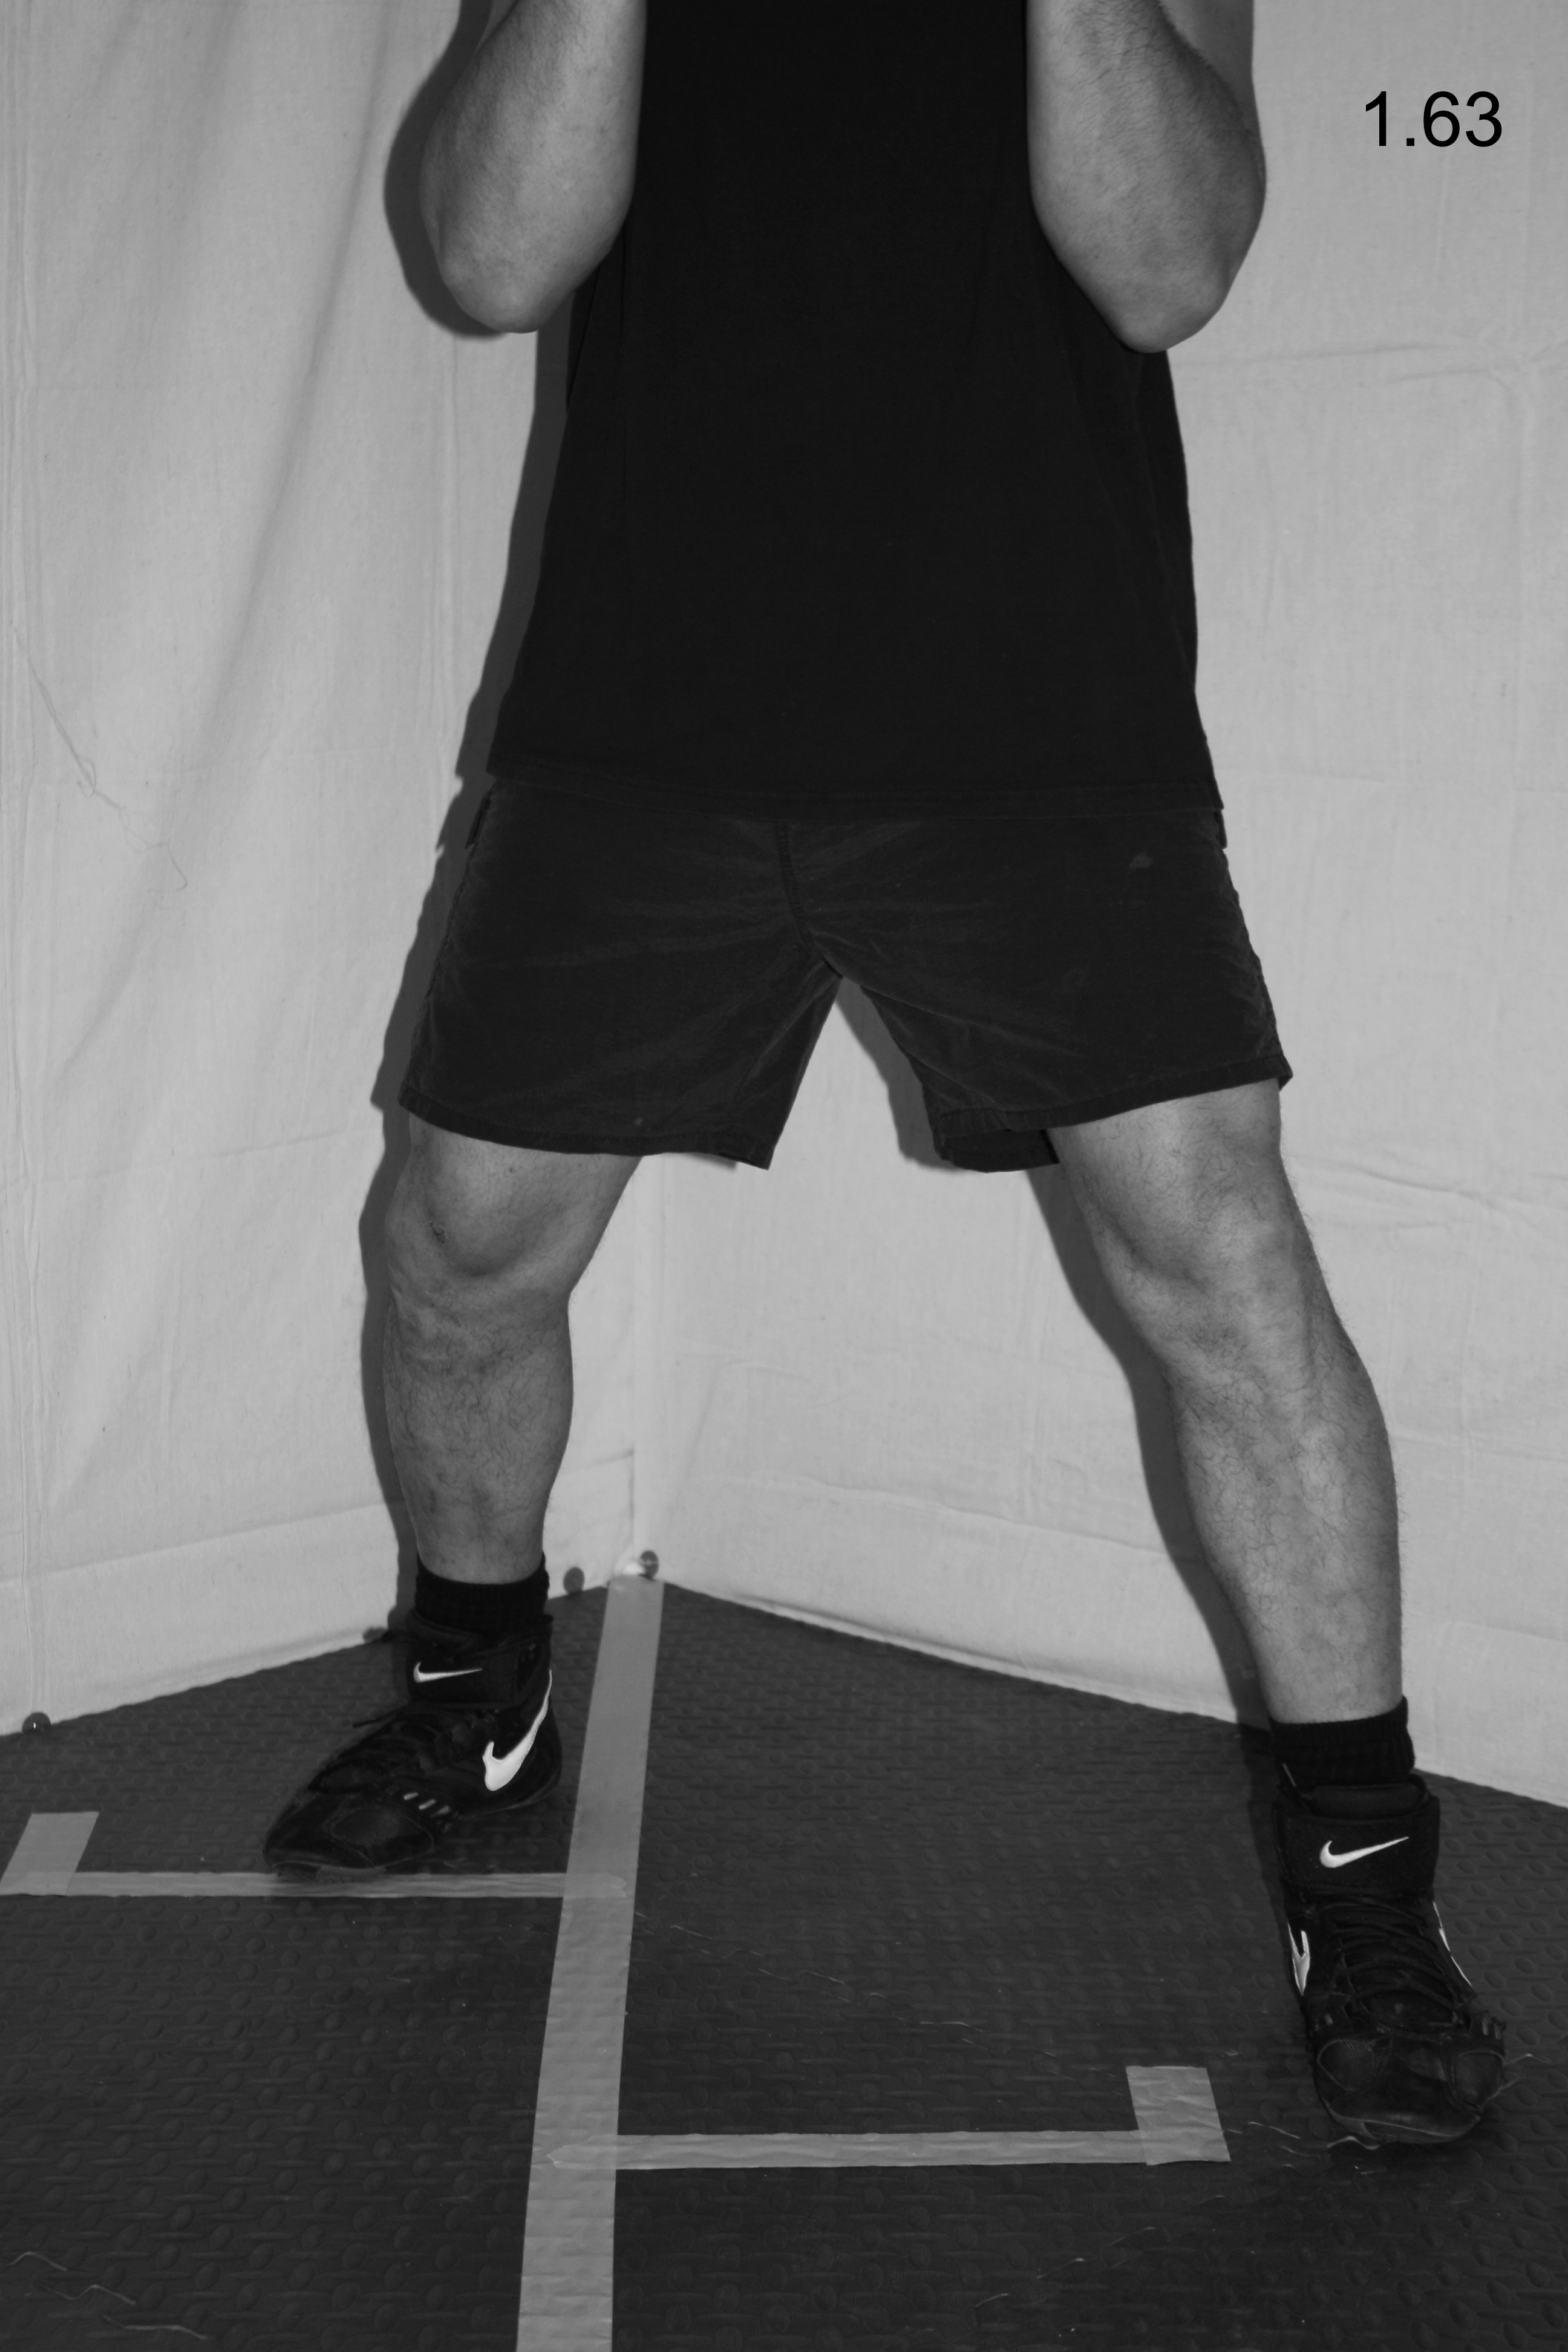
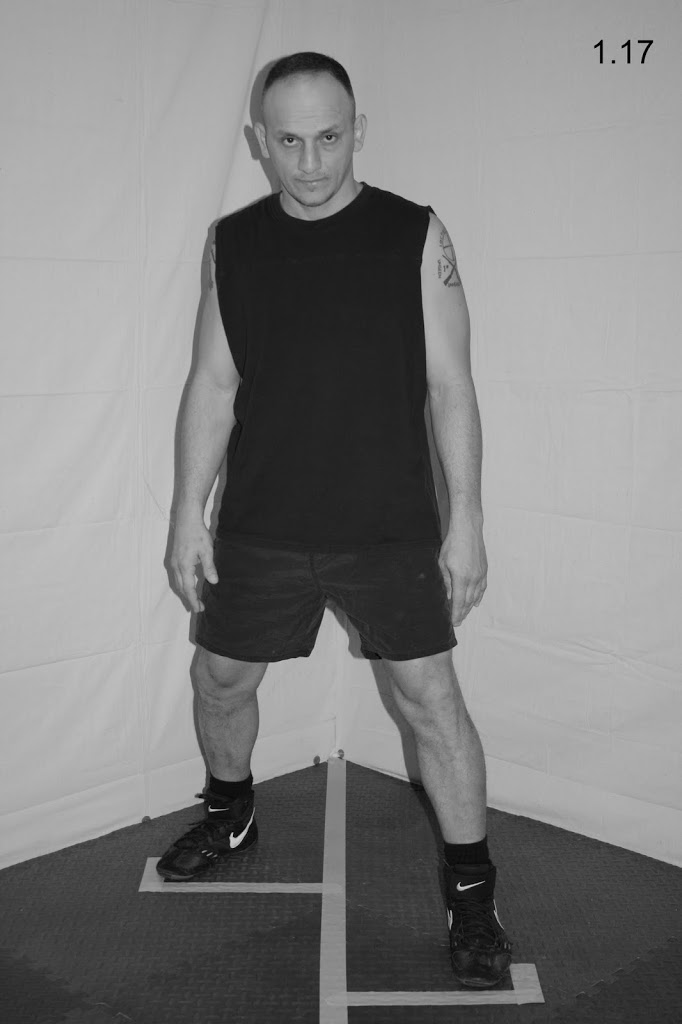
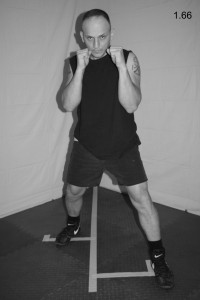
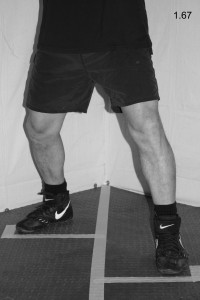
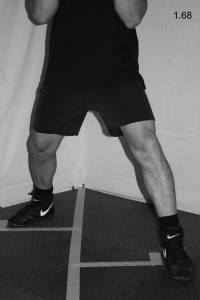
Step Two:   Quickly drag your right foot forward and diagonally the same distance the left foot traveled, which will bring you back to your fighting stance (see Fig. 1.66). For a close-up of the diagonal front step leg action, see Fig. 1.67 – 1.69.
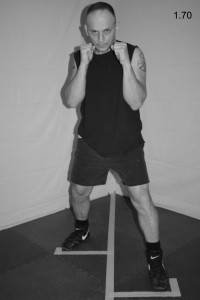
1.66

1.67  1.68

1.69

DIAGONAL BACK STEP

Moving directly rearward against an advancing suspect can sometimes be risky, because your head and body remain along the same line of attack and your suspect can move forward quicker than you can move backward. If your suspect were to reach you, he would have momentum on his side and could tackle you to the ground. Thus, it is imperative you get out of the suspect’s line of attack while positioning yourself to deliver strikes of your own that can help end the physical confrontation. The diagonal back step can help you accomplish these goals.

The diagonal back step can be even more effective when used in combination with other footwork techniques, such as pivots and side steps.

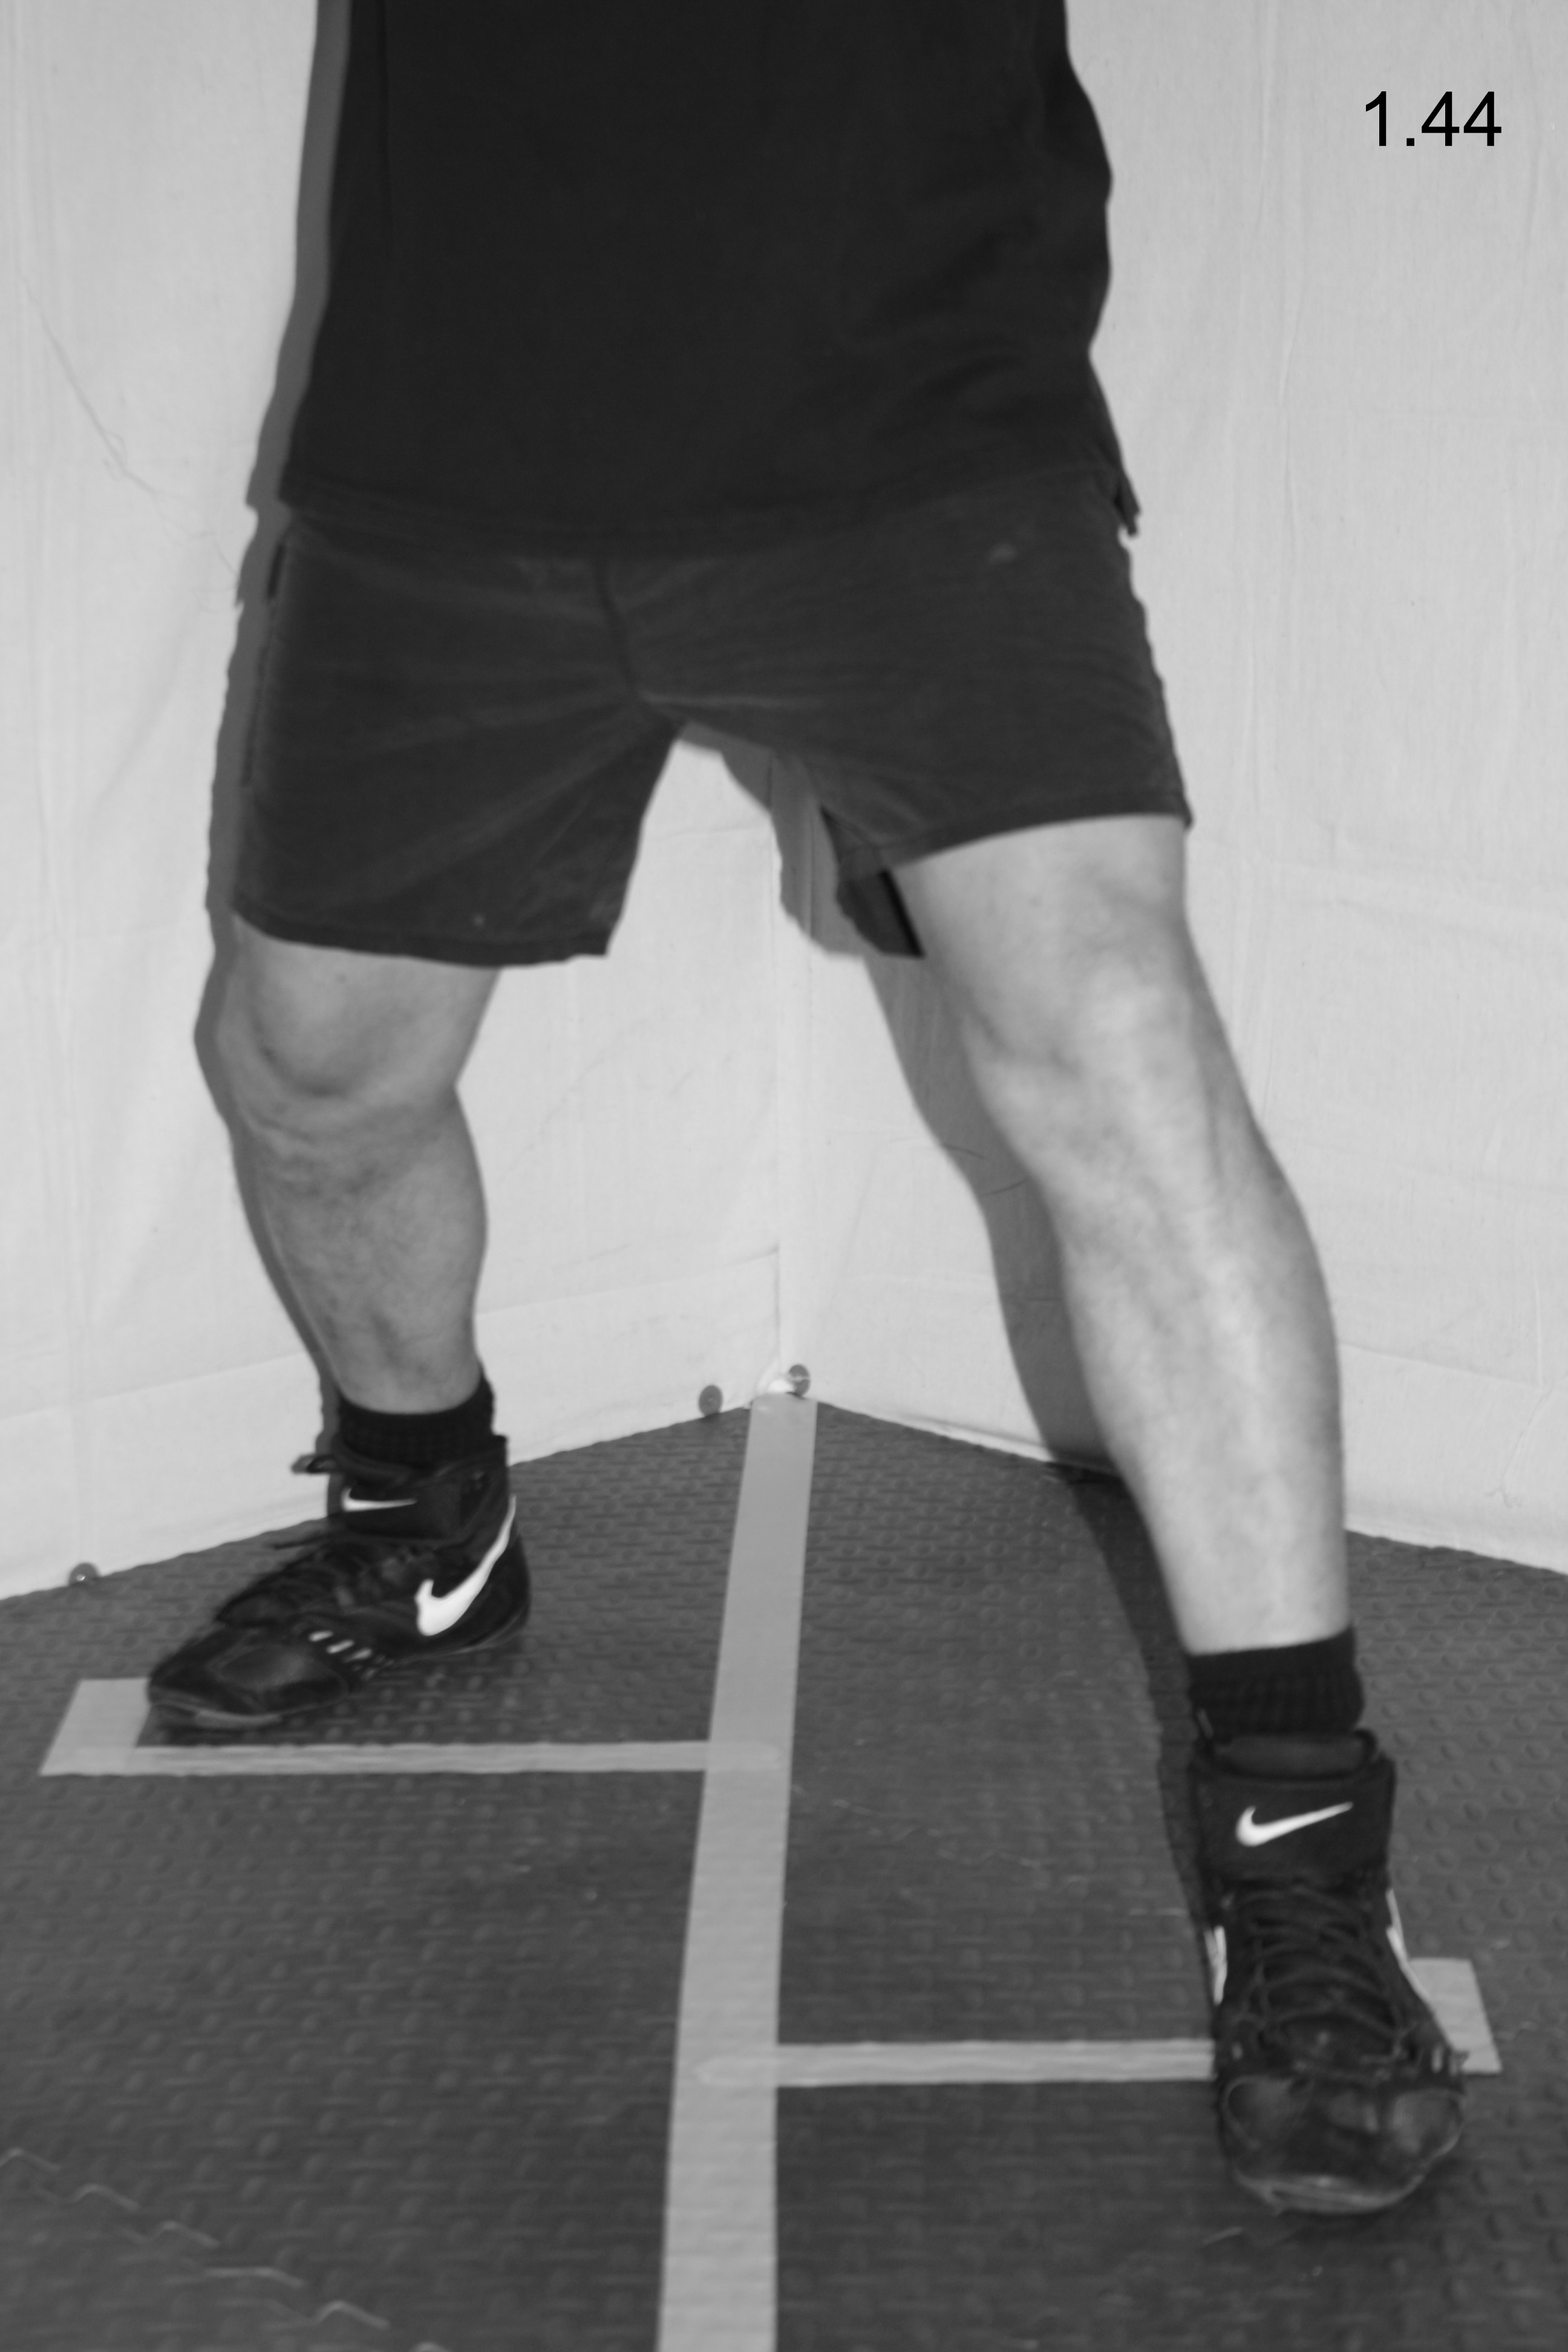
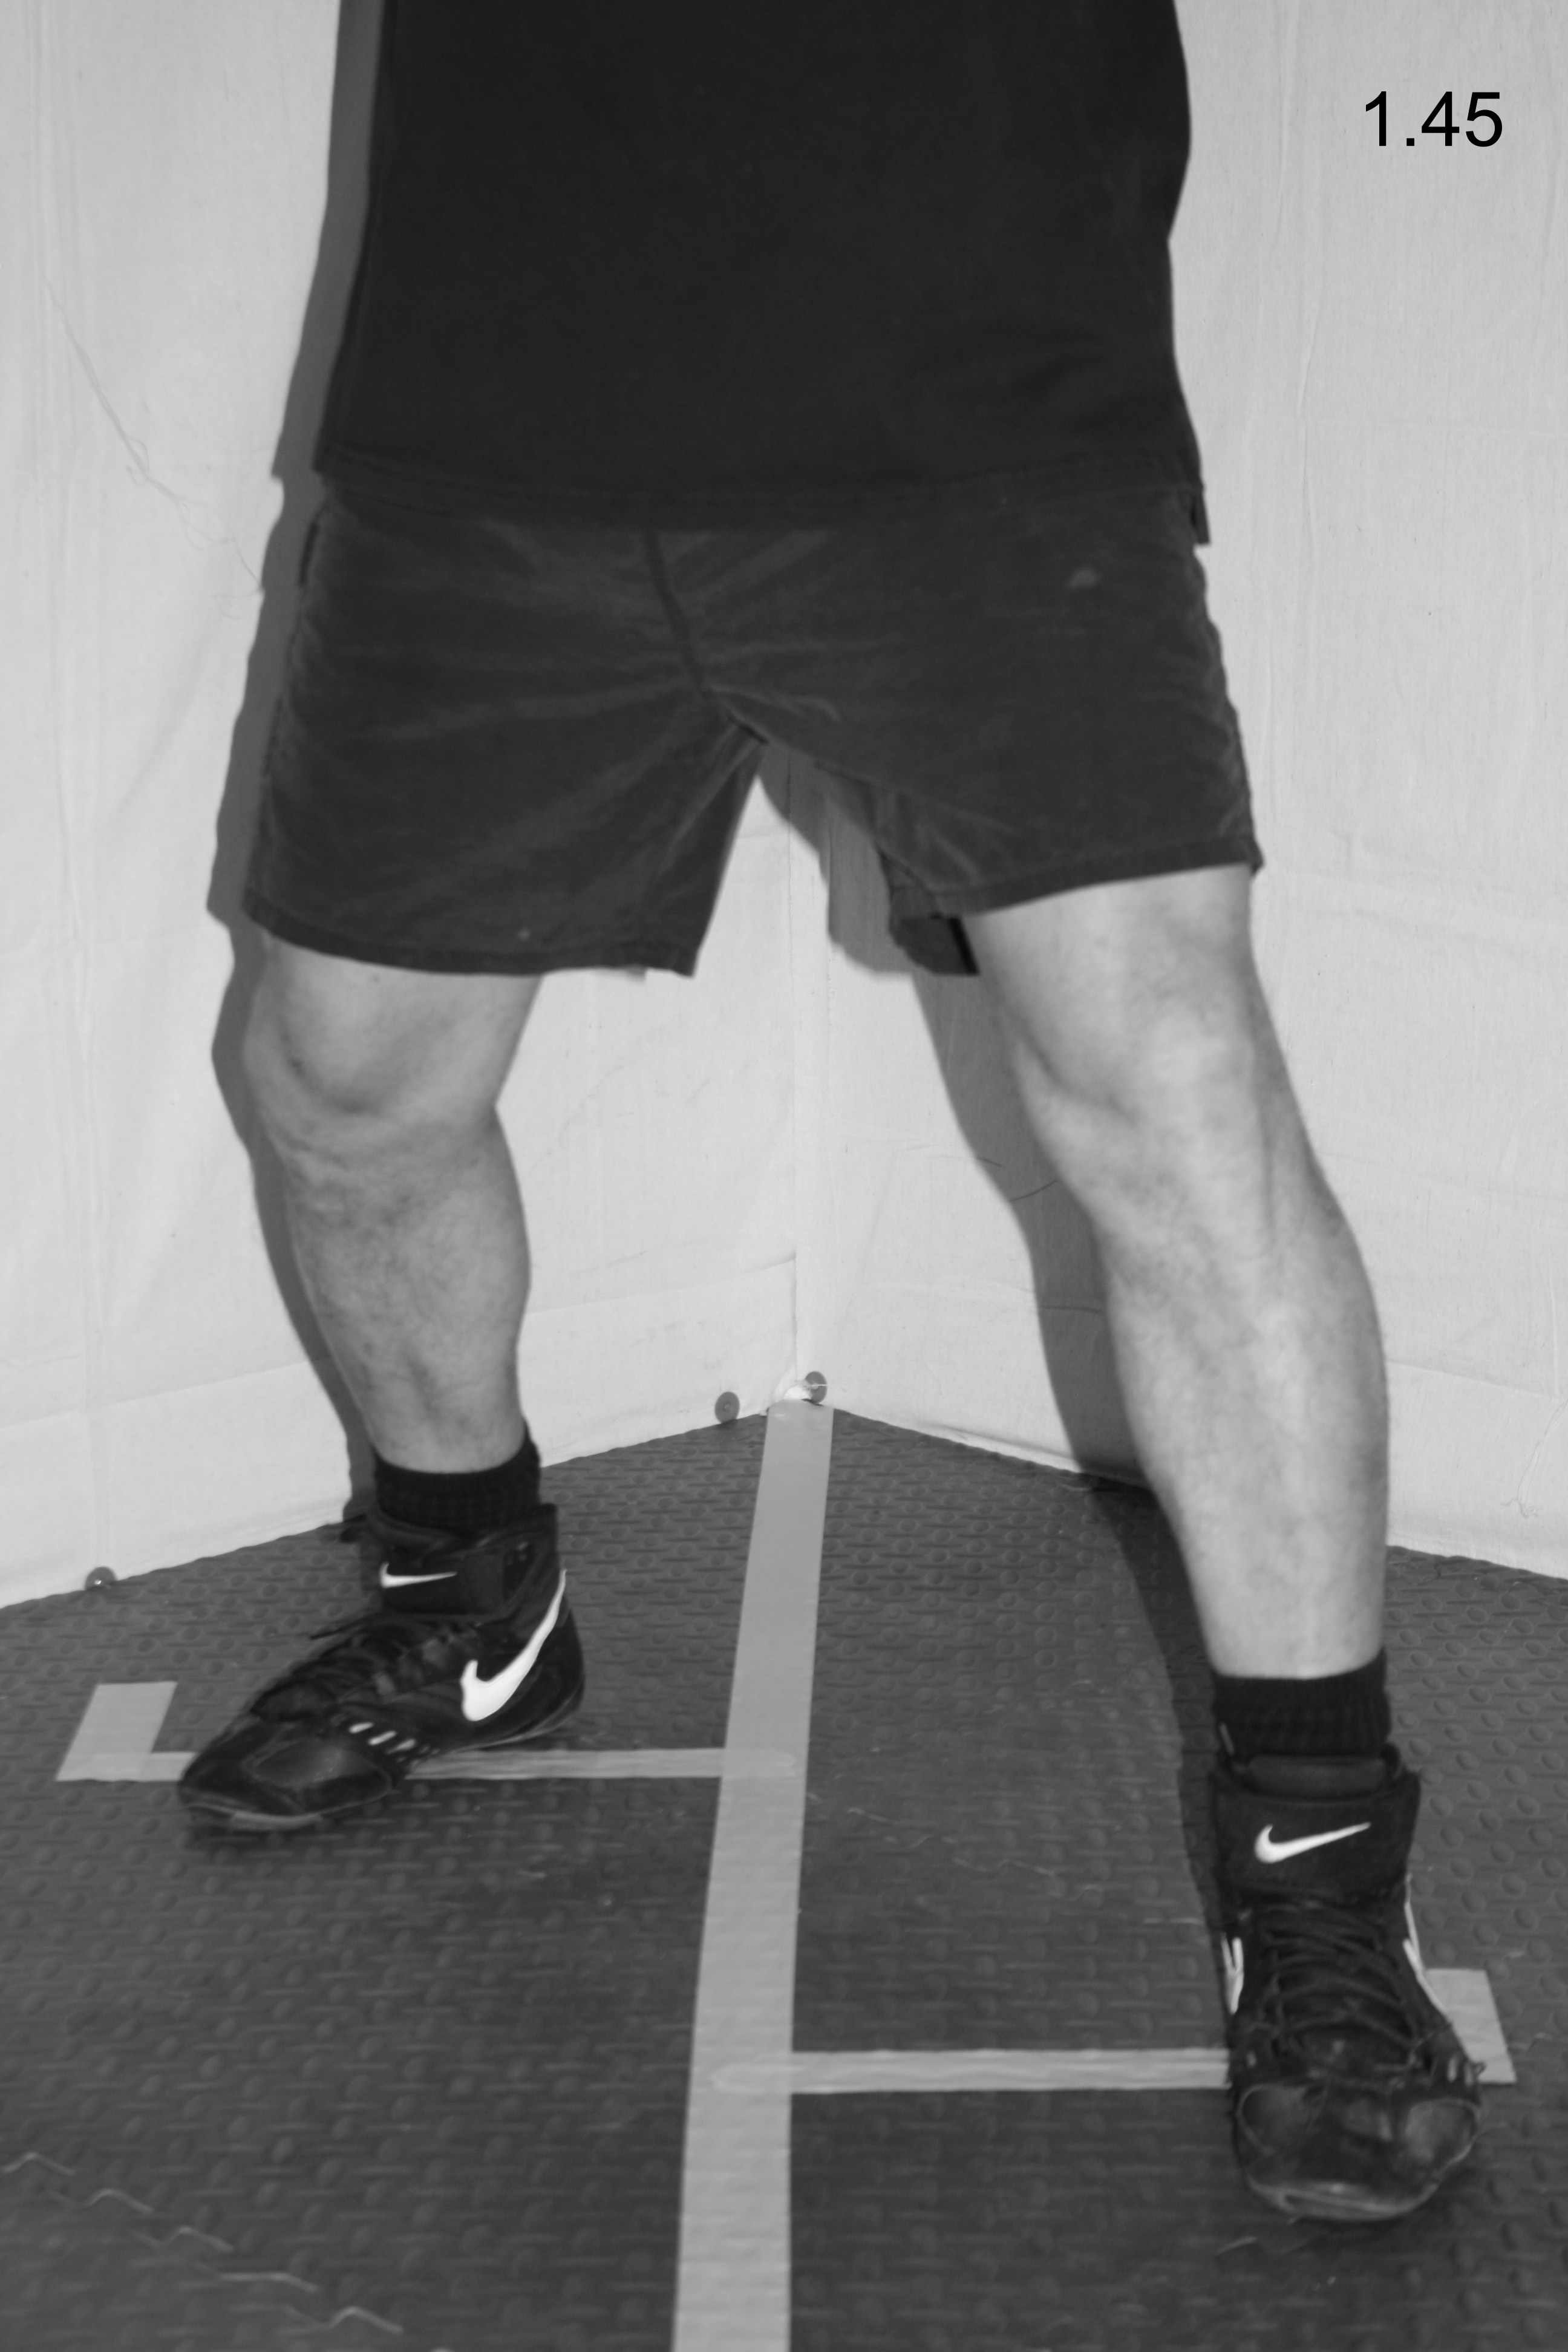
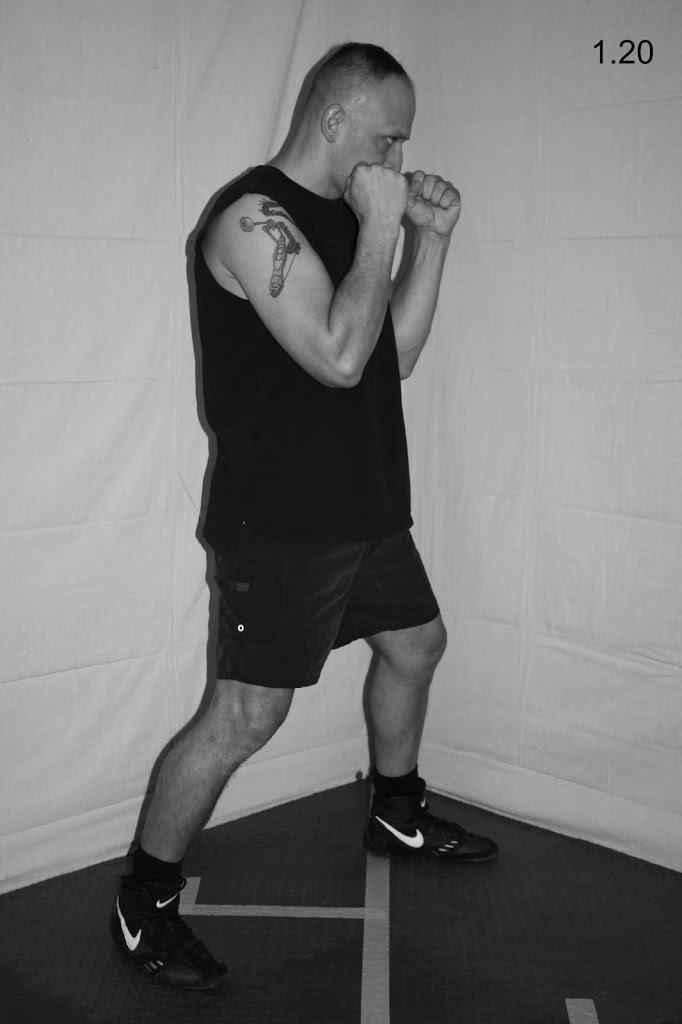
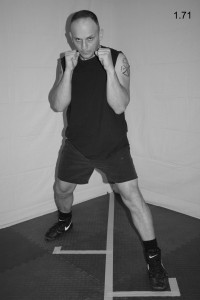
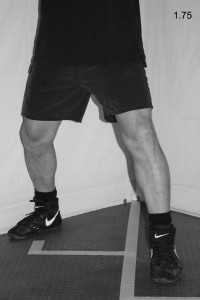
Step One:   From your fighting stance (see Fig. 1.70), push off with the ball of your left foot and slide your right foot about one half step rearward and diagonally to the right, at about a forty-five degree angle (see Fig. 1.71).

1.70  1.71

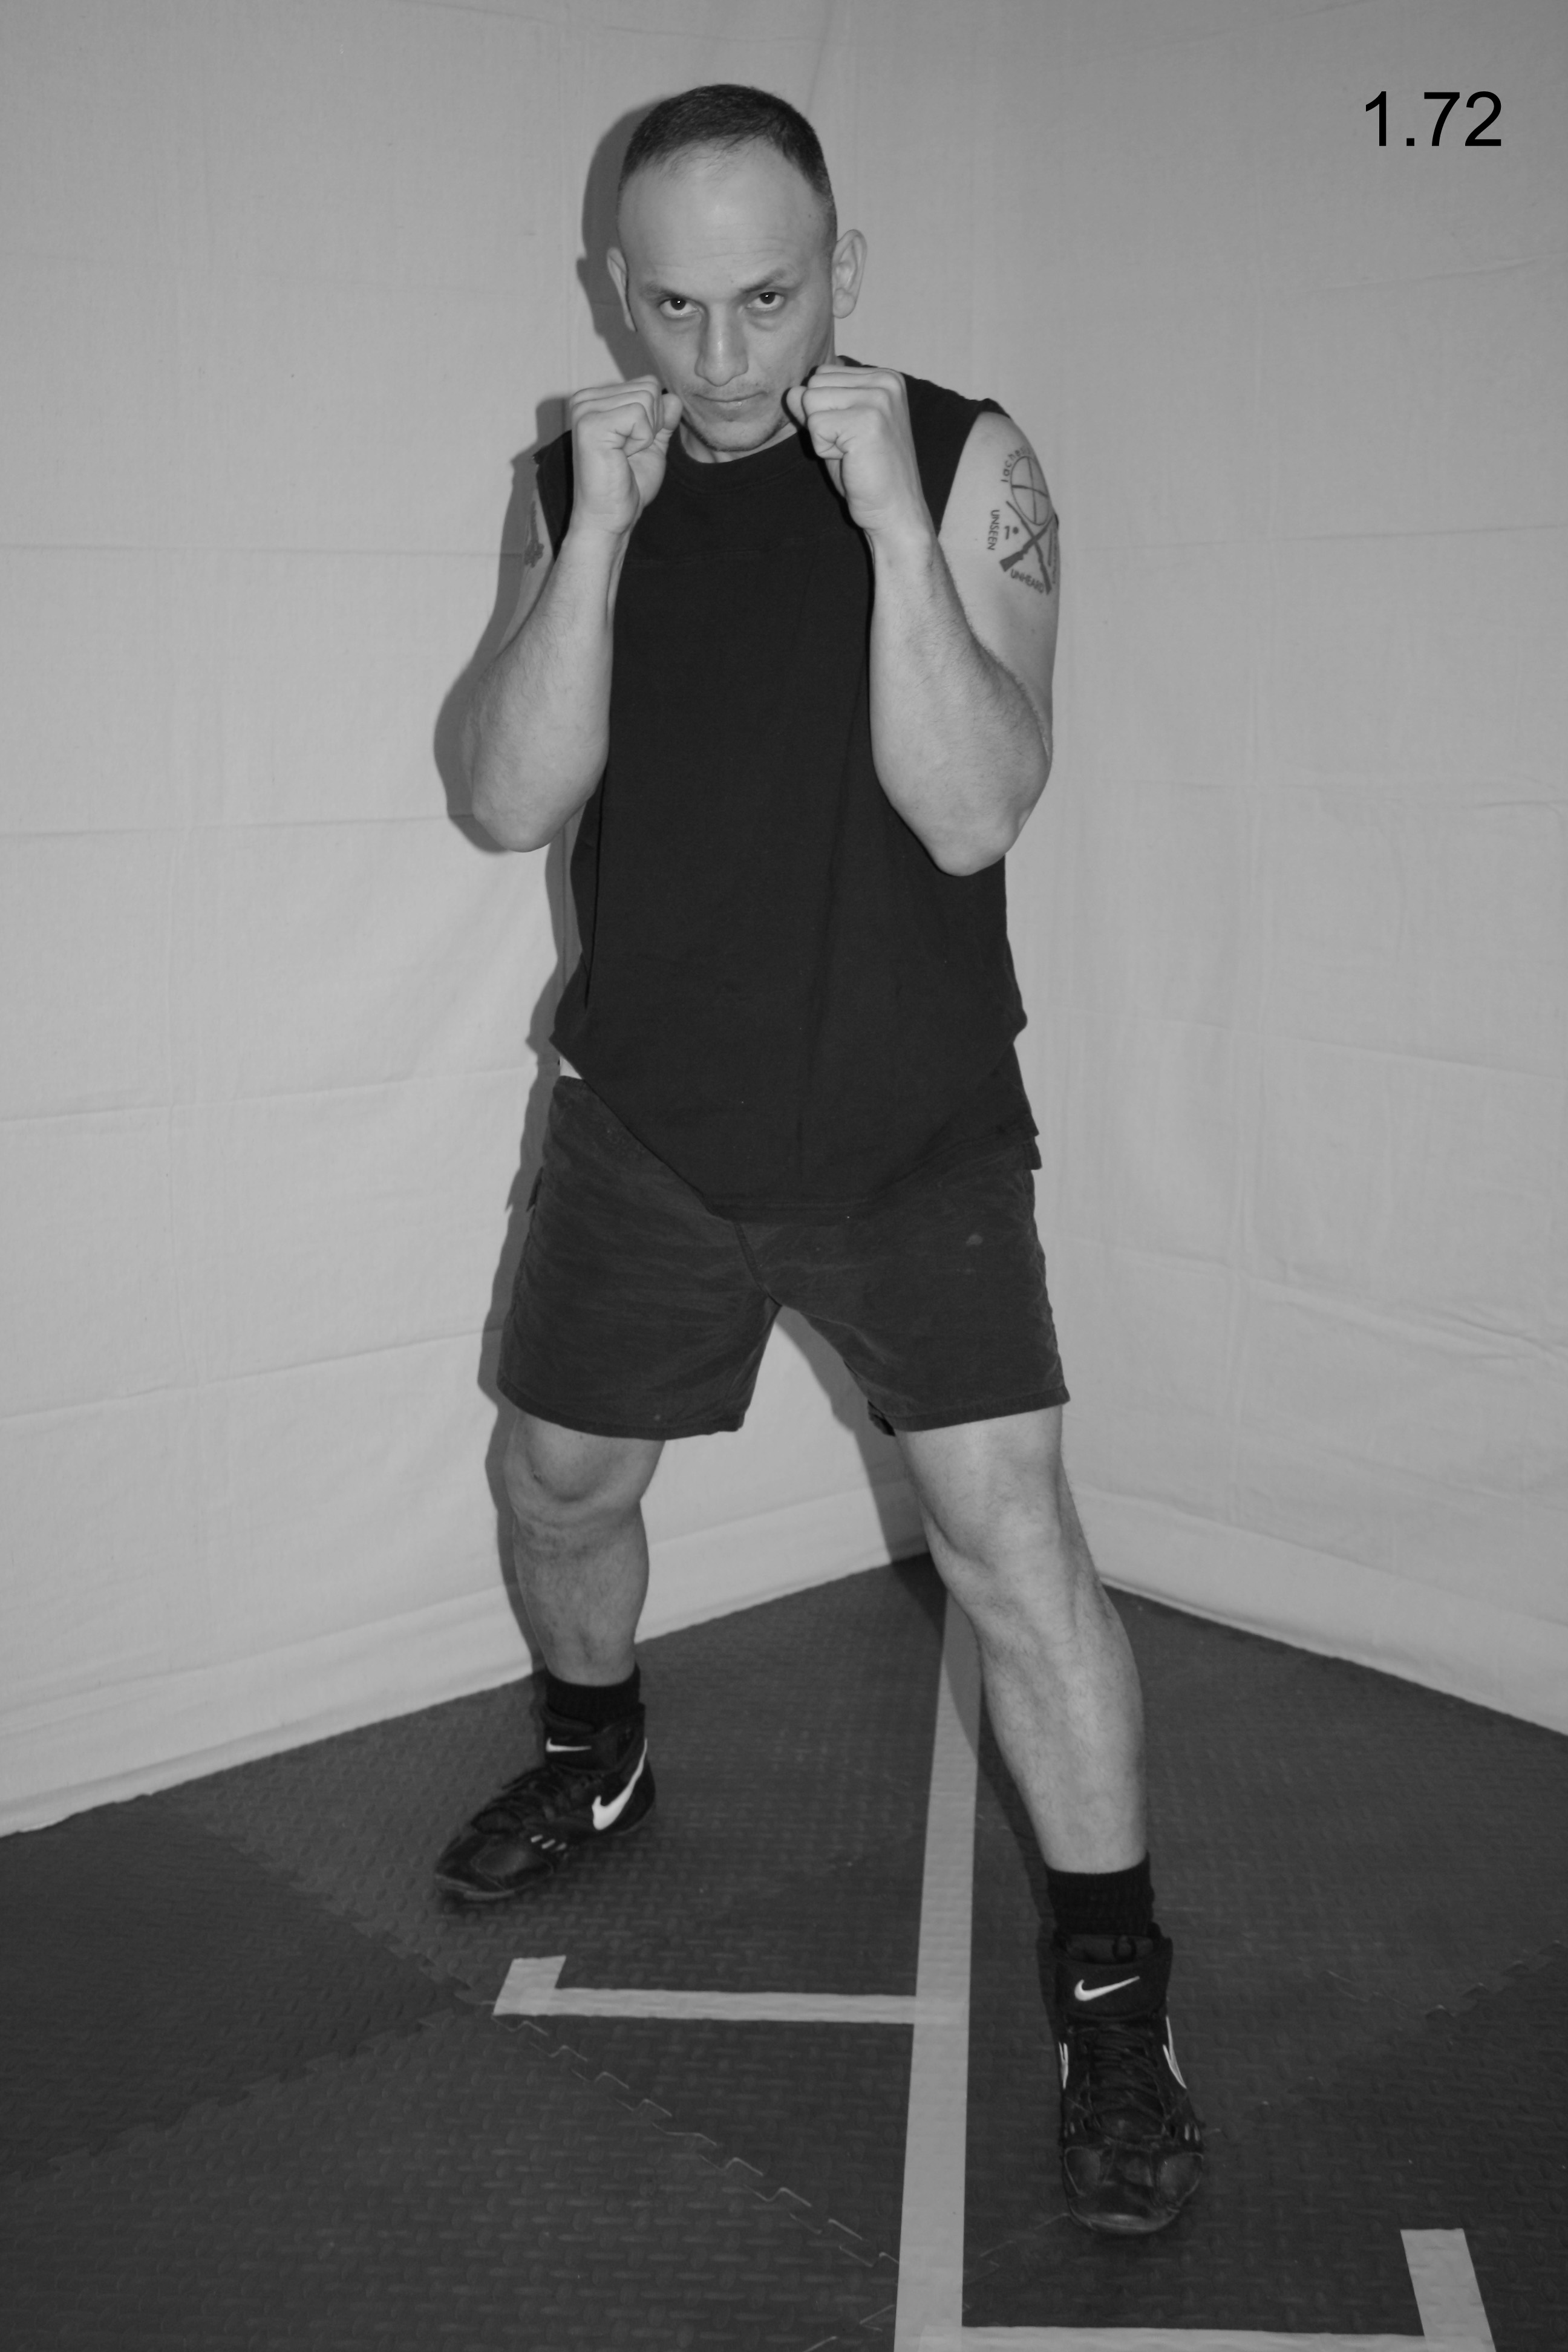
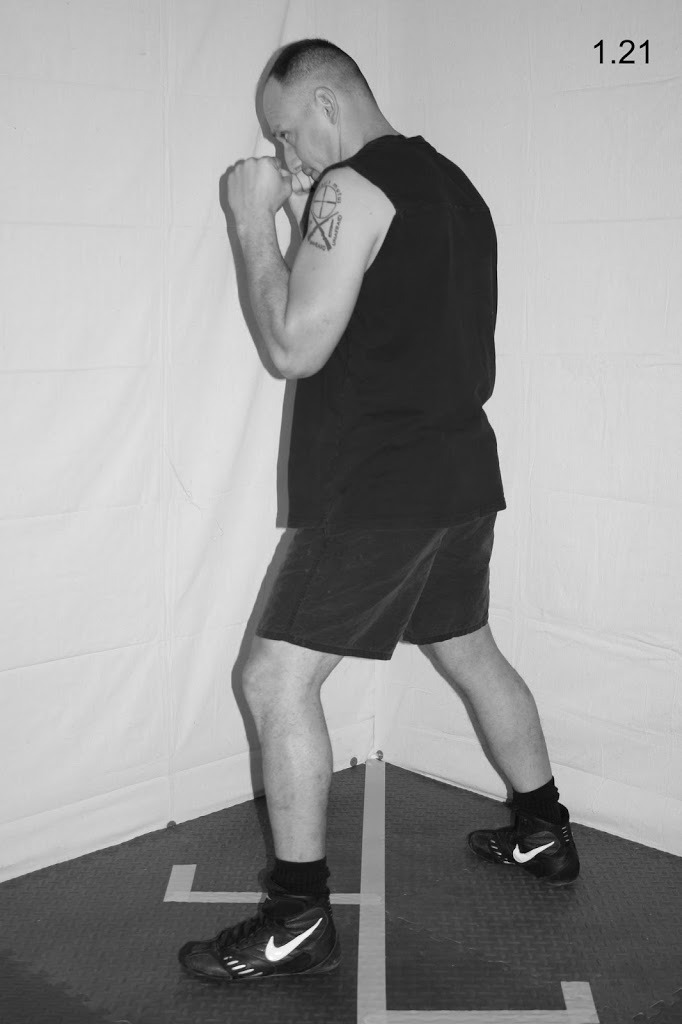
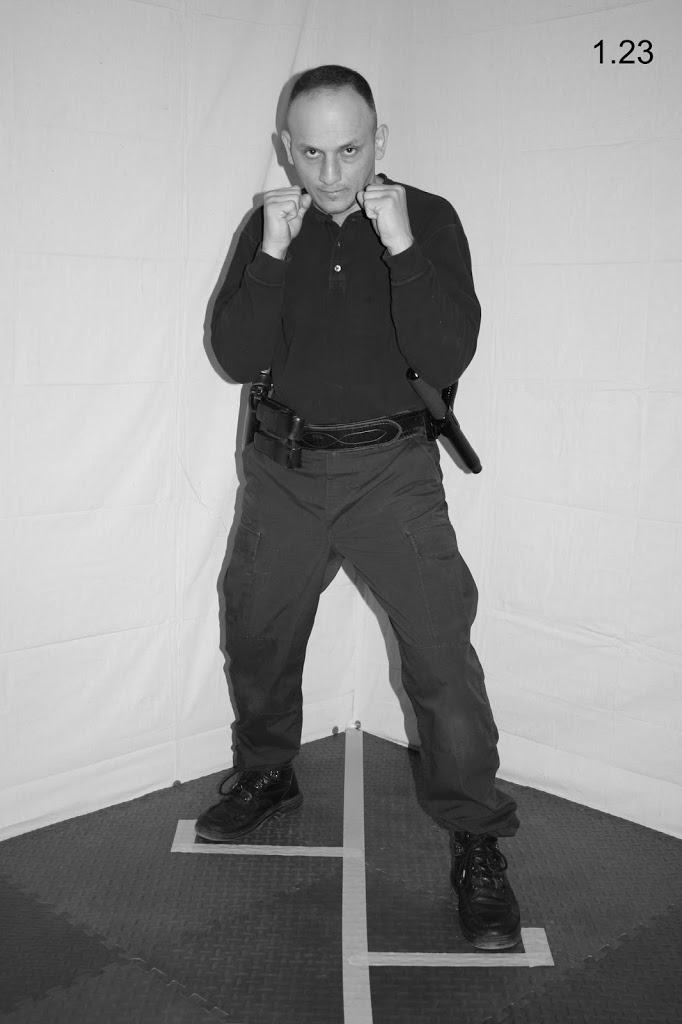
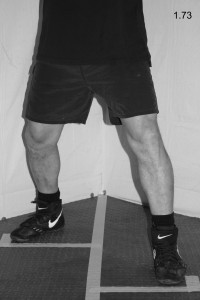
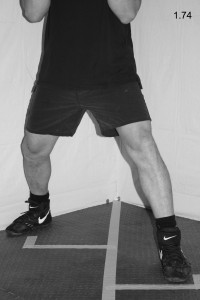
Step Two:   Quickly drag your left foot rearward and diagonally the same distance the right foot traveled, which will bring you back to your fighting stance (see Fig. 1.72). For a close-up of the diagonal back step leg action, see Fig. 1.73 – 1.75.

1.72

1.73  1.74

1.75

COUNTERCLOCKWISE PIVOT

The counterclockwise pivot is a technique that spins your body forward and is great for matching your suspect’s movements, evading strikes, or creating angles from which to launch your own strikes. It is also a great technique to use to keep up with a suspect who is trying to circle you to the left in an attempt to get behind you.

Your suspect’s movement will determine how far you pivot. If your suspect moved around to your immediate left, you would pivot ninety-degrees to keep him in front of you. If your suspect moved slightly to your left, you would pivot at about a forty-five degree angle to keep him in front of you, and etc.

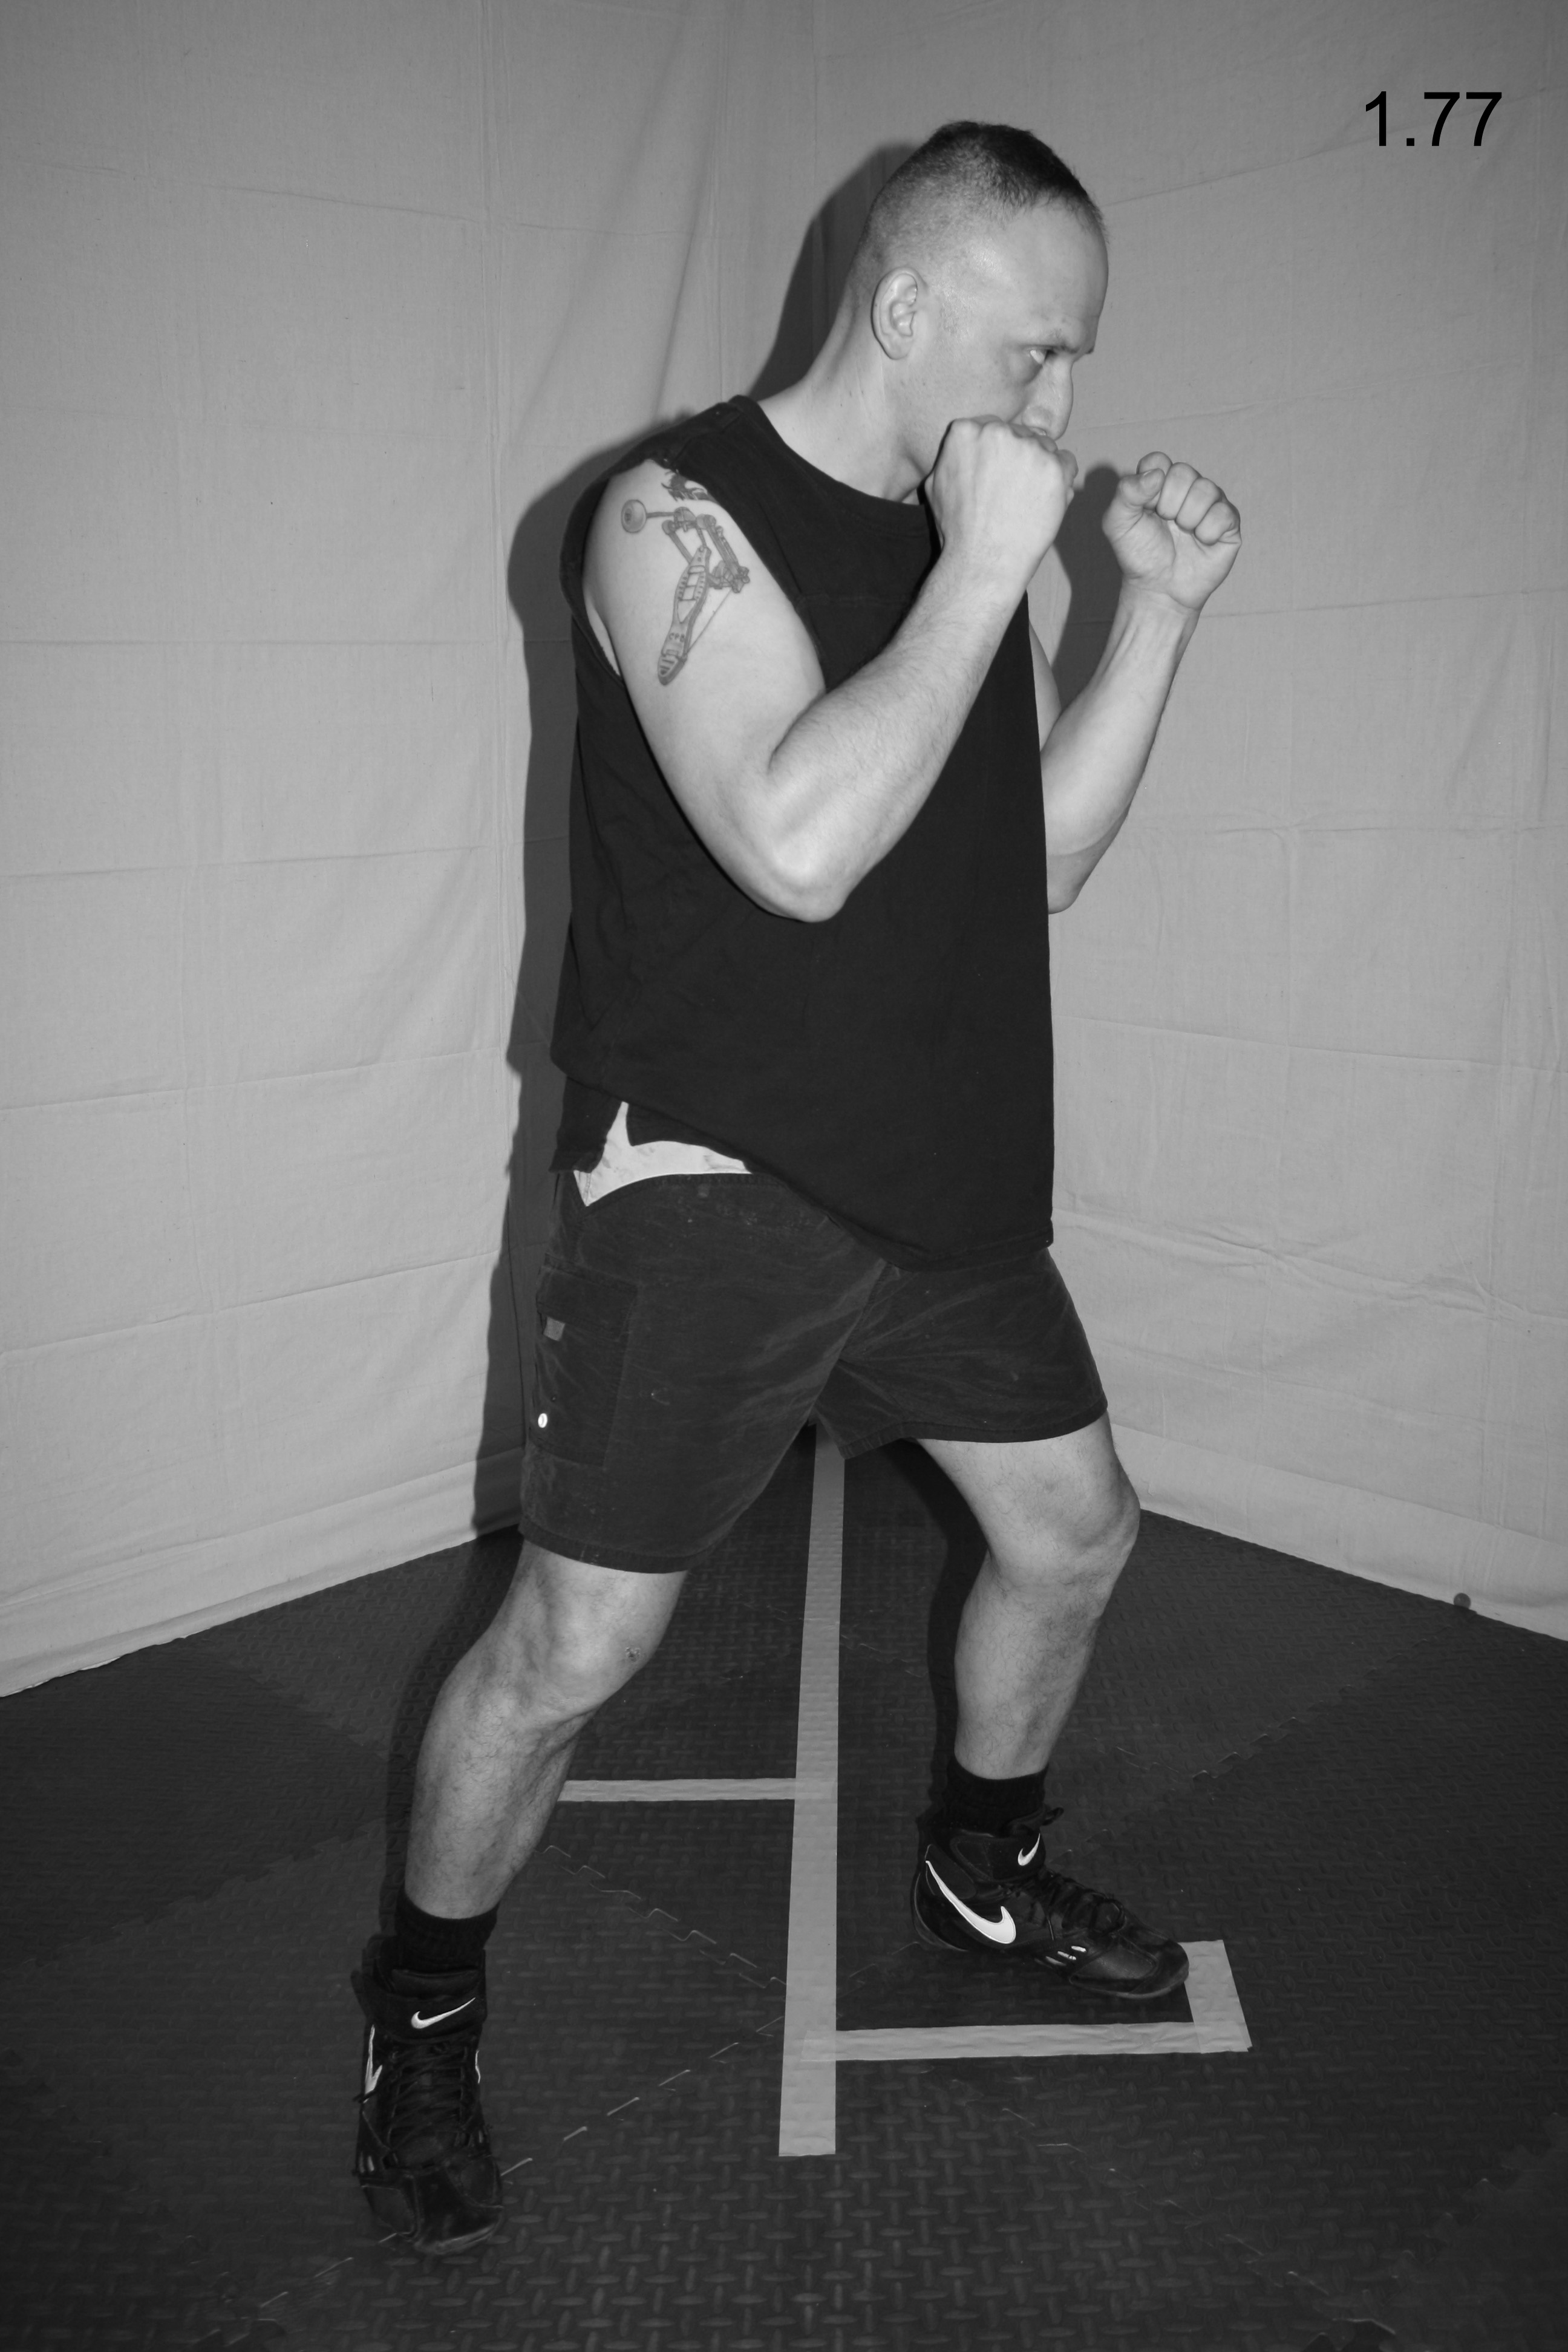
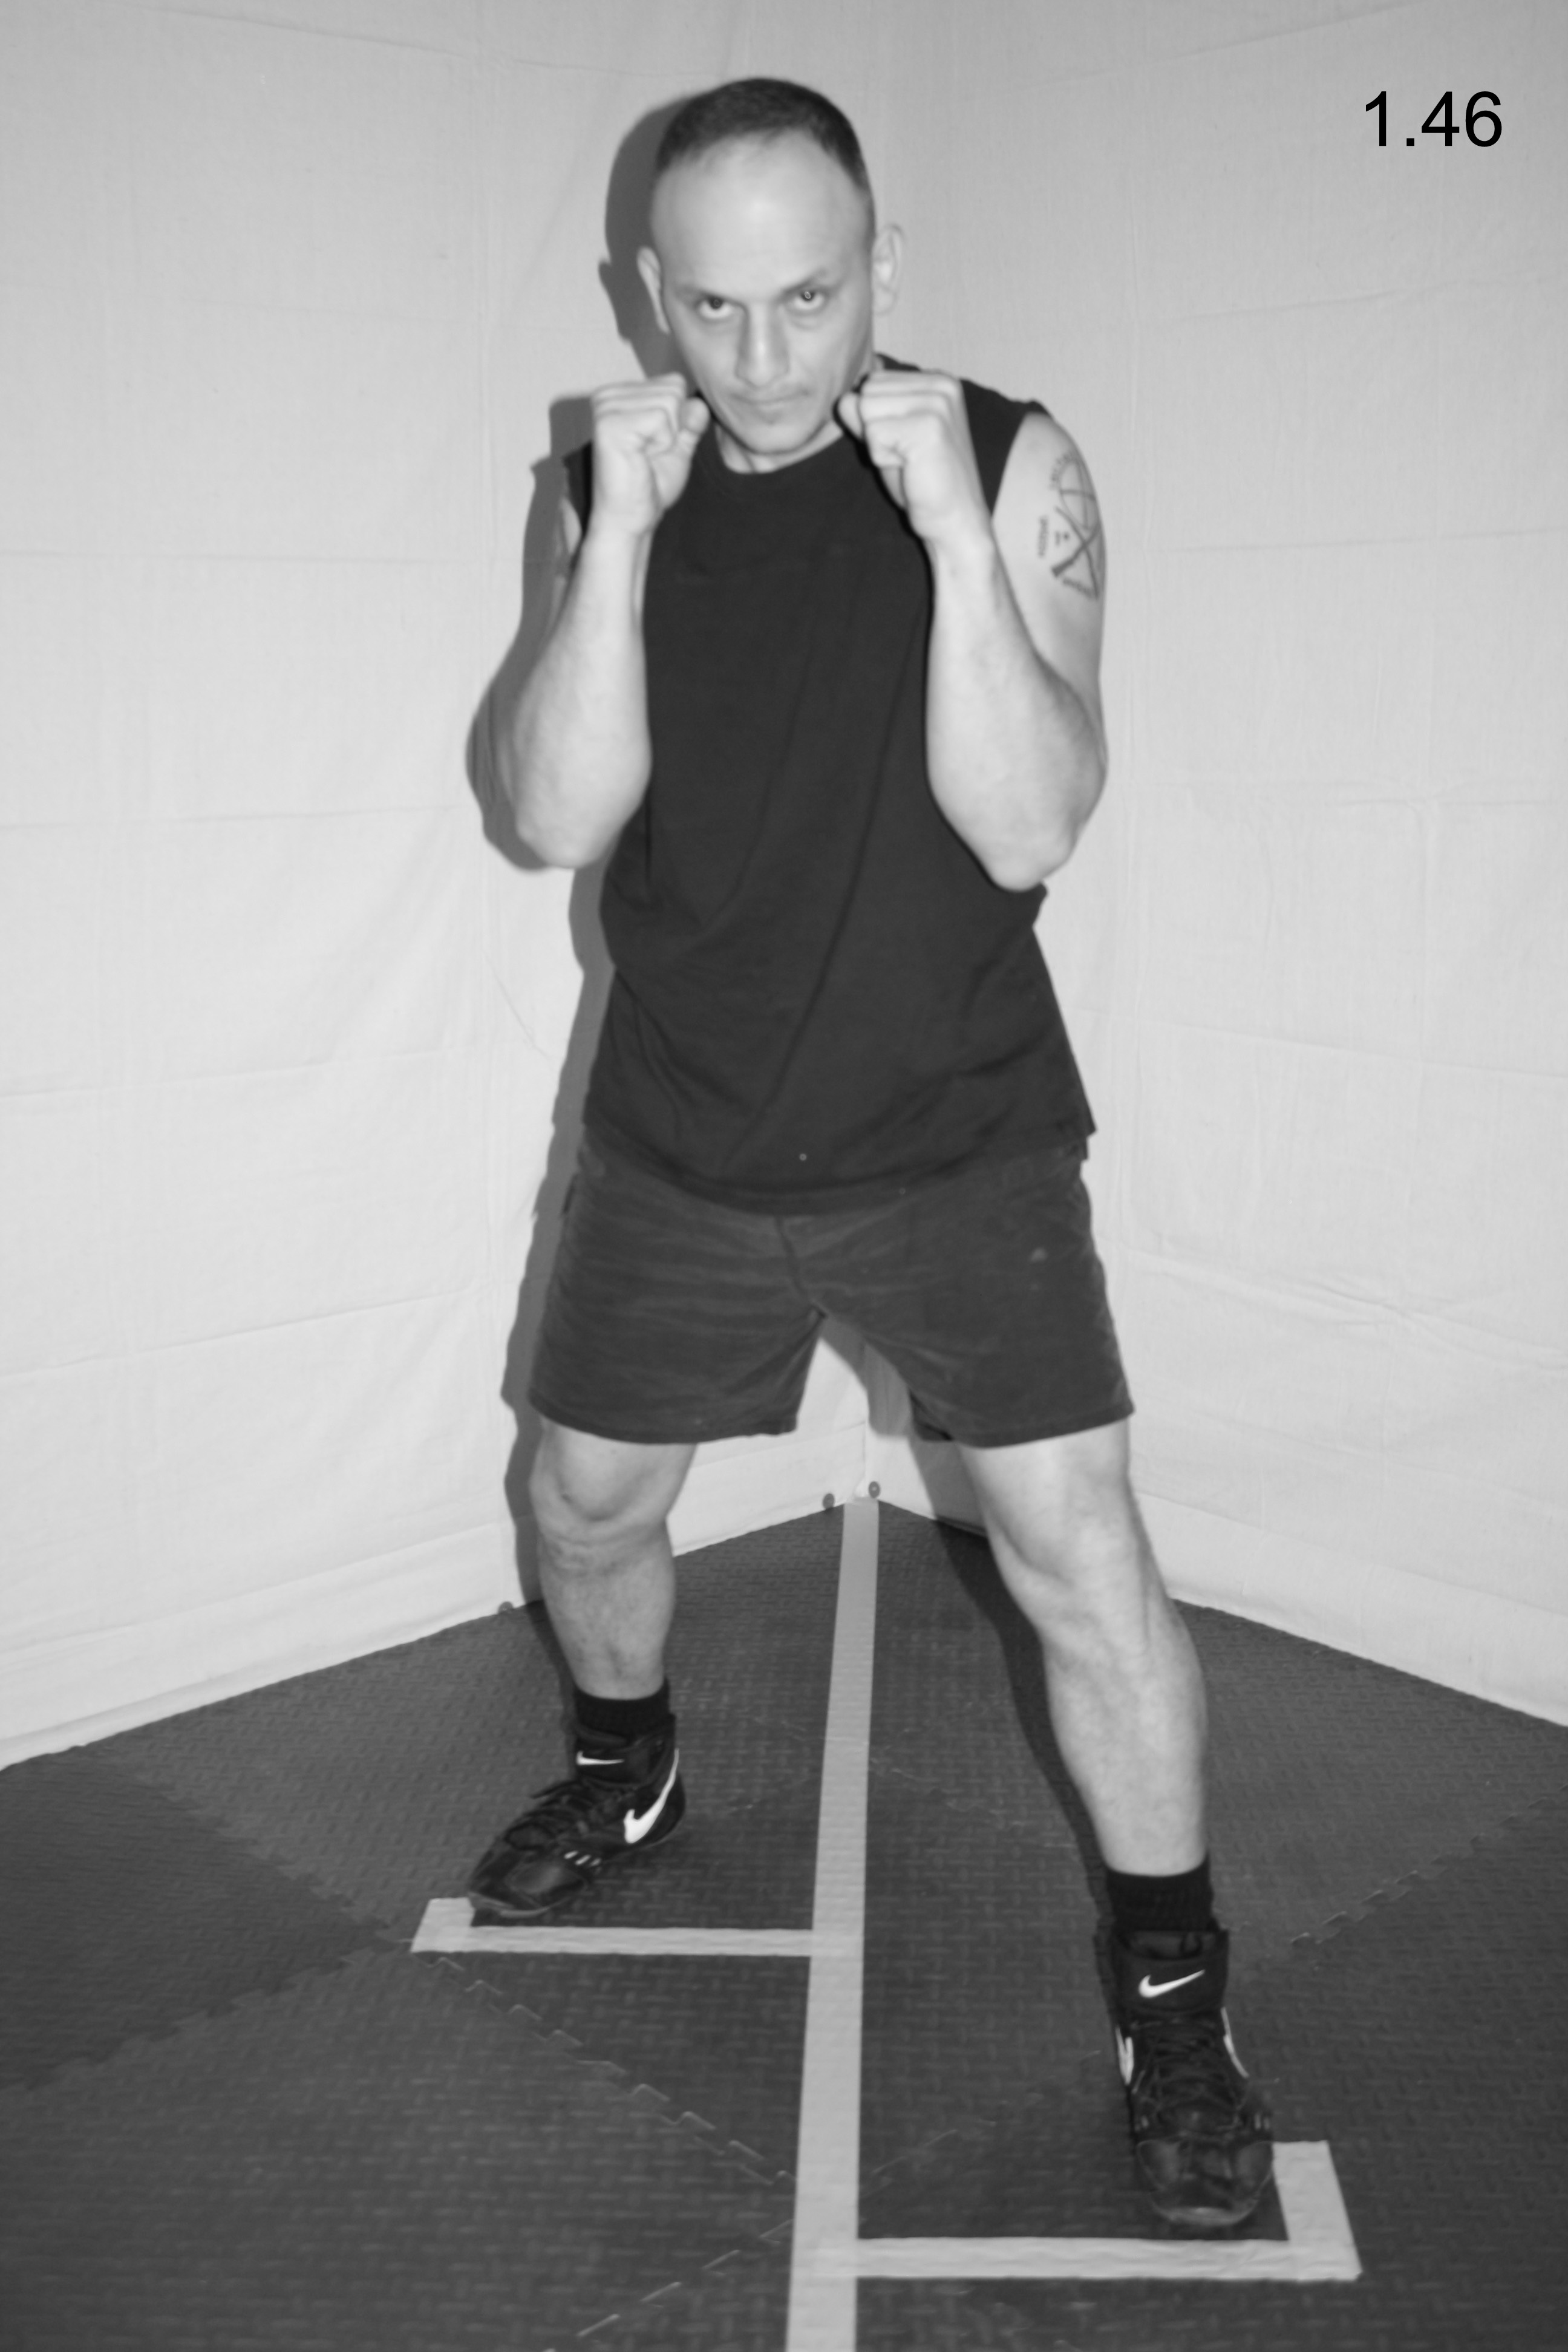
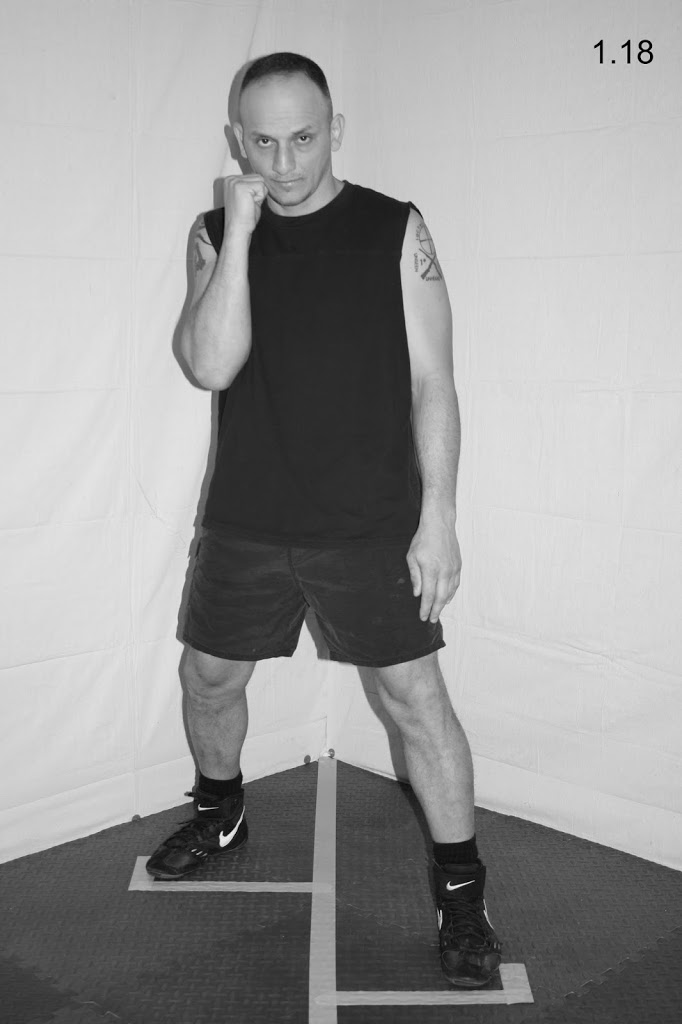
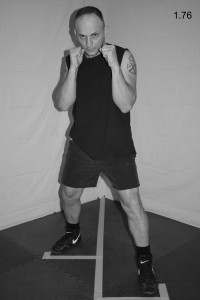
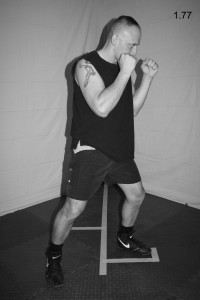
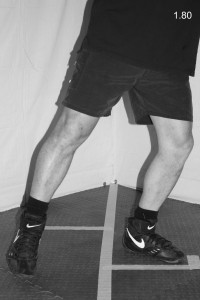
Step One:   From your fighting stance (see Fig. 1.76), imagine the ball of your left foot is nailed to the floor. Push off with the ball of your right foot and pivot counterclockwise on the ball of your left foot, sliding your right foot along the ground in a forward arc (see Fig. 1.77).

1.76  1.77

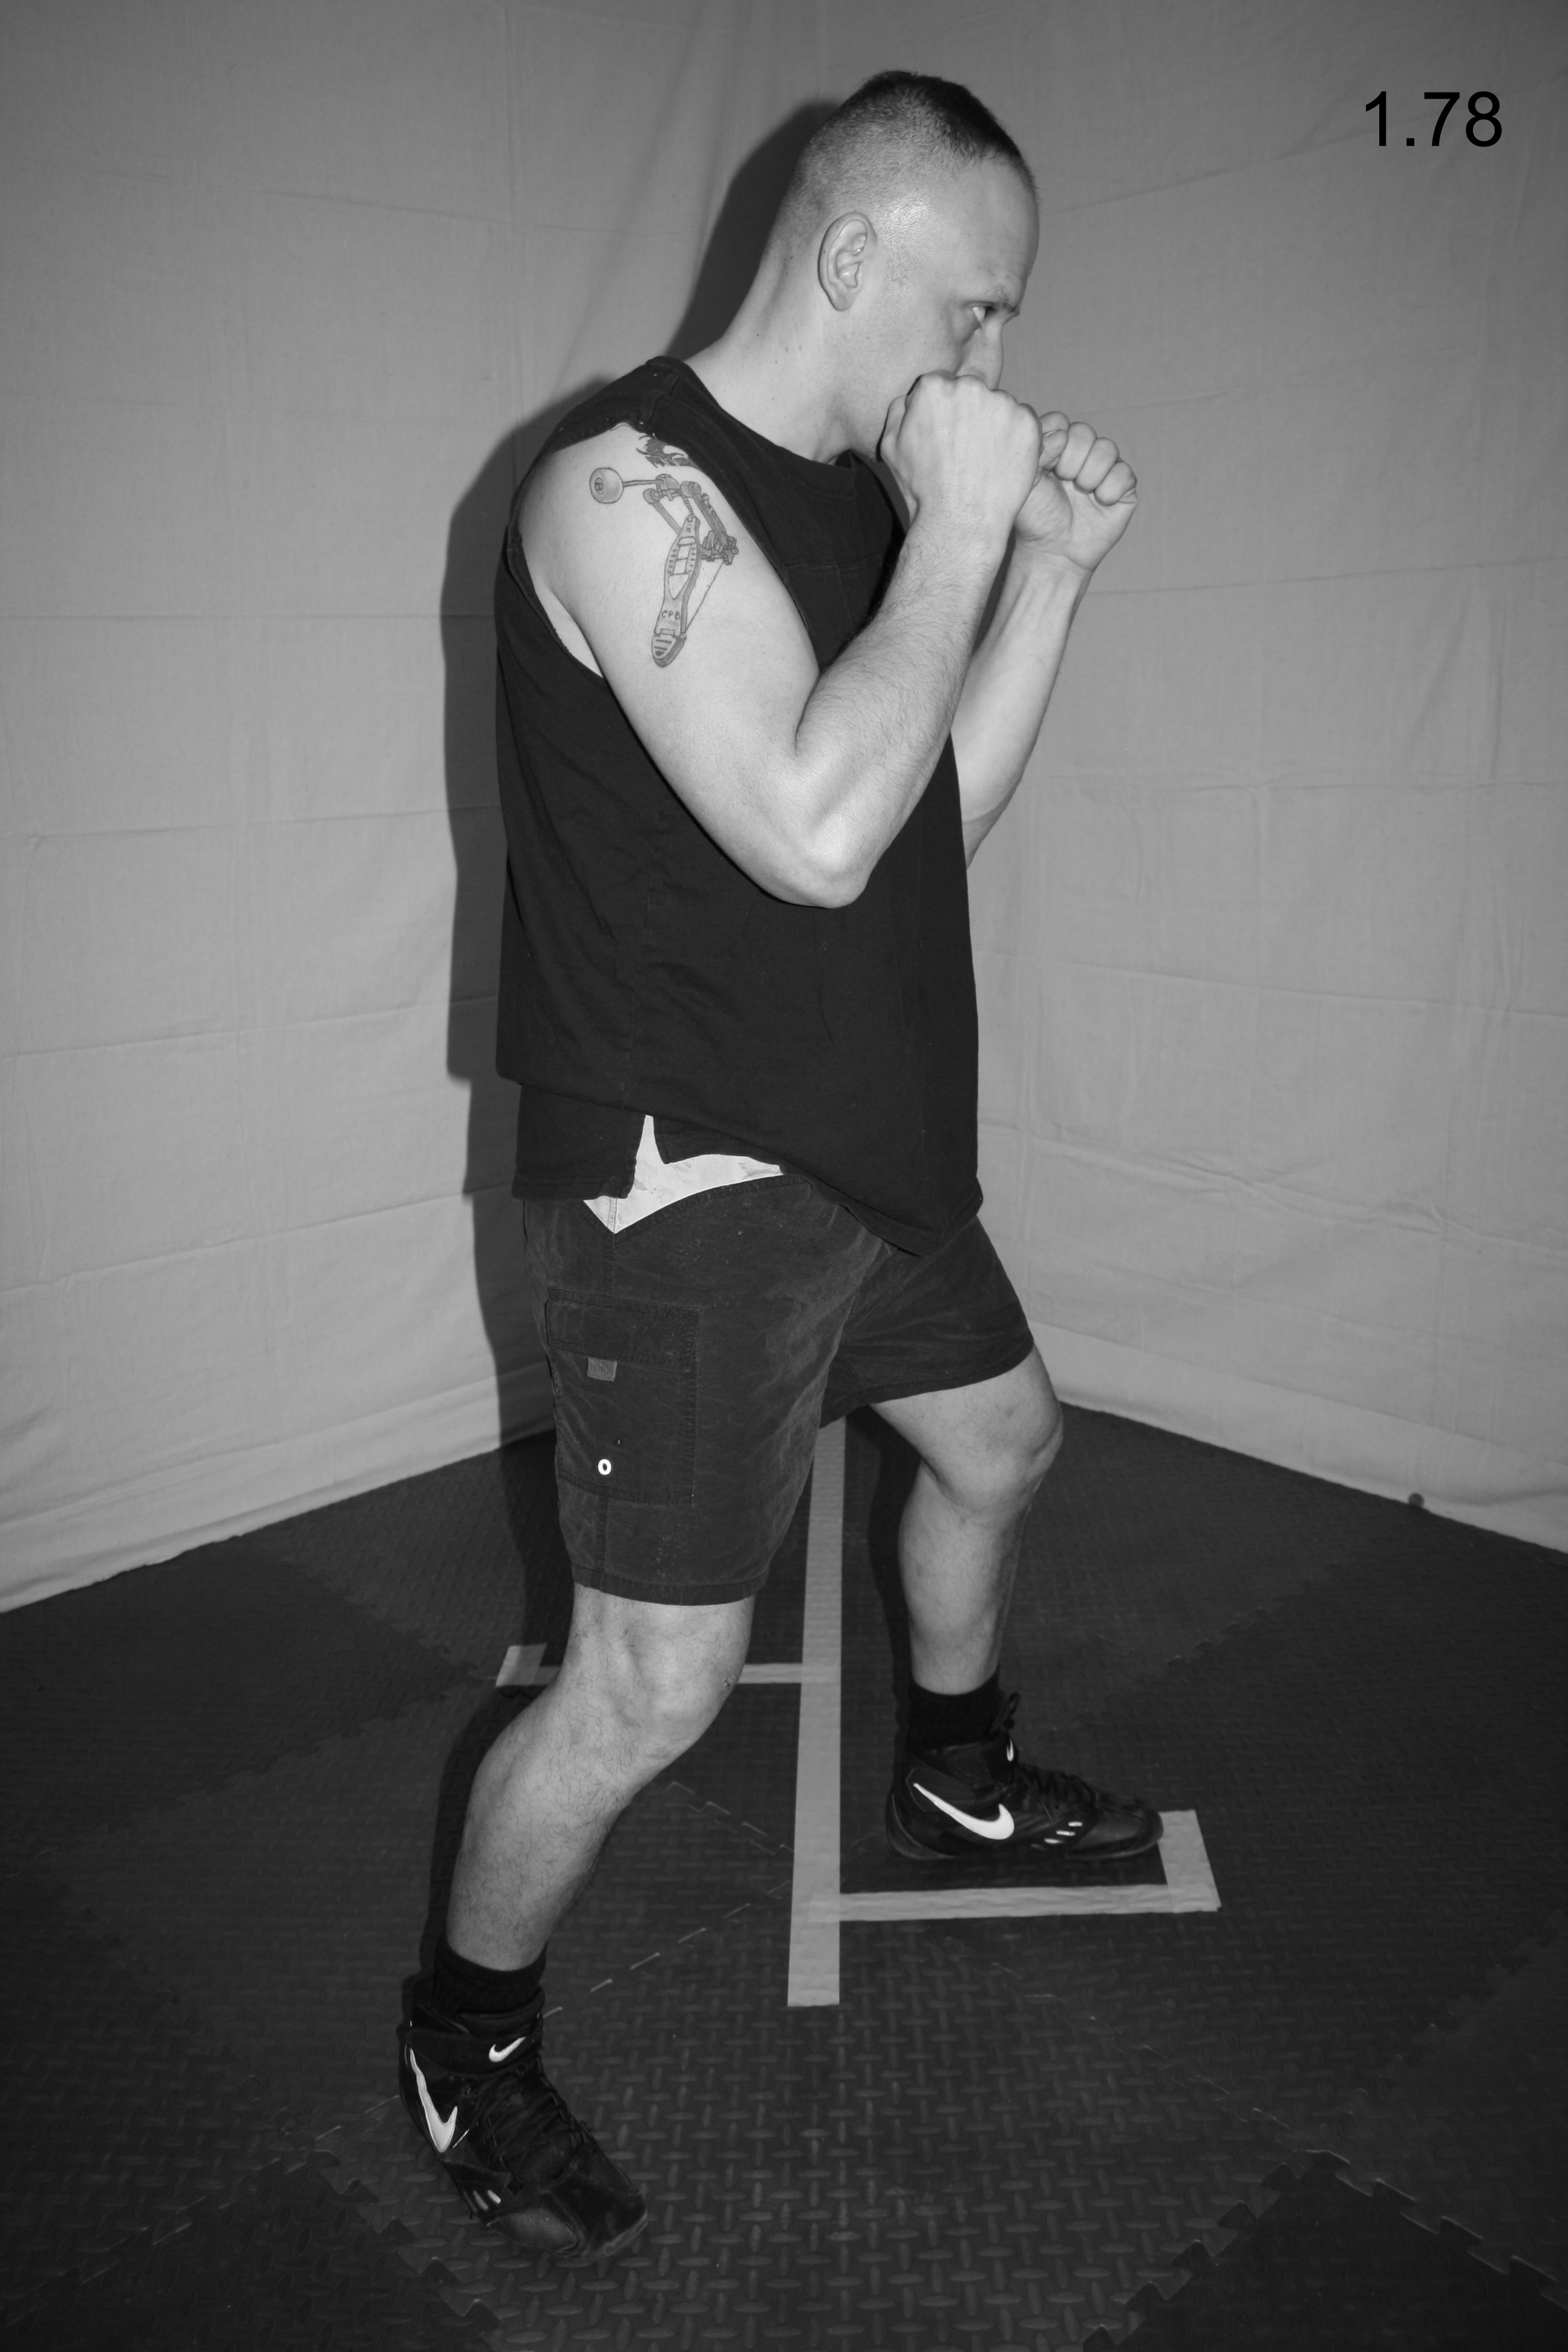
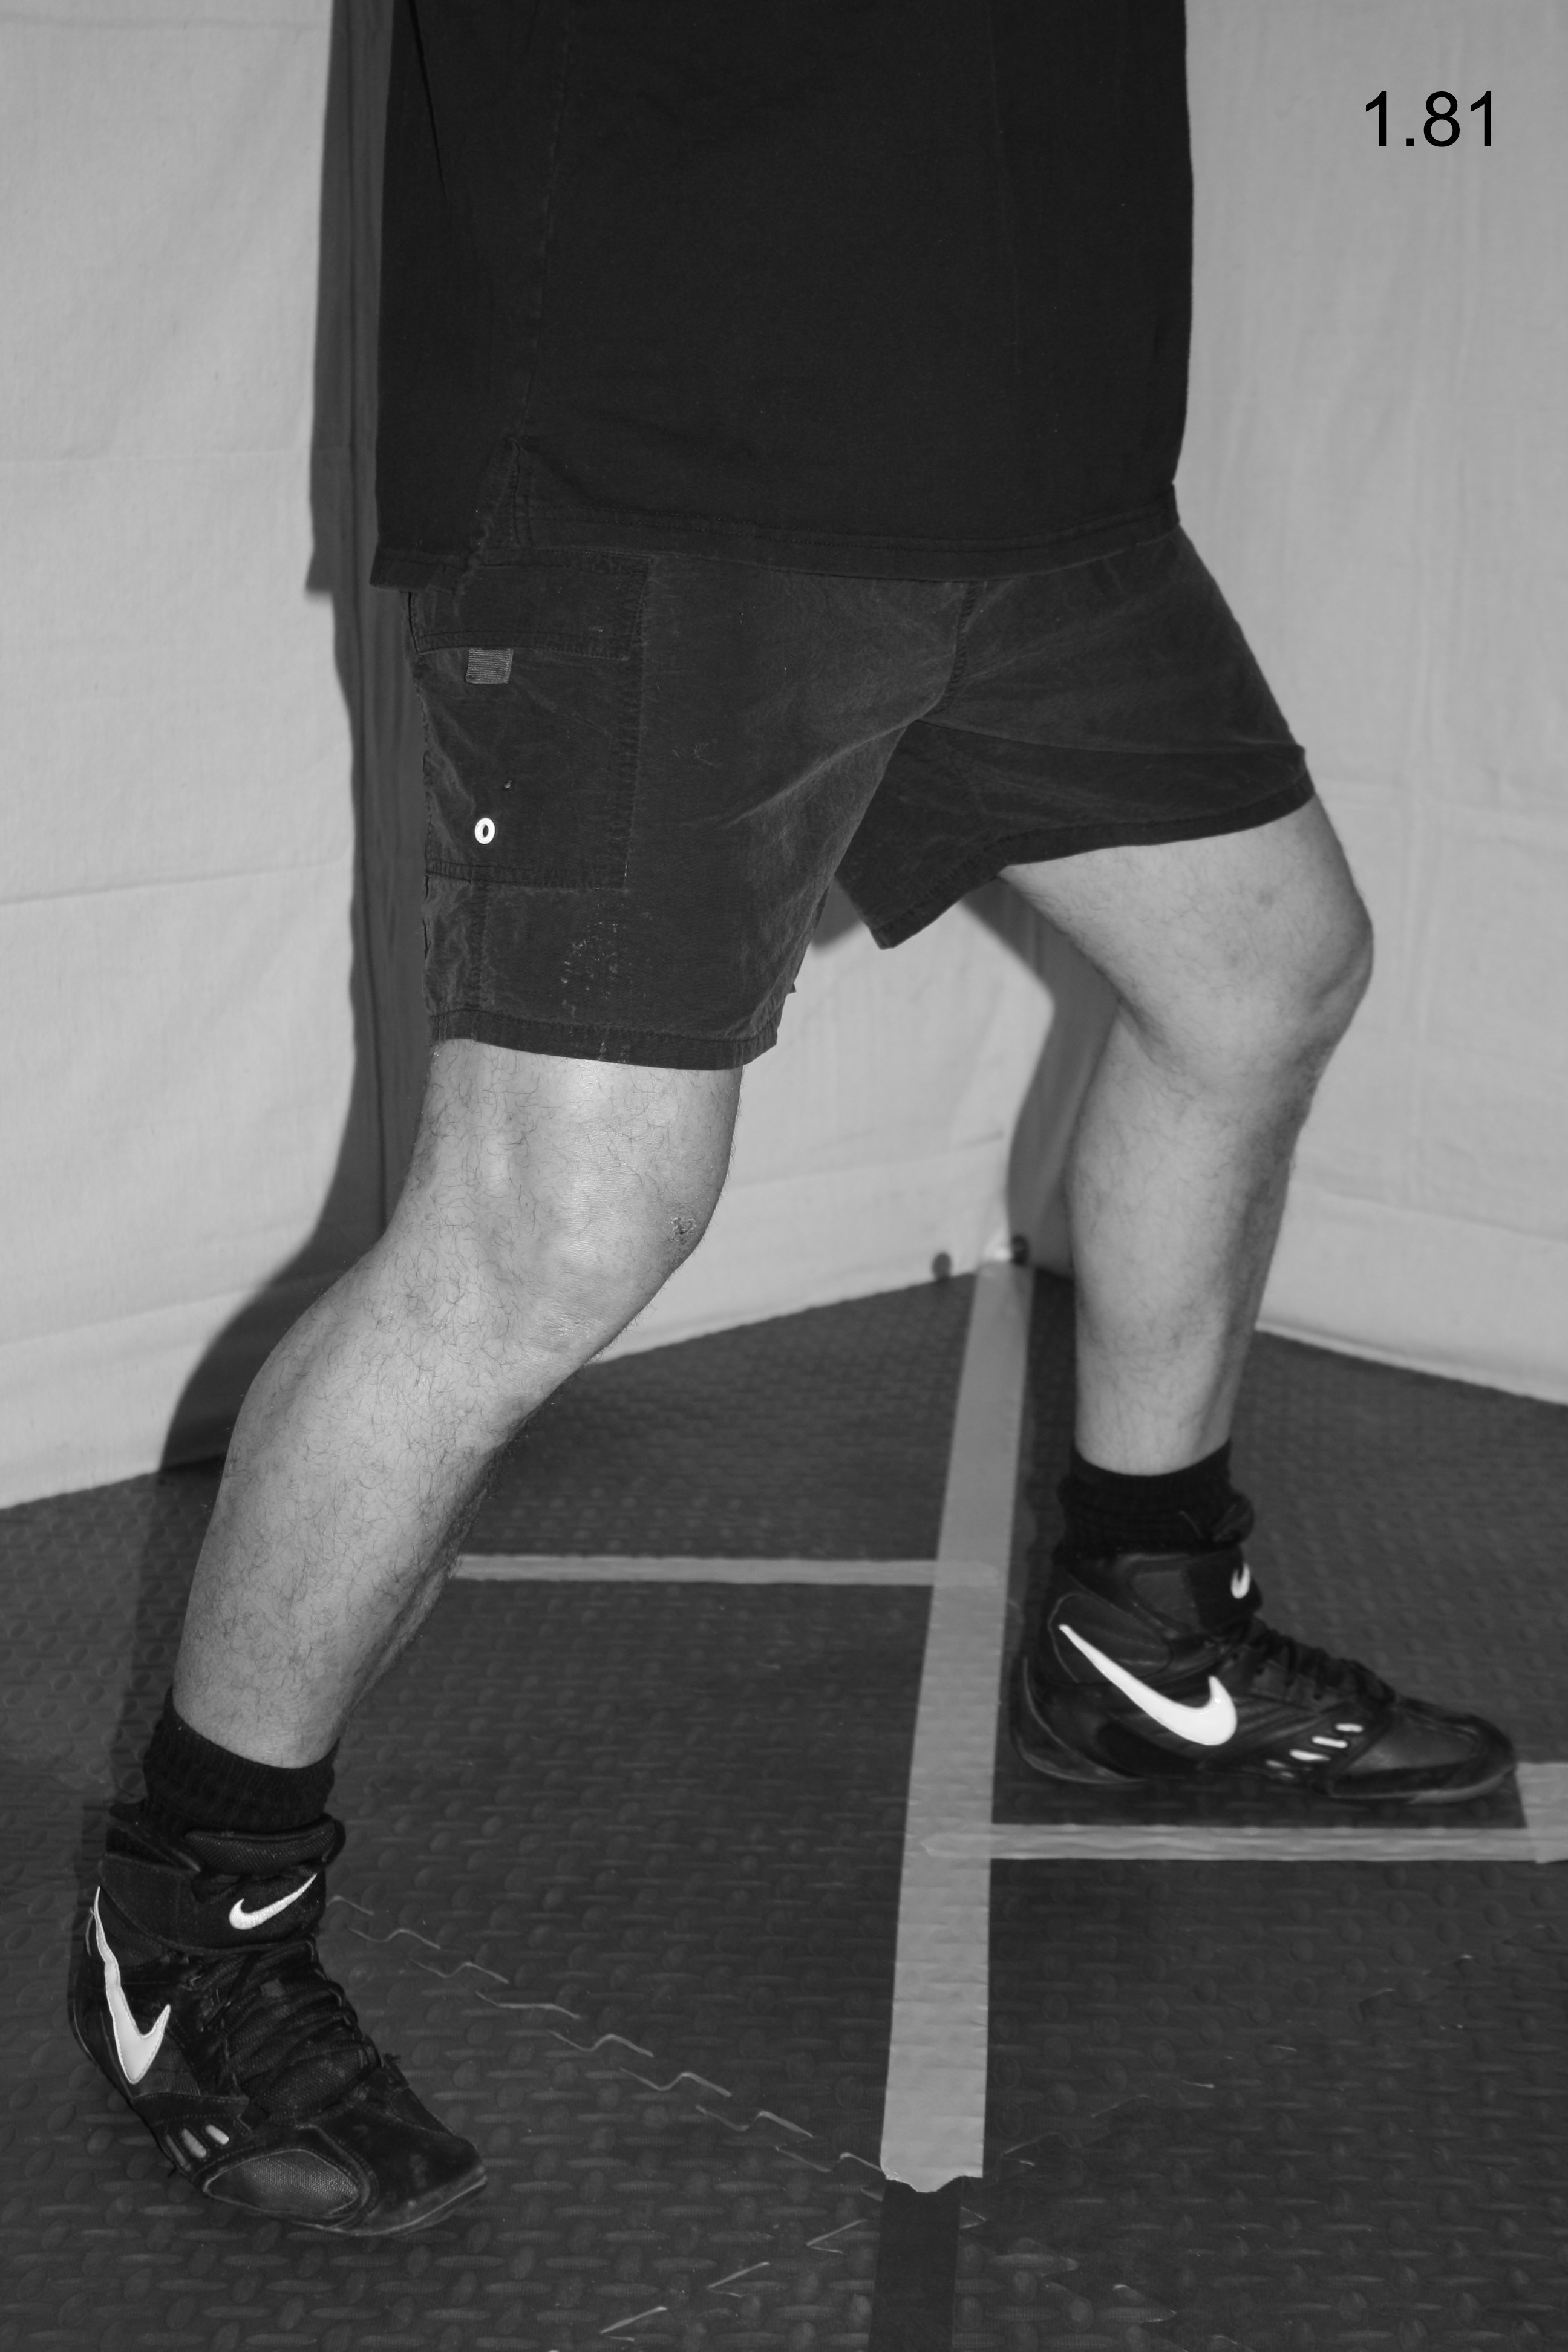
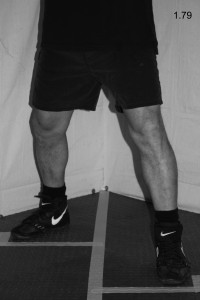
Step Two:   As you pivot, your entire body should move in concert with your right foot and you should maintain your fighting stance throughout the pivot. When you end the pivot, you should be back in your fighting stance at an angle to your suspect (see Fig. 1.78). For a close-up of the counterclockwise pivot leg action, see Fig. 1.79 – 1.81.

1.78

1.79  1.80

1.81

CLOCKWISE PIVOT

The clockwise pivot is a technique that spins your body rearward and, like the counterclockwise pivot, it is great for matching your suspect’s movements, evading strikes, or creating angles from which to launch your own strikes. It is also a great technique to use to keep up with a suspect who is trying to circle you to the right in an attempt to get behind you.

Pivoting works great in combination with other footwork techniques. If you are constantly changing direction and distance, while pivoting to create angles, your suspect will have a hard time finding you in a fight. It will also help create openings for your strikes to land, which will greatly increase your chances of delivering fight-stopping strikes.

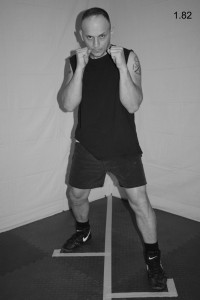
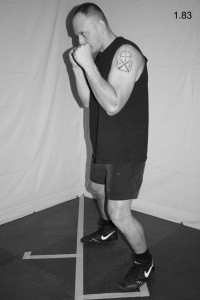
Step One:   From your fighting stance (see Fig. 1.82), imagine the ball of your left foot is nailed to the floor. Push off with the ball of your right foot and pivot clockwise on the ball of your left foot, sliding your left foot along the ground in a backward arc (see Fig. 1.83).

1.82  1.83

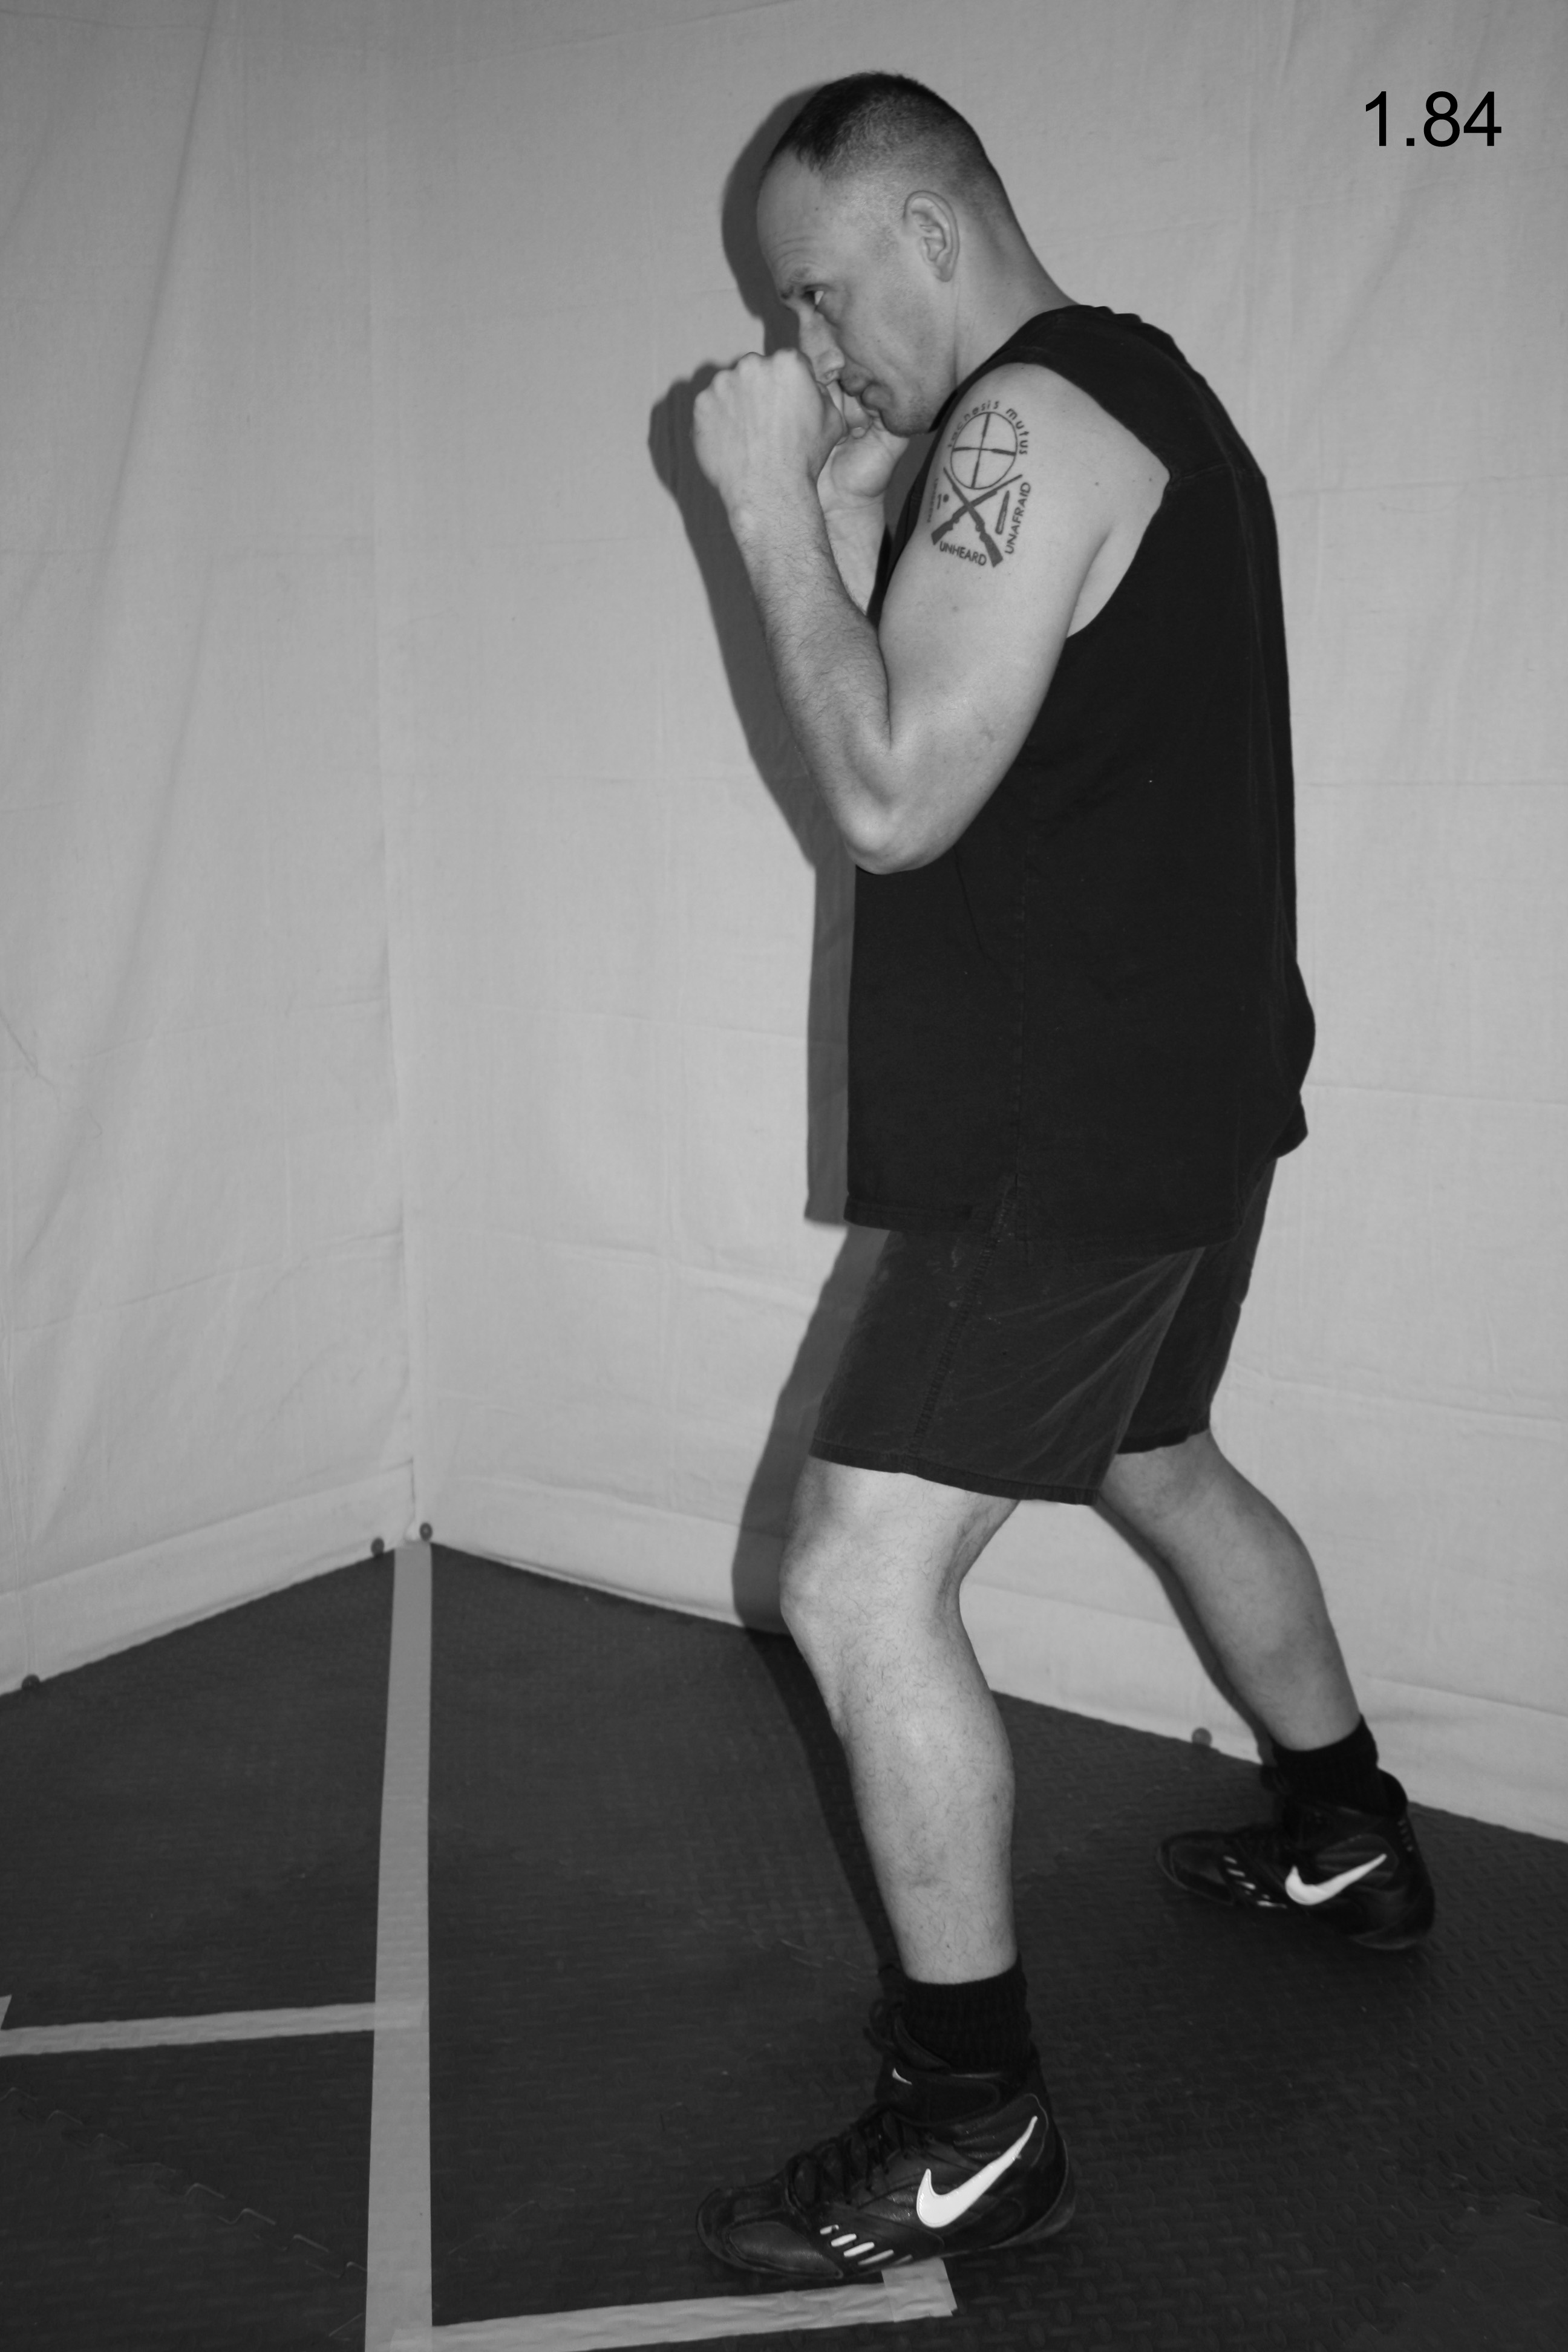
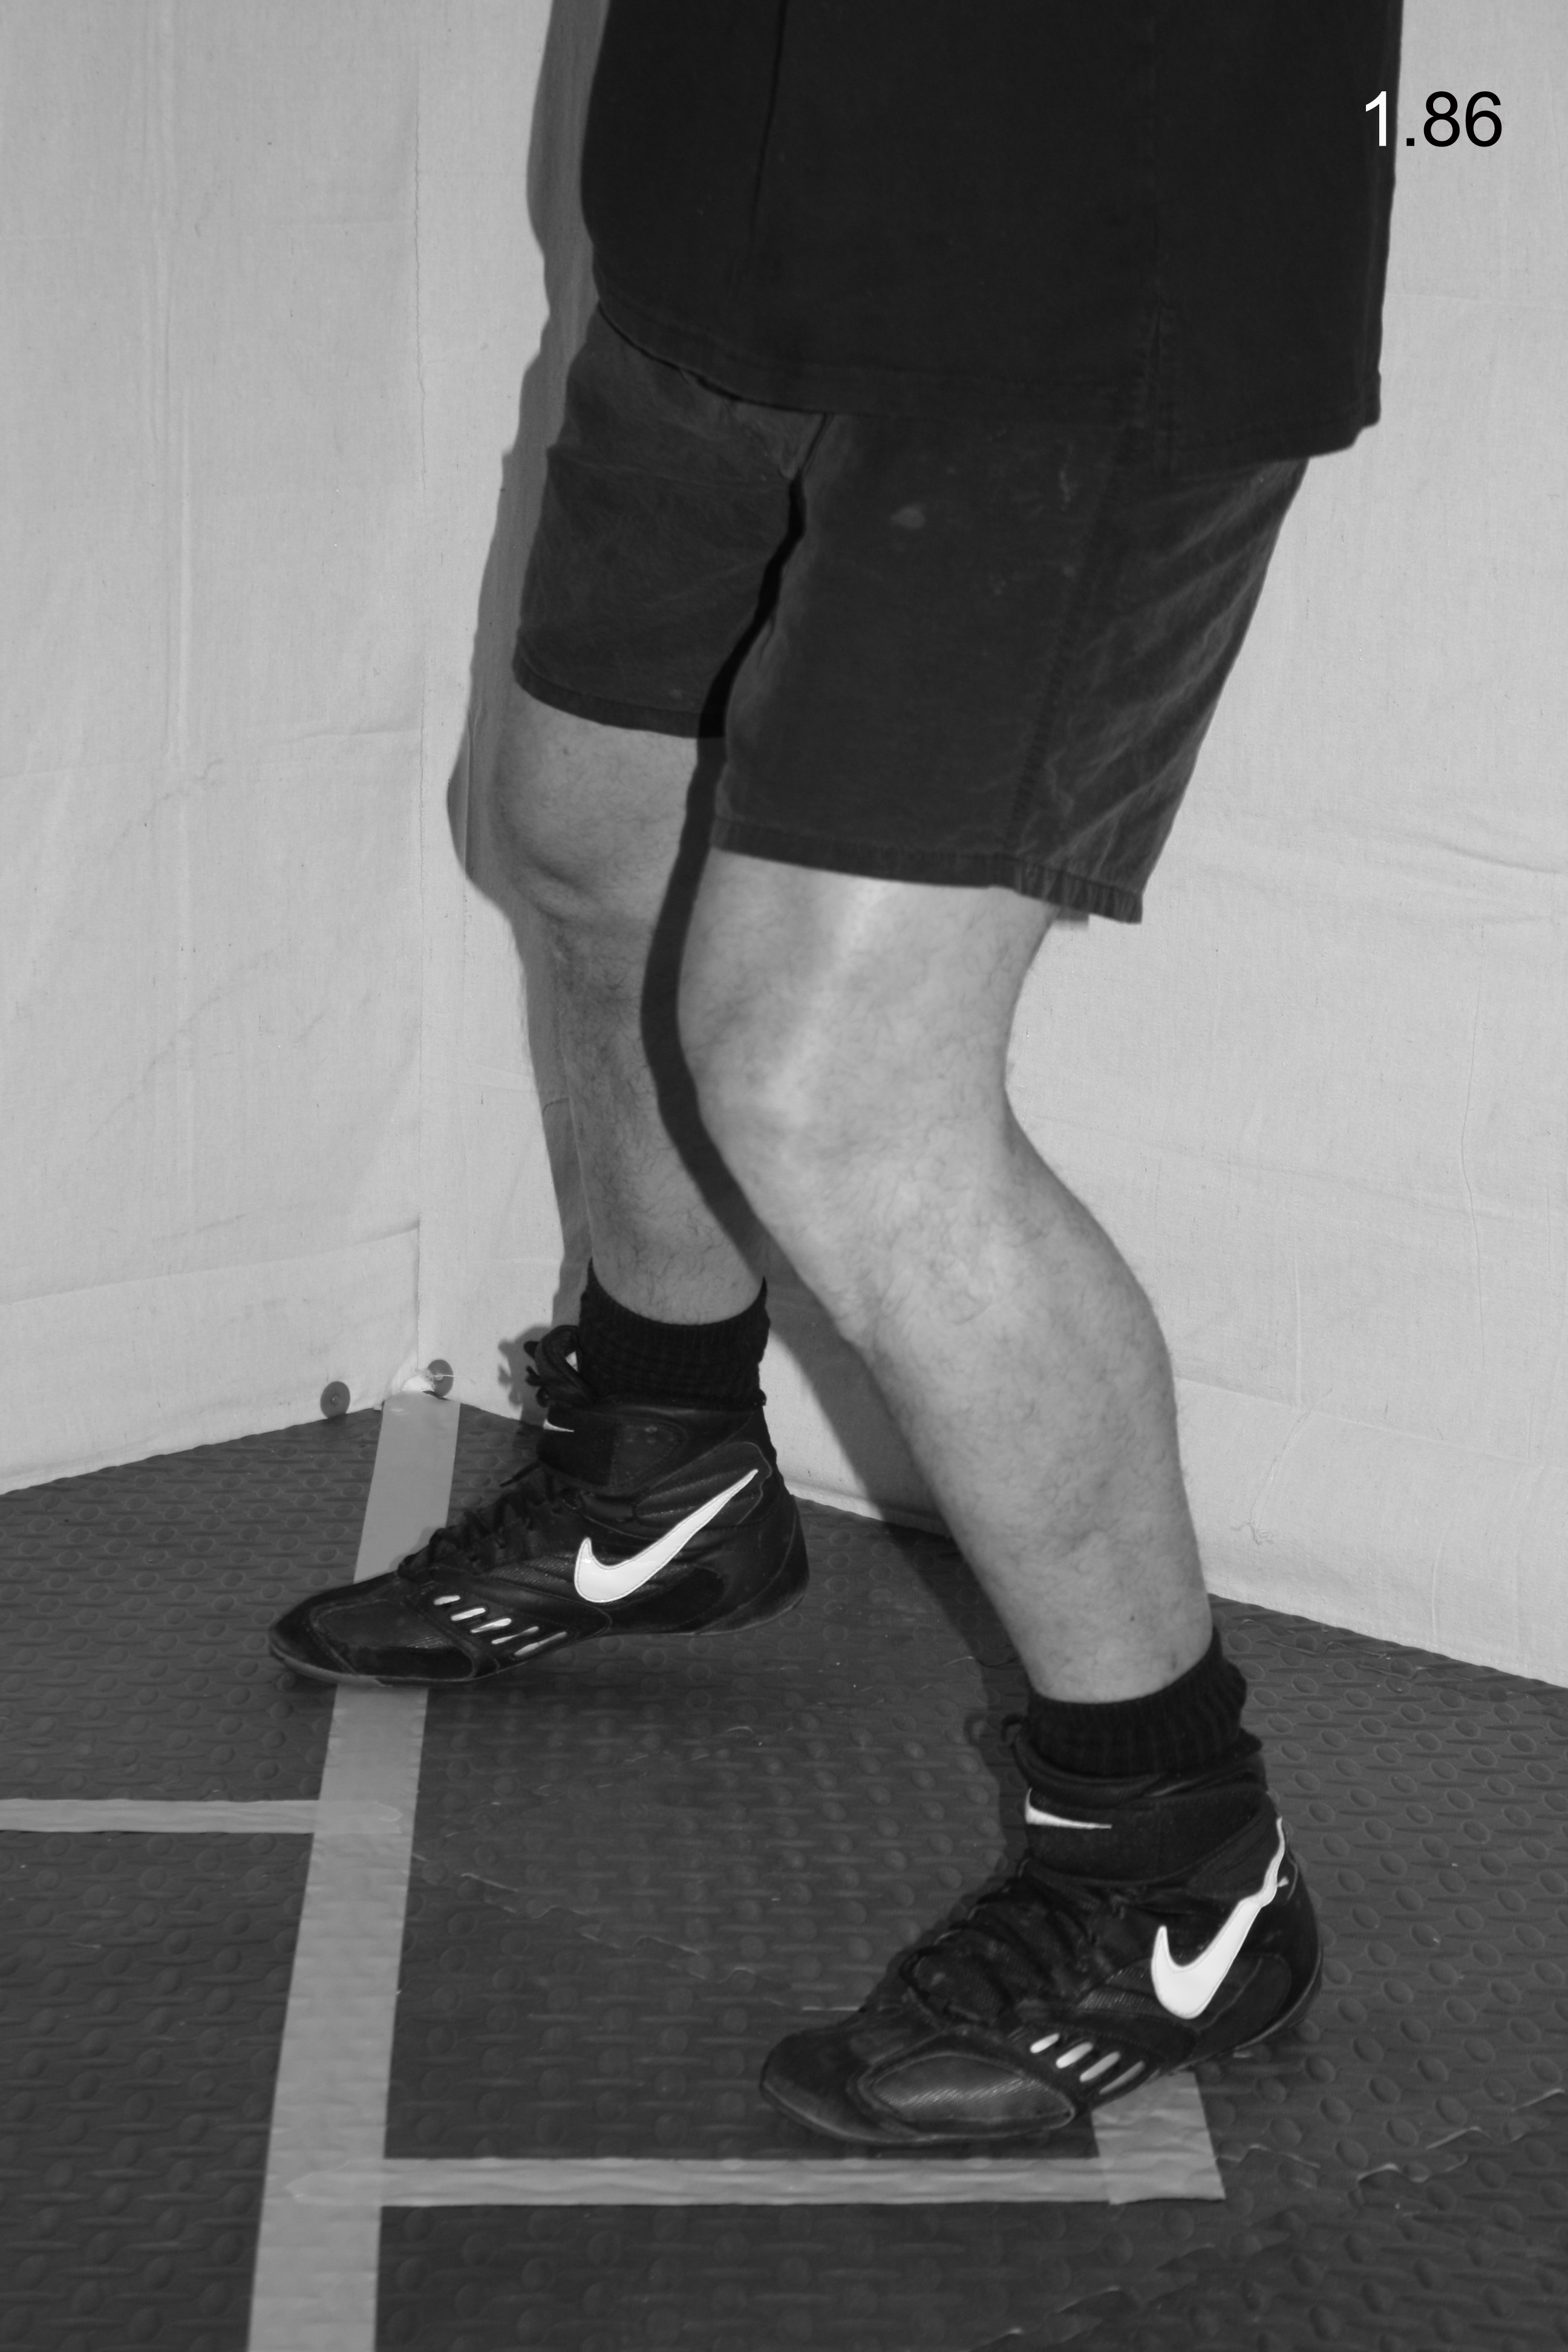
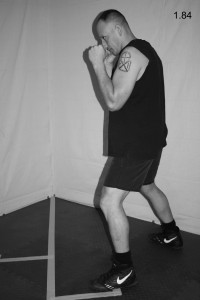
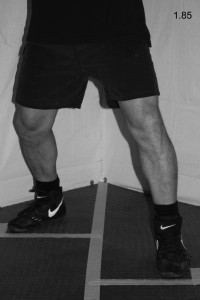
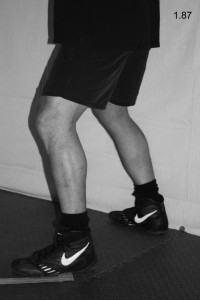
Step Two:   As with the counterclockwise pivot, your entire body should move in concert with your right foot and you should maintain your fighting stance throughout the pivot. When you end the pivot, you should be back in your fighting stance at an angle to your suspect (see Fig. 1.84). For a close-up of the counterclockwise pivot leg action, see Fig. 1.85 – 1.87.

1.84

1.85  1.86

1.87

IMPROVING FOOTWORK

The best way to improve footwork is to actually practice the specific footwork techniques you will utilize during a physical confrontation, such as those listed previously in this chapter. In addition, there are specific exercises that can make you quicker on your feet, improve your balance while moving, and increase leg endurance.

PRACTICING FOOTWORK TECHNIQUES

To improve your footwork, practice each of the footwork techniques daily for a set number of repetitions. Move slowly at first and concentrate on performing each move with technical perfection. Be certain not to overstep, cross your feet, or bring your feet too close together while performing these movements. Also, remember to maintain your fighting stance while you move and remain on the balls of your feet. Once you can perform each of these techniques with ease, gradually increase your speed until you can perform them quickly and effortlessly.

At this point, you can begin combining front steps with back steps with side steps with pivoting, etc. You can perform this freestyle form of footwork for a certain number of timed sets with rest periods between each set. While moving, imagine there is a suspect in front of you who is also moving and vying for a position of advantage. After only a few weeks of perfect practice, you will notice a marked improvement in your footwork and you will feel much lighter on your feet.

SHADOW DRILL

Once you can perform the various footwork techniques in combination, you can progress to a more advanced exercise that I call the “shadow drill”. It is a reactionary drill that will teach you to instinctively react to a suspect’s movements. Much of law enforcement work is reactionary, meaning the suspect’s actions dictate what we do and when we do it. The element of surprise is on their side. Thus, it is imperative that you learn to react quickly and appropriately to a suspect’s movements. Proper footwork can quickly move you out of danger and into position to counterattack a suspect’s aggressive action. This level of proficiency can only be attained through constant, perfect repetition and the shadow drill is an excellent exercise for accomplishing this.

The shadow drill is a partner drill, but the partner does not have to necessarily be a fellow officer. It can be your neighborhood buddy, your spouse, or even your child. It has always been difficult for me to find willing training partners within my law enforcement community, so I made good use of my wife and children. Not only were they helping me develop skills that kept me safe on the job, but we were also spending quality and fun time together. Contrary to what many think, self-defense training does not have to be boring. Utilizing our imagination and creativity, we can stay motivated while developing those skills that are pertinent to our street survival.

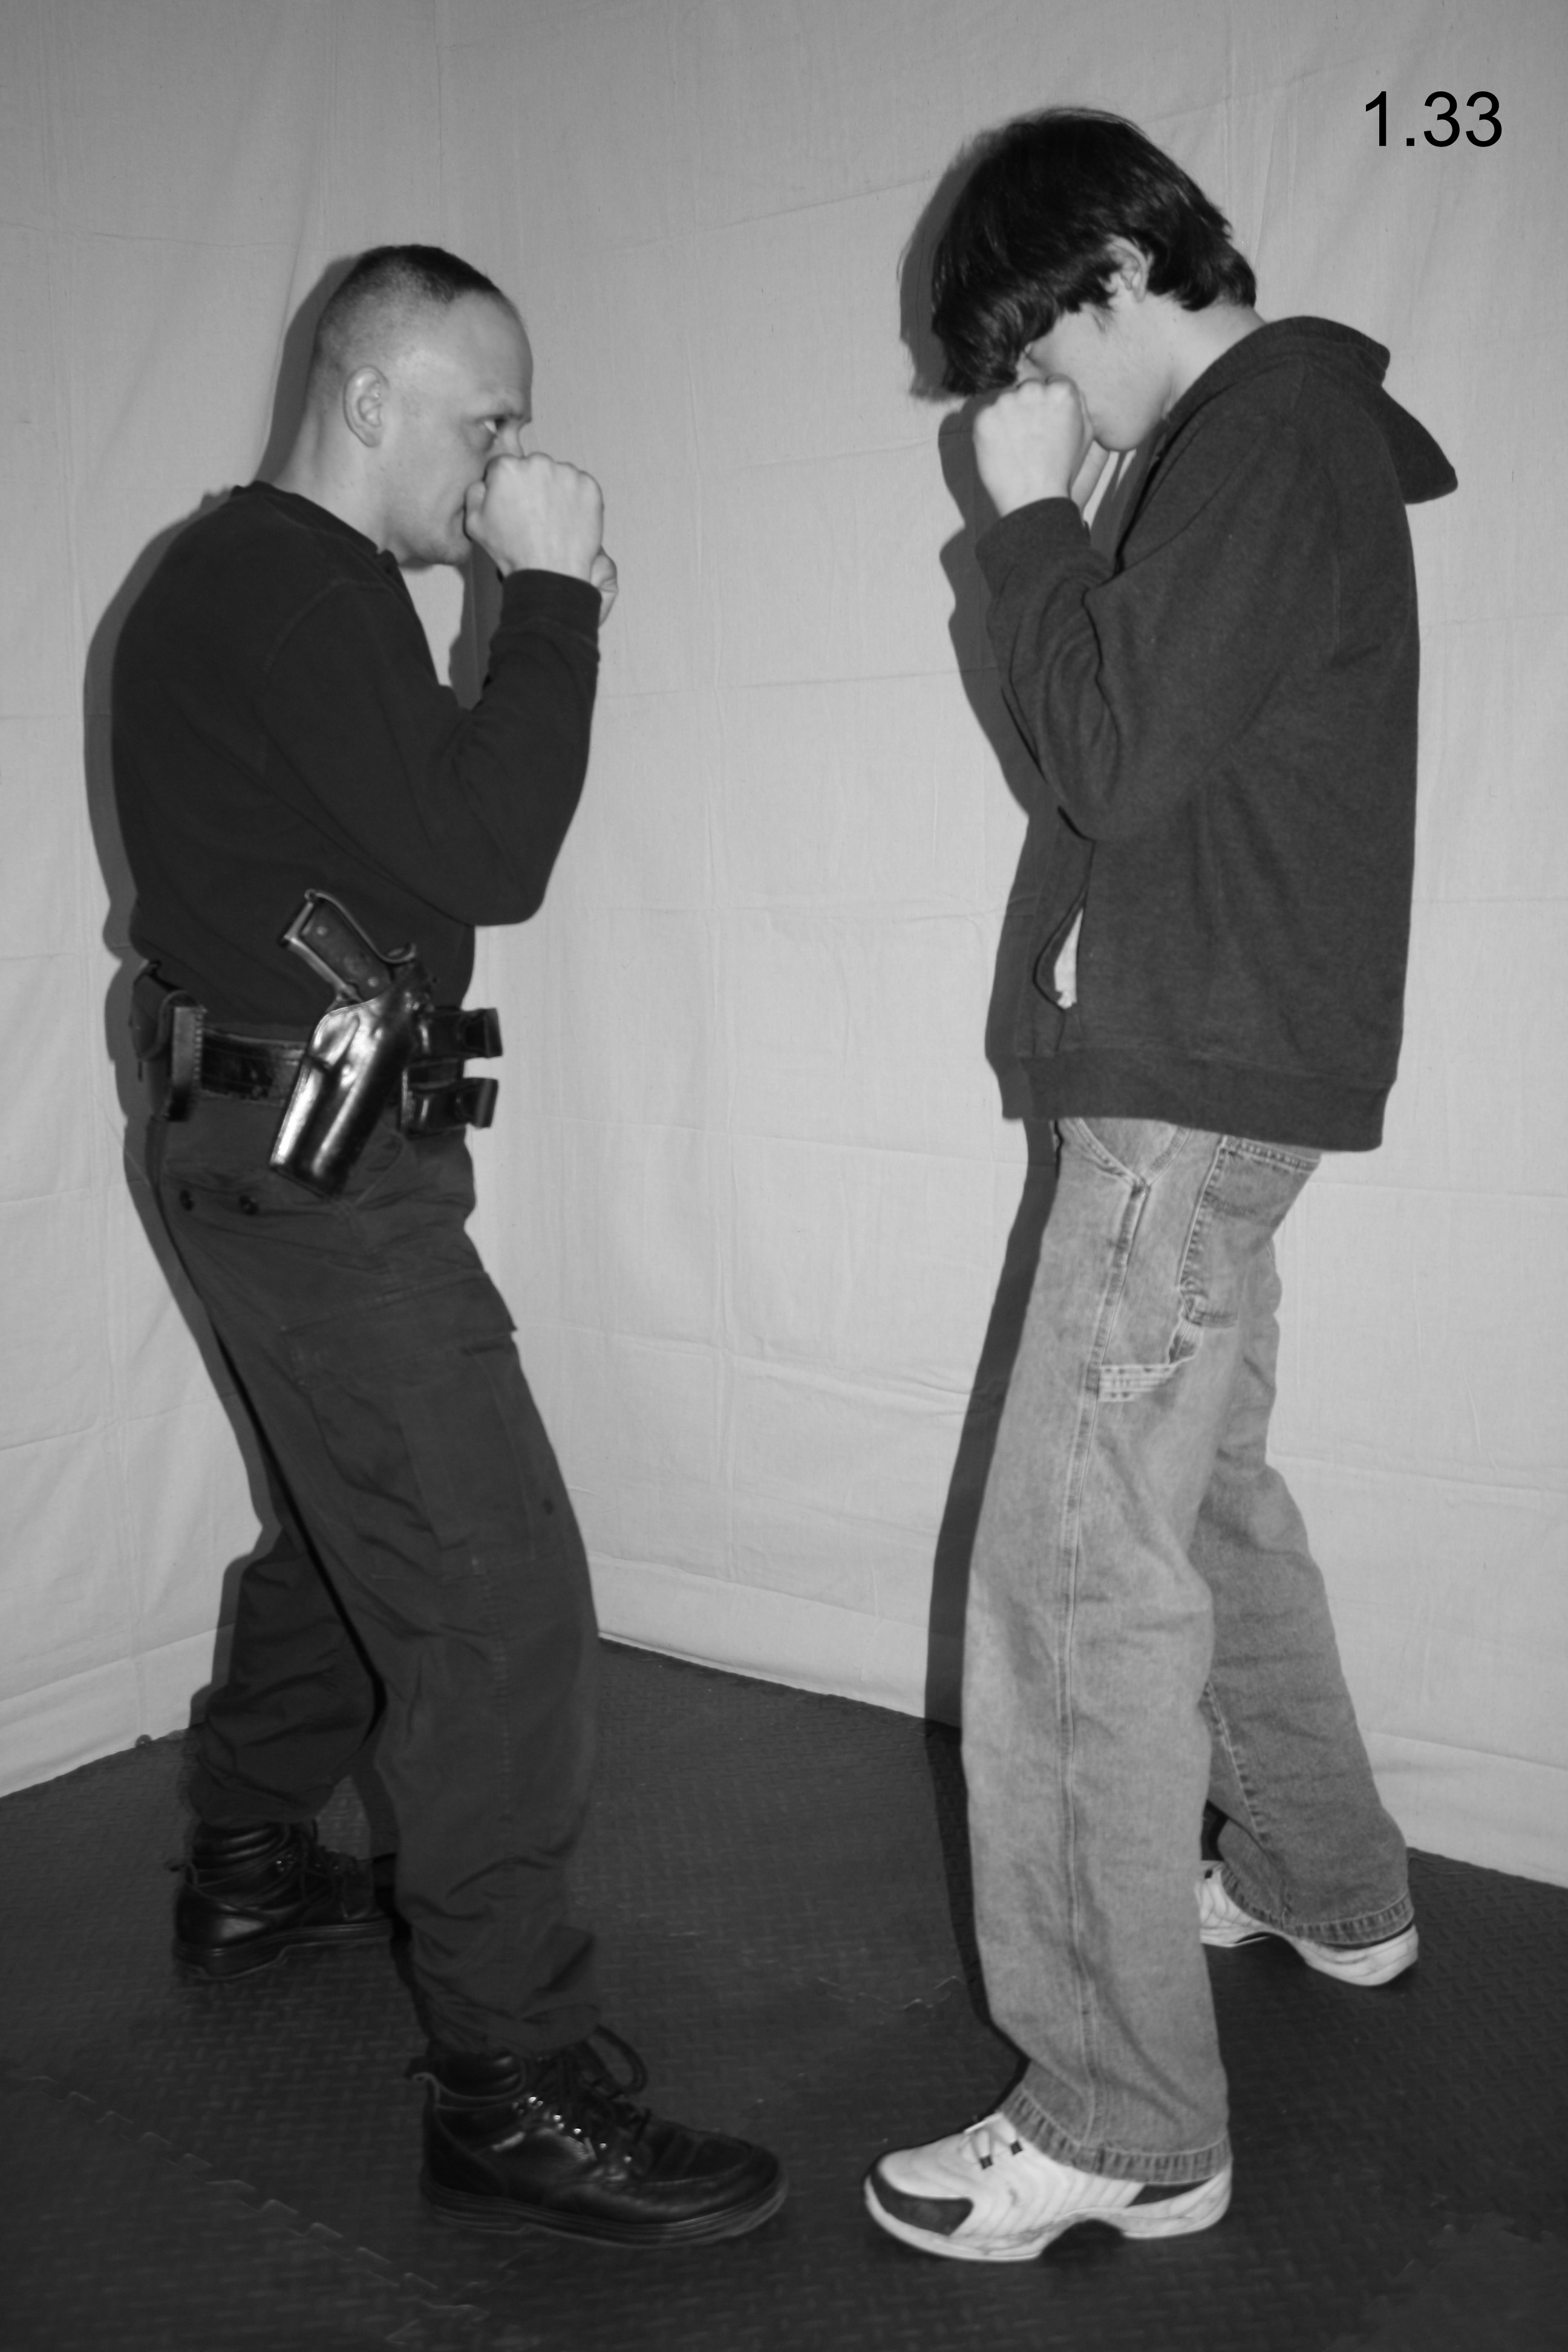
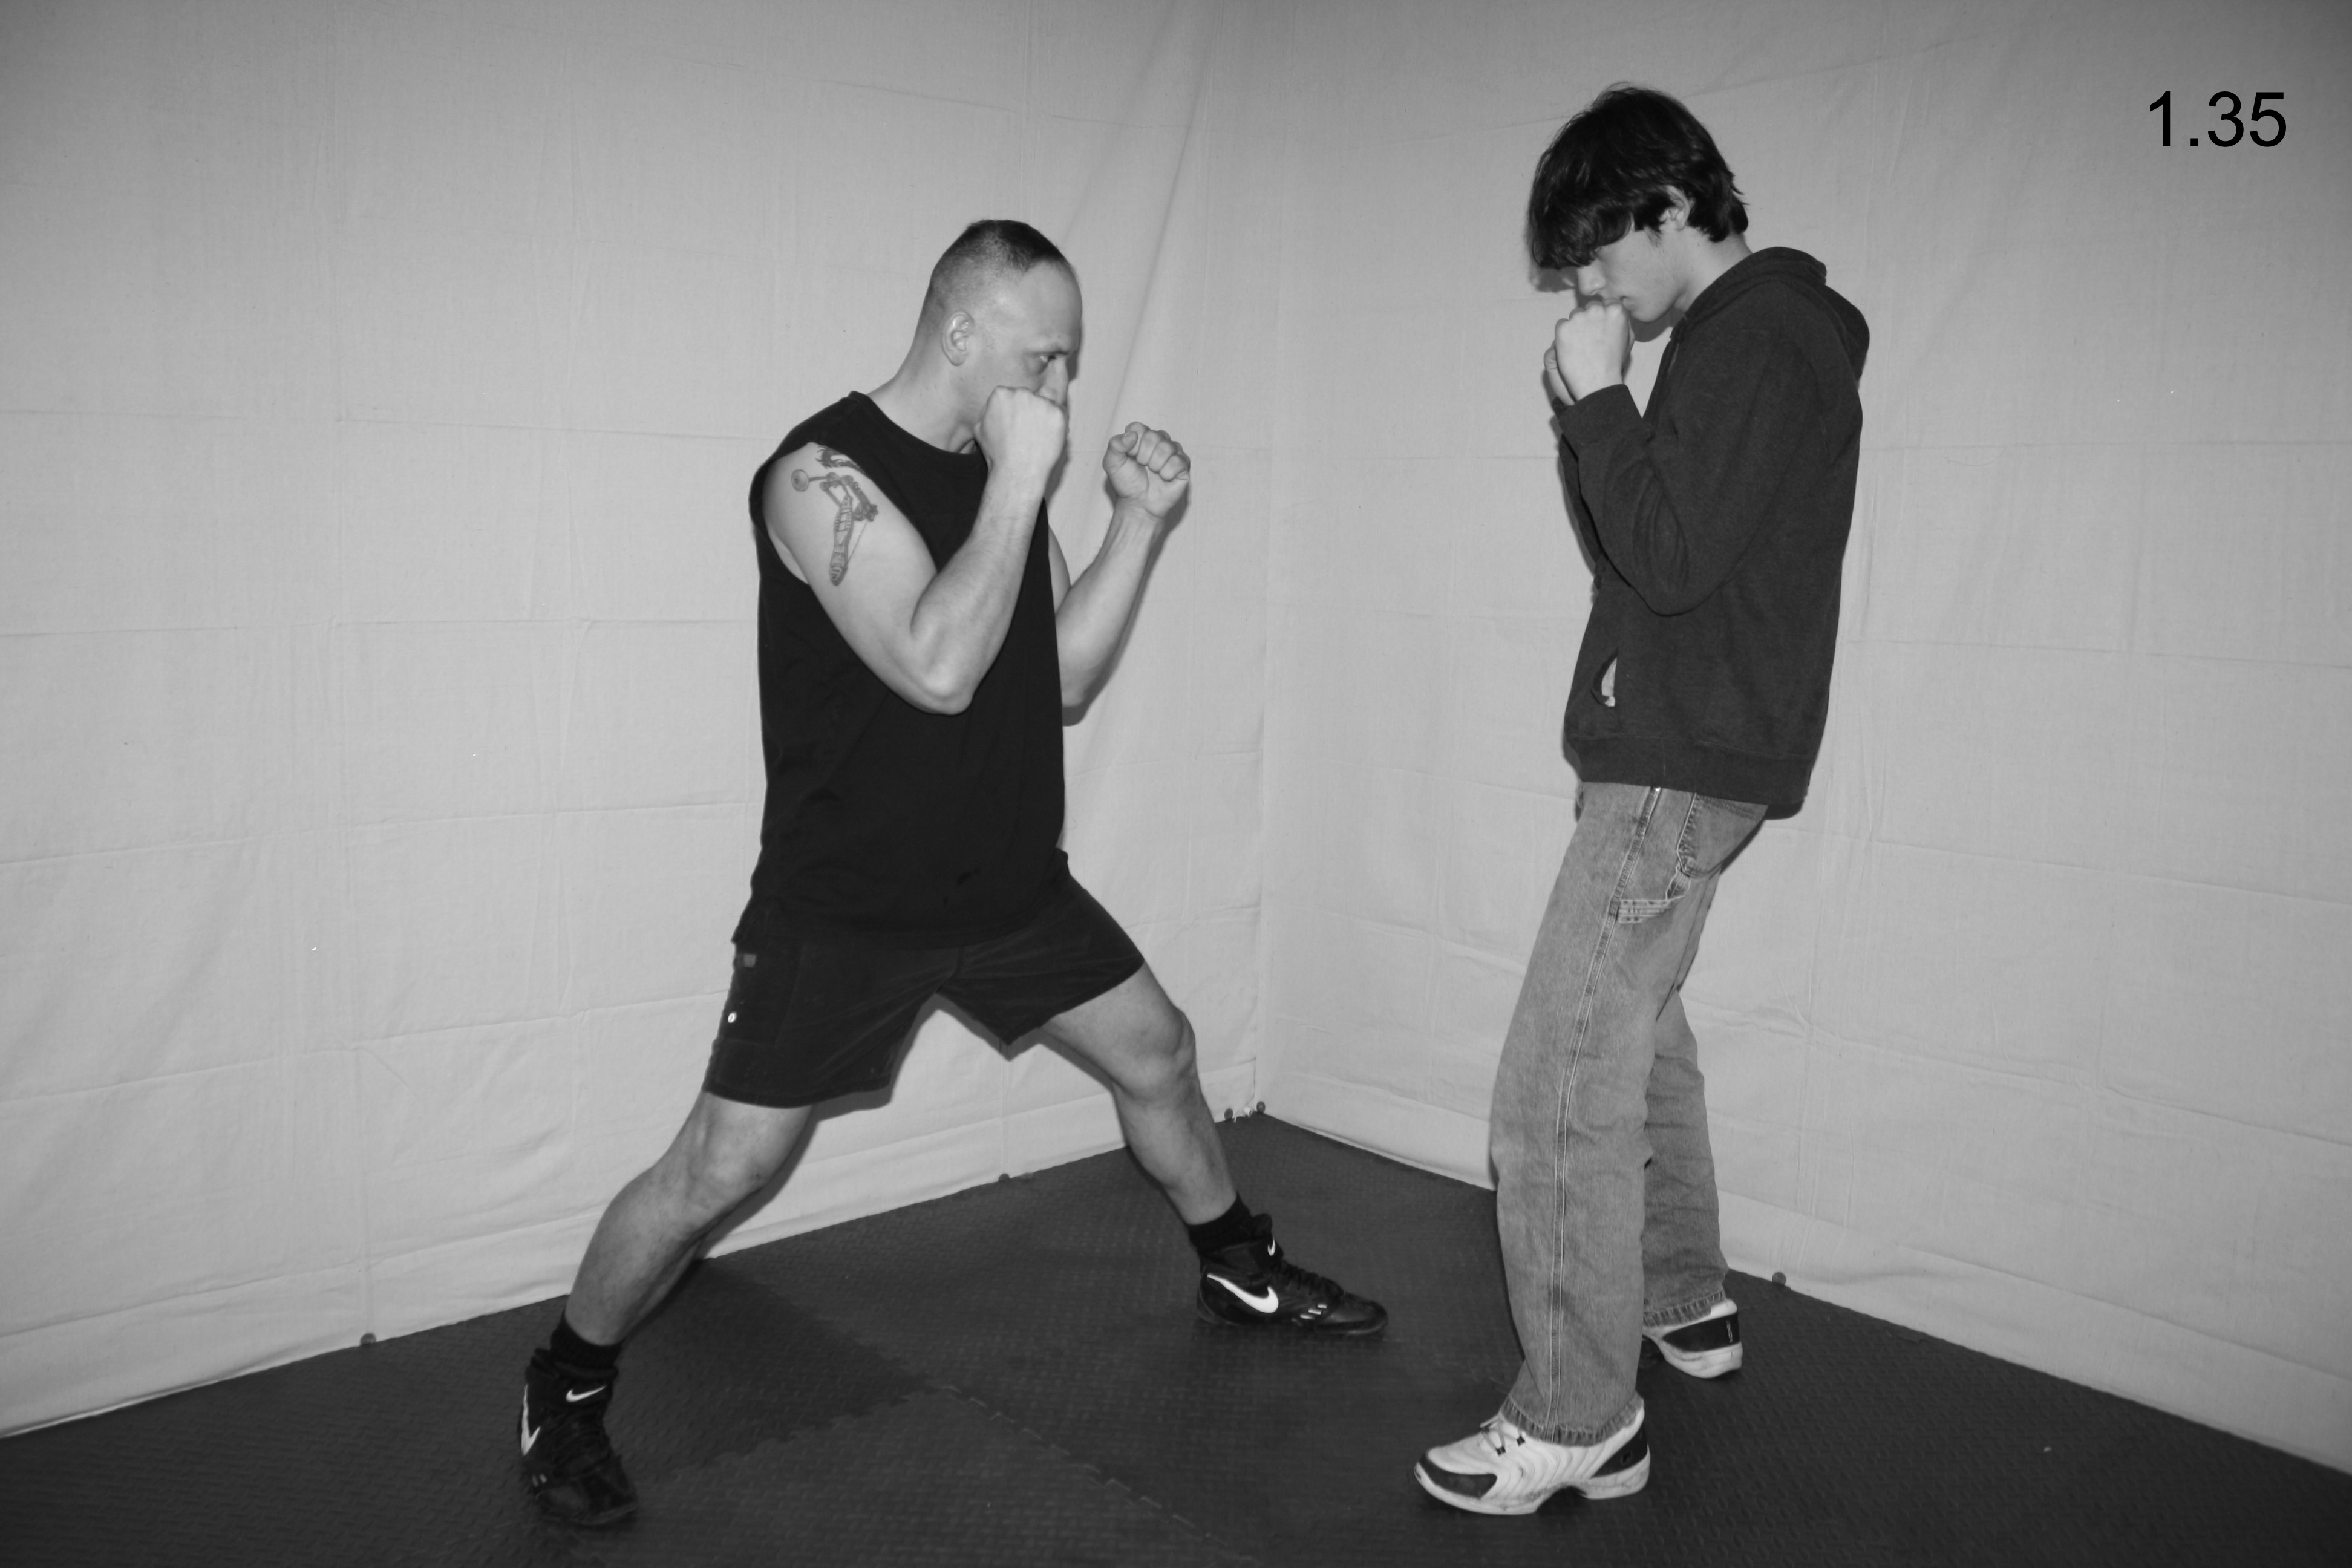
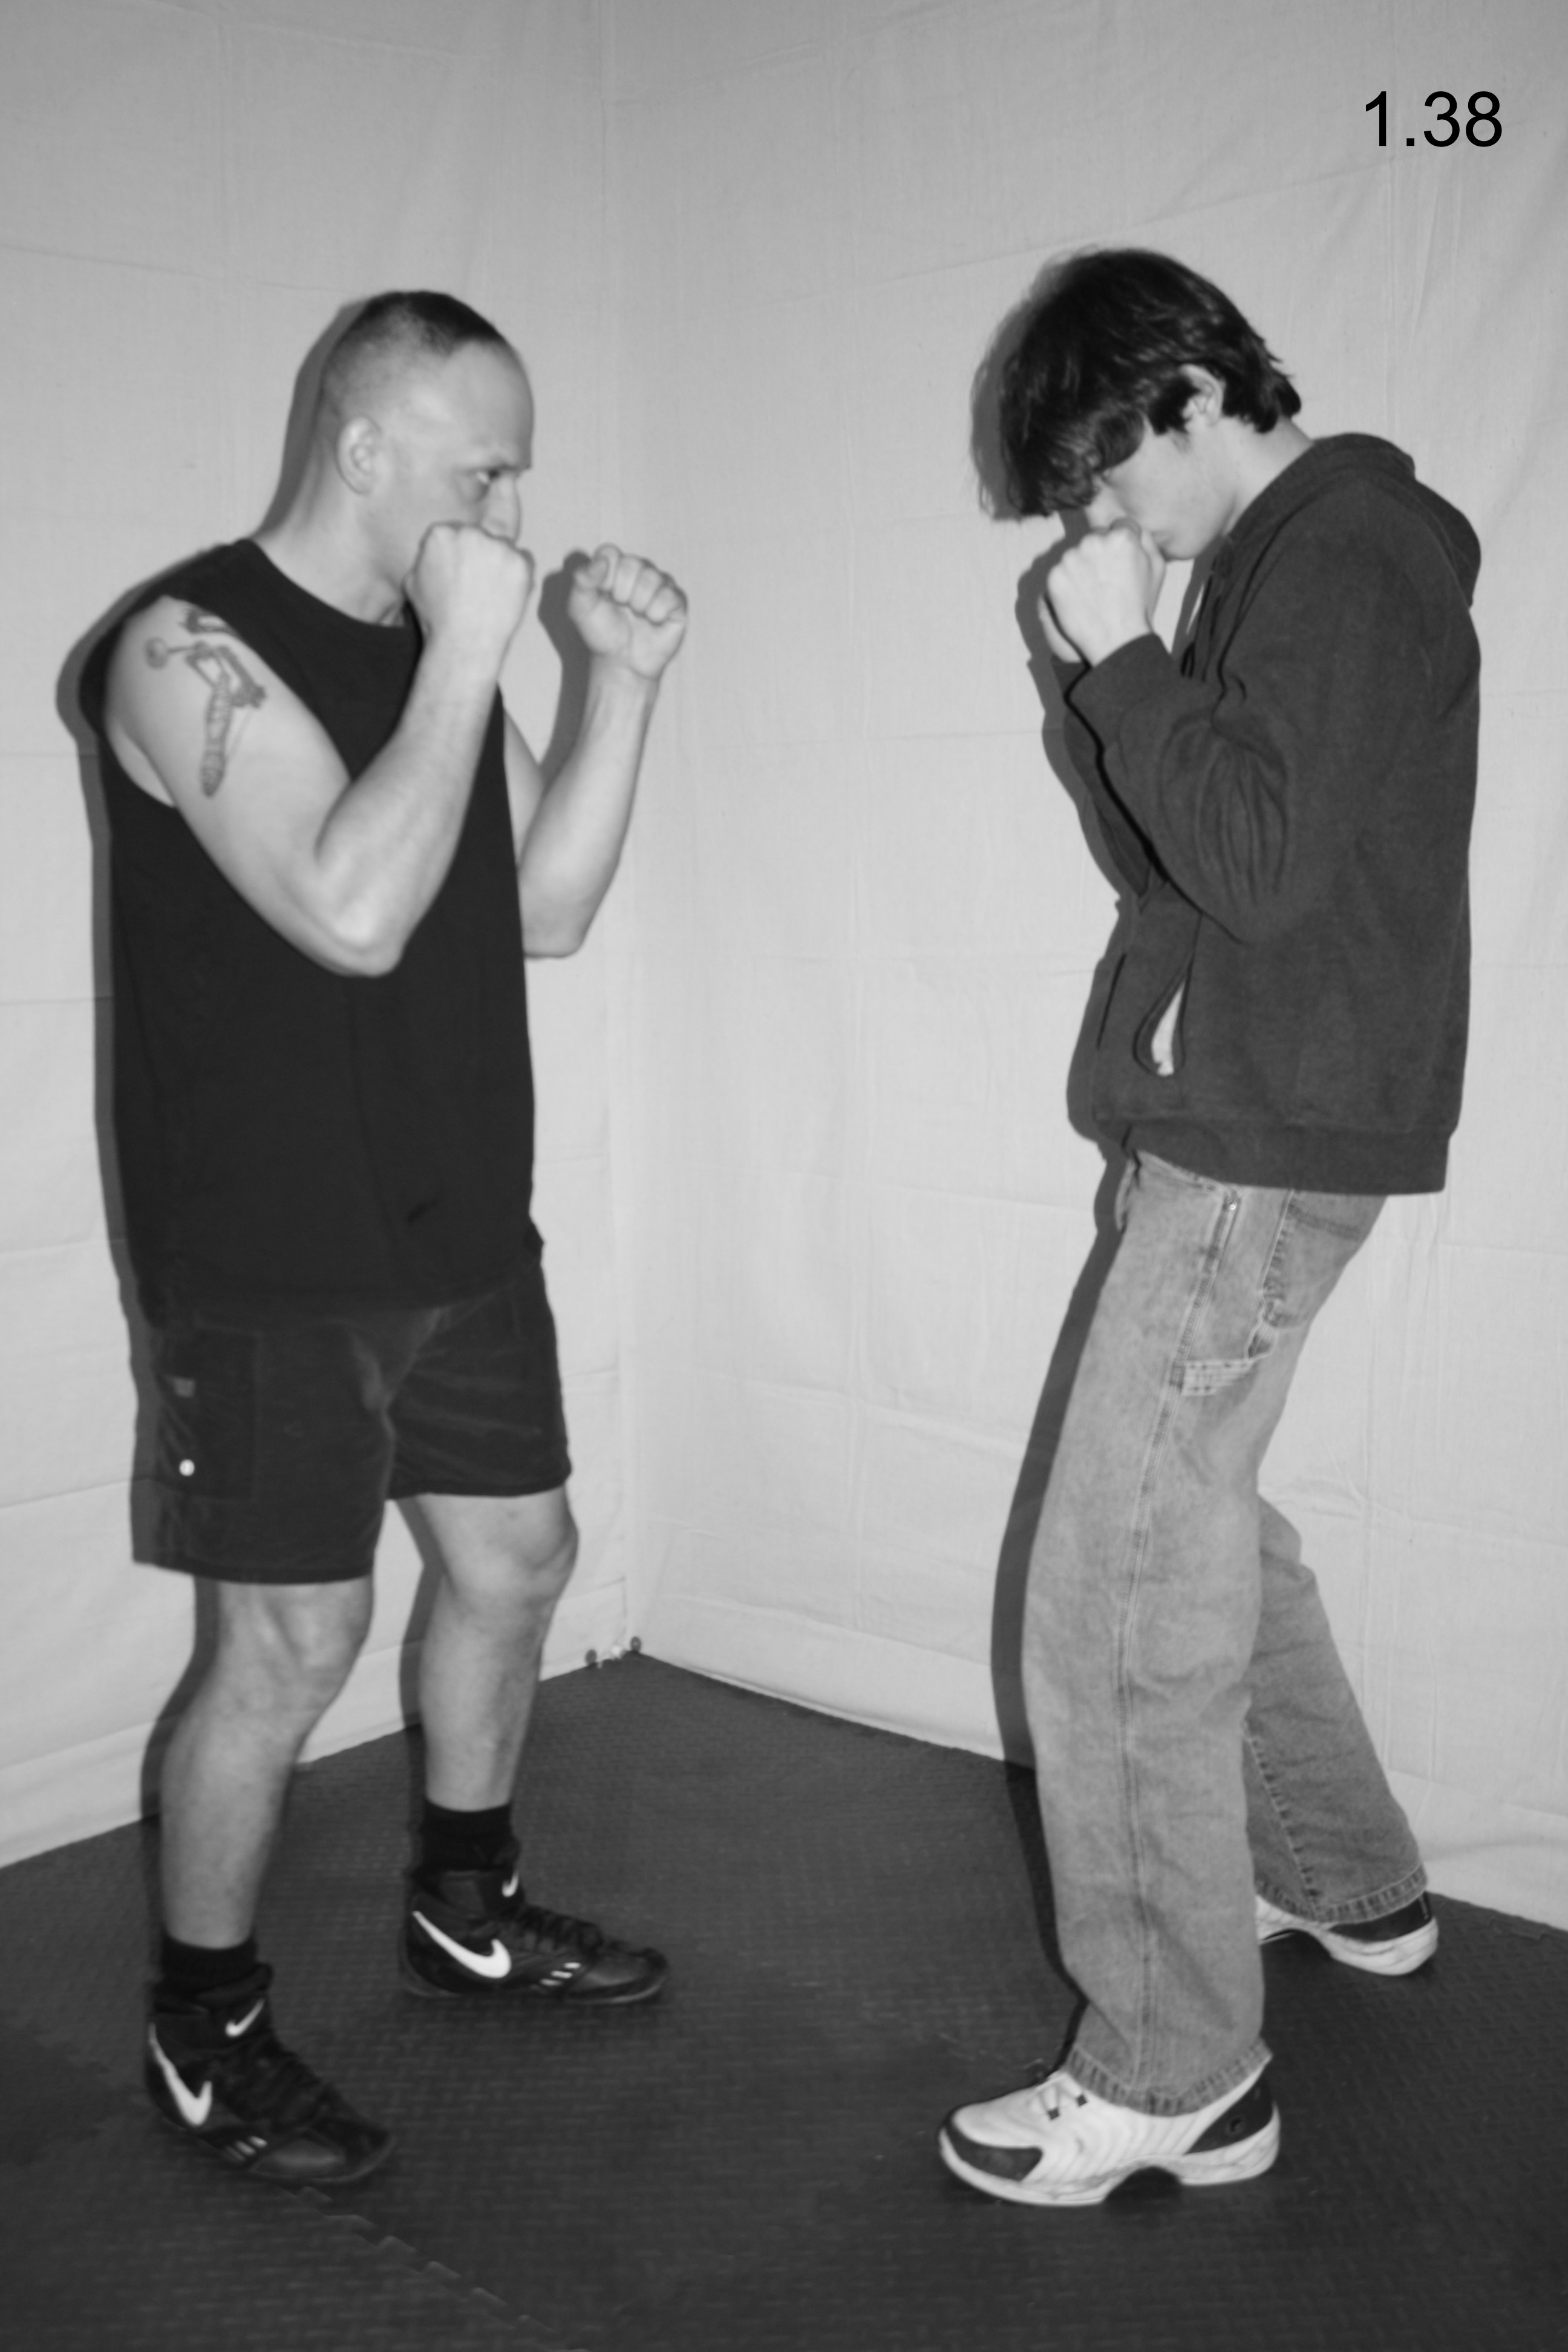
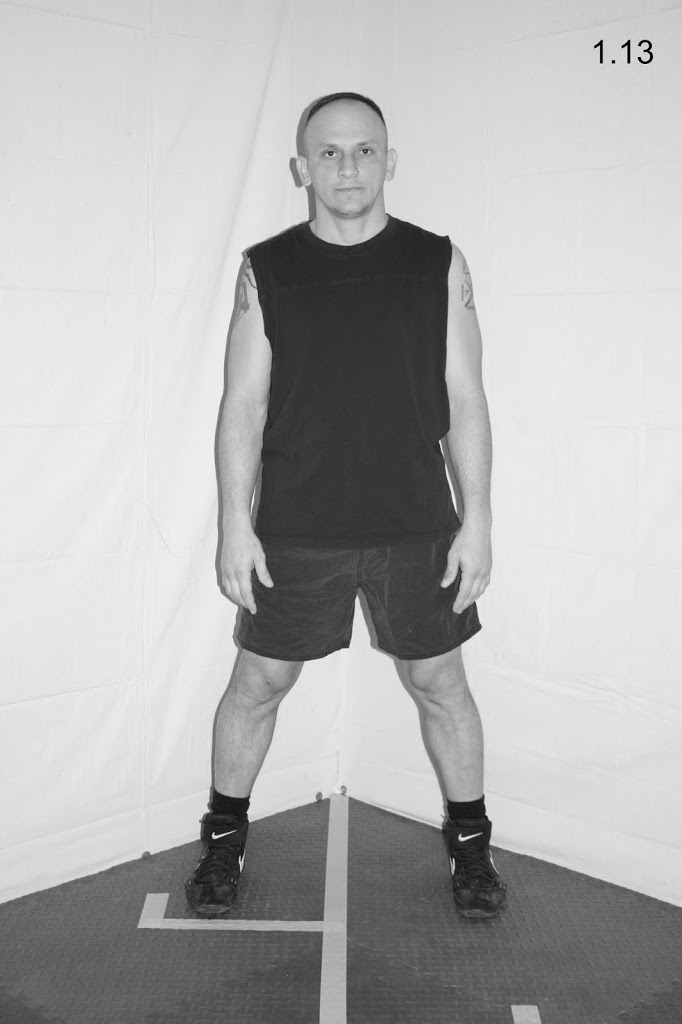
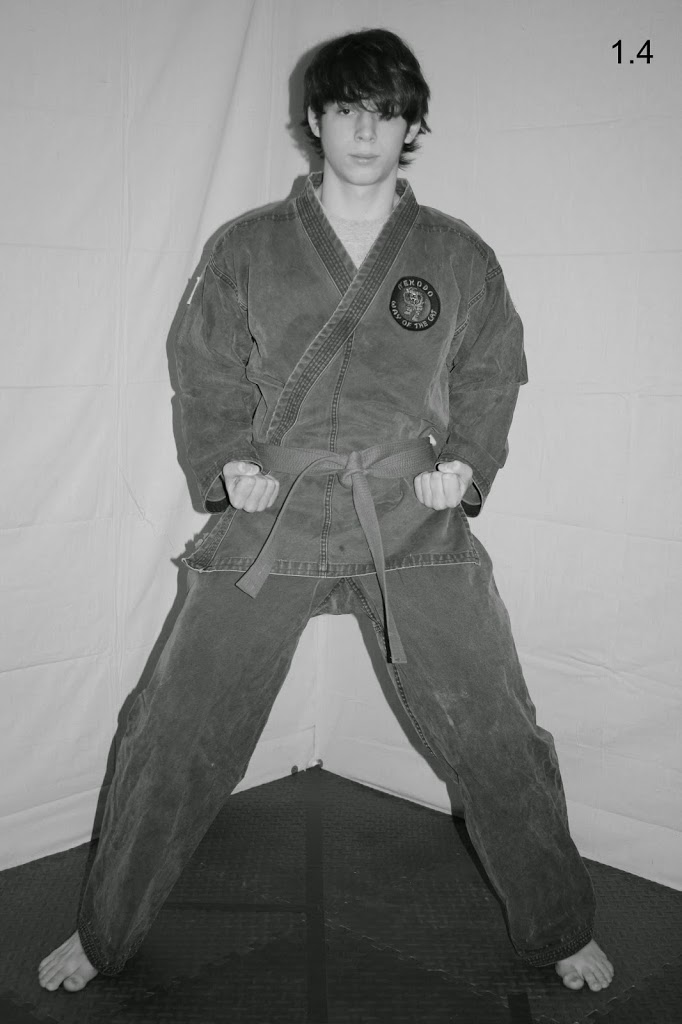
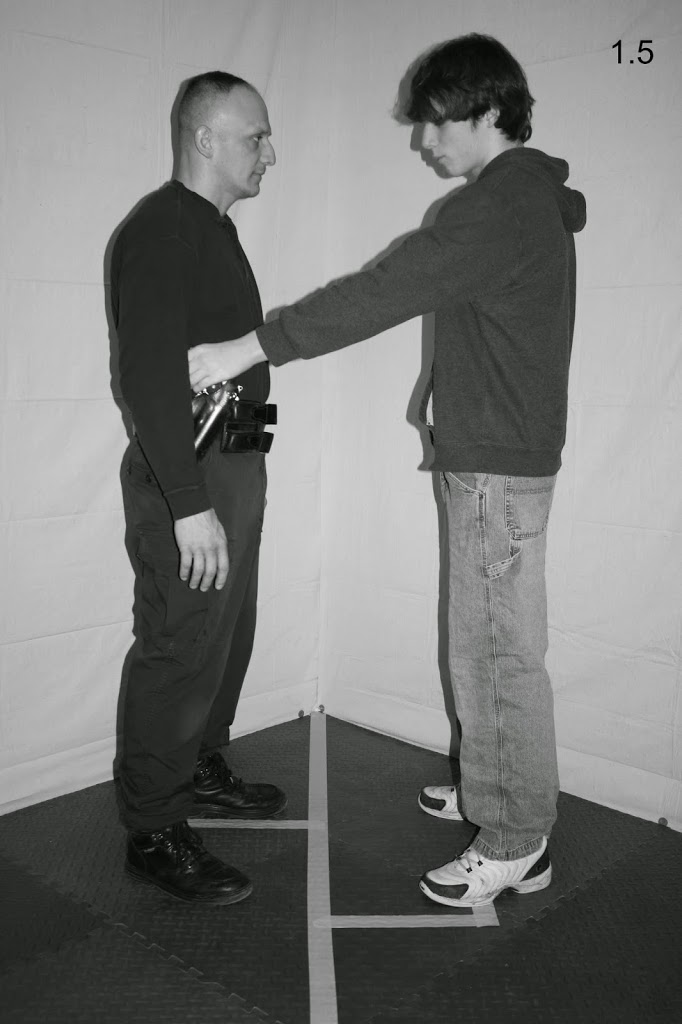
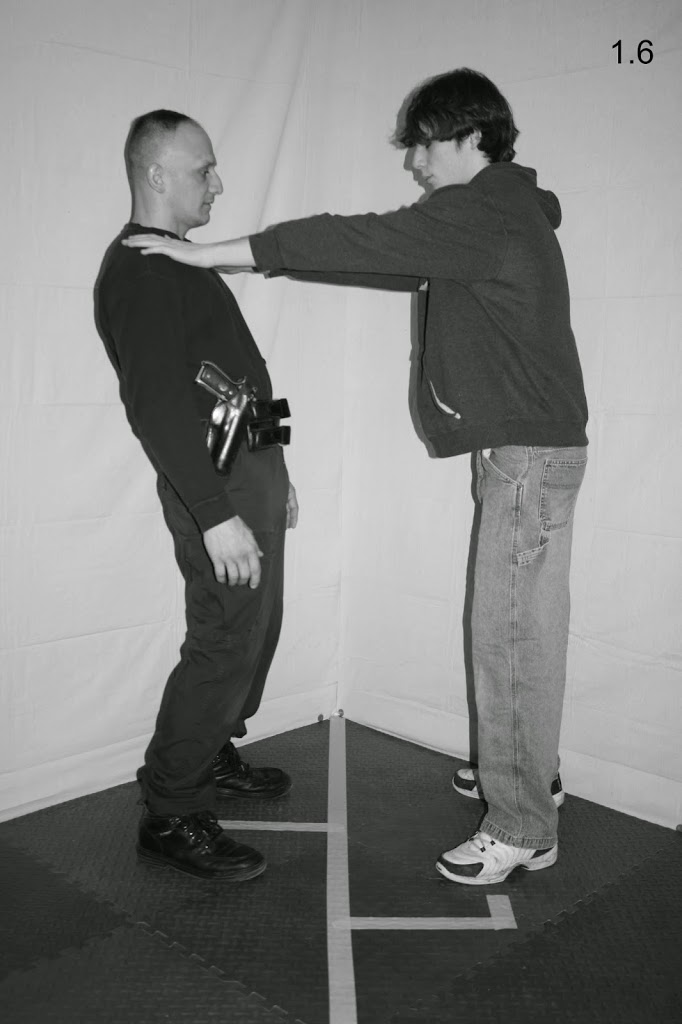
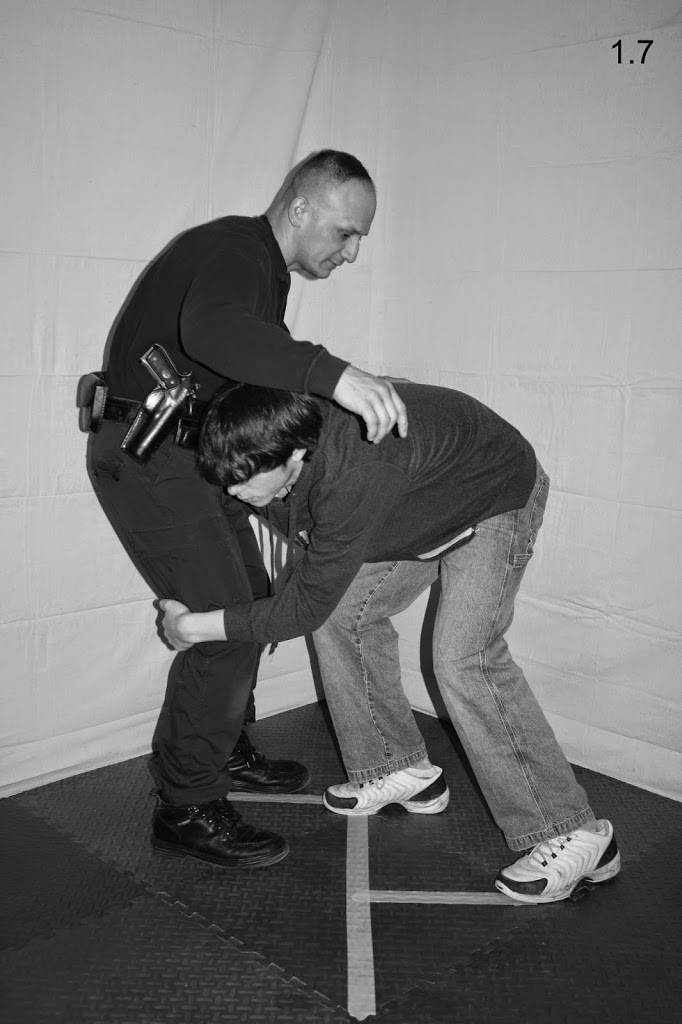
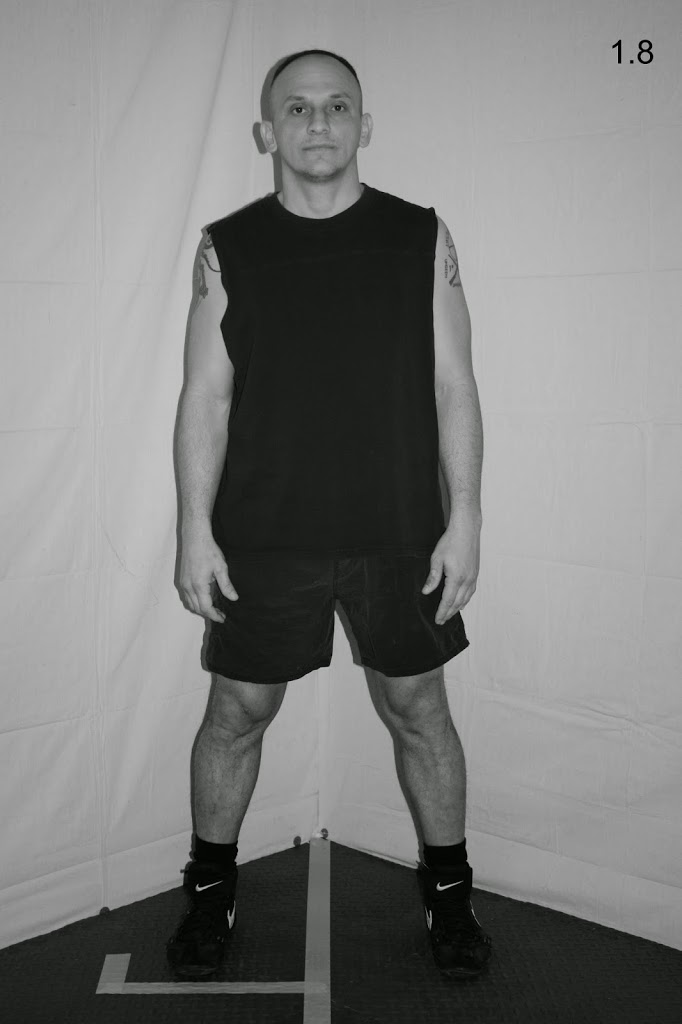
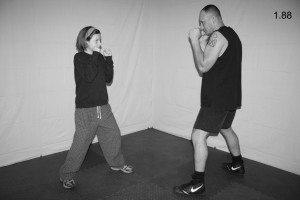
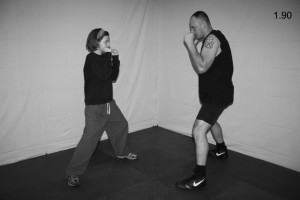
Step One:   Begin in your fighting stance in front of a partner (see Fig. 1.88).

1.88

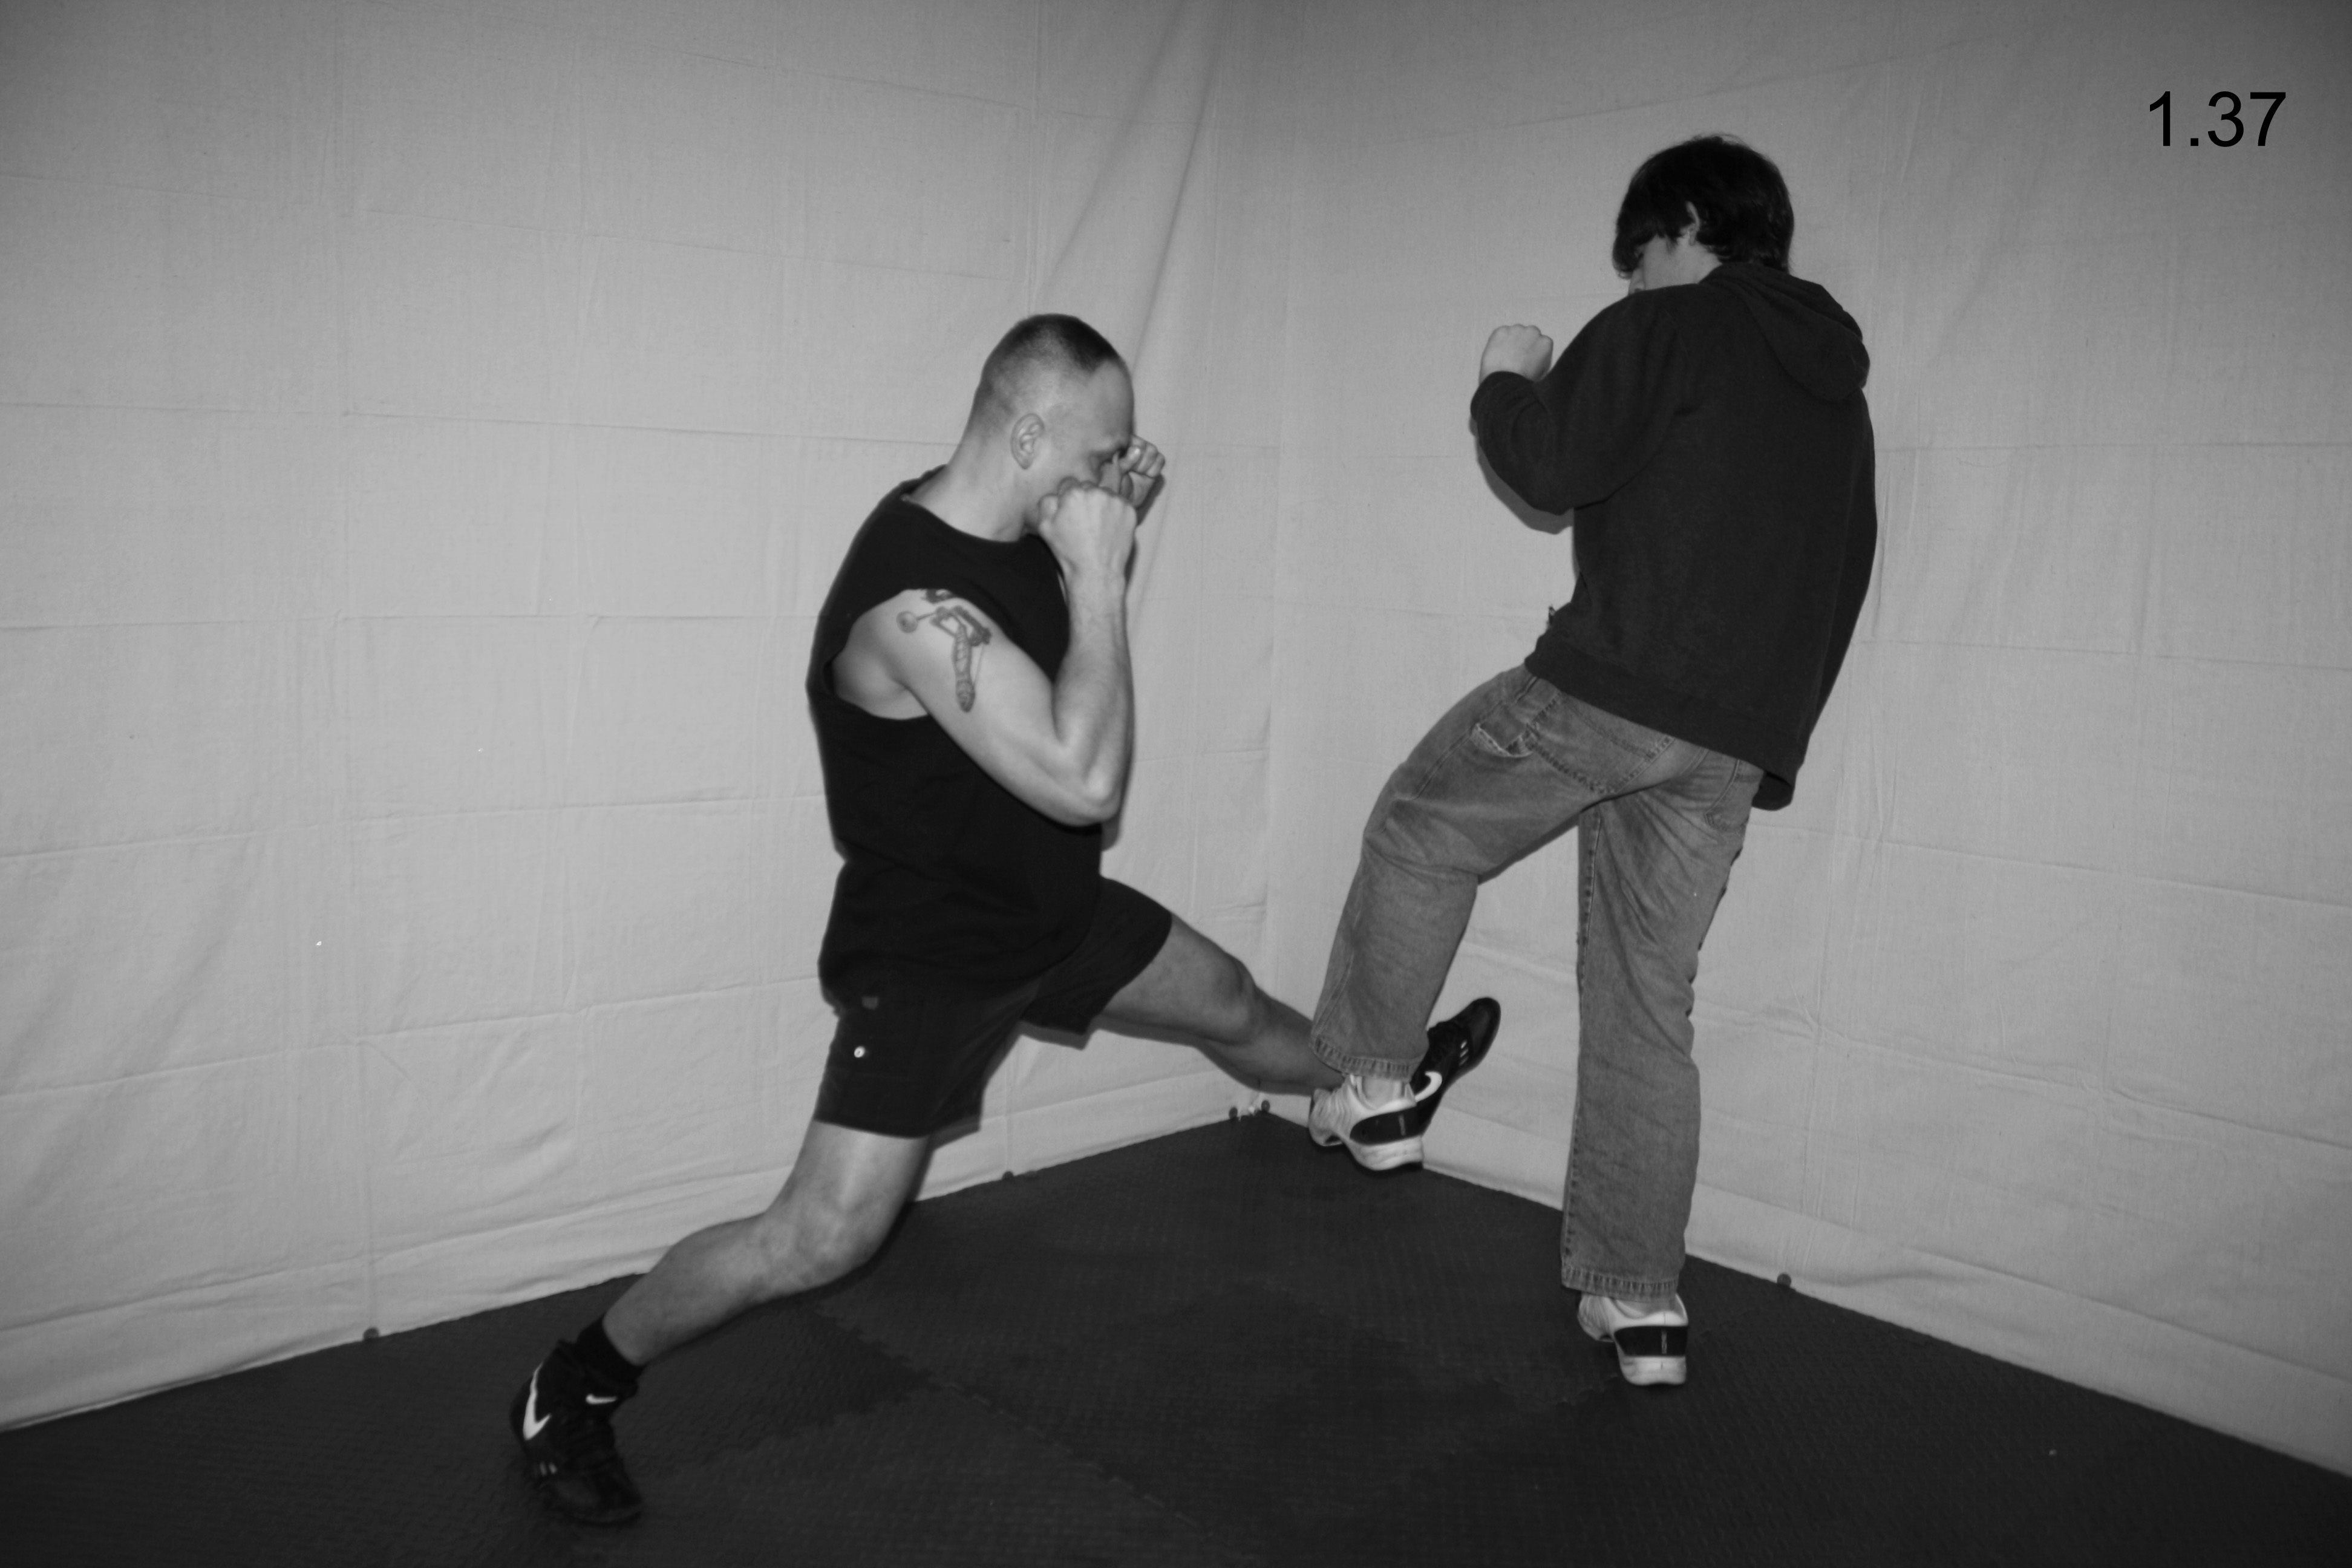
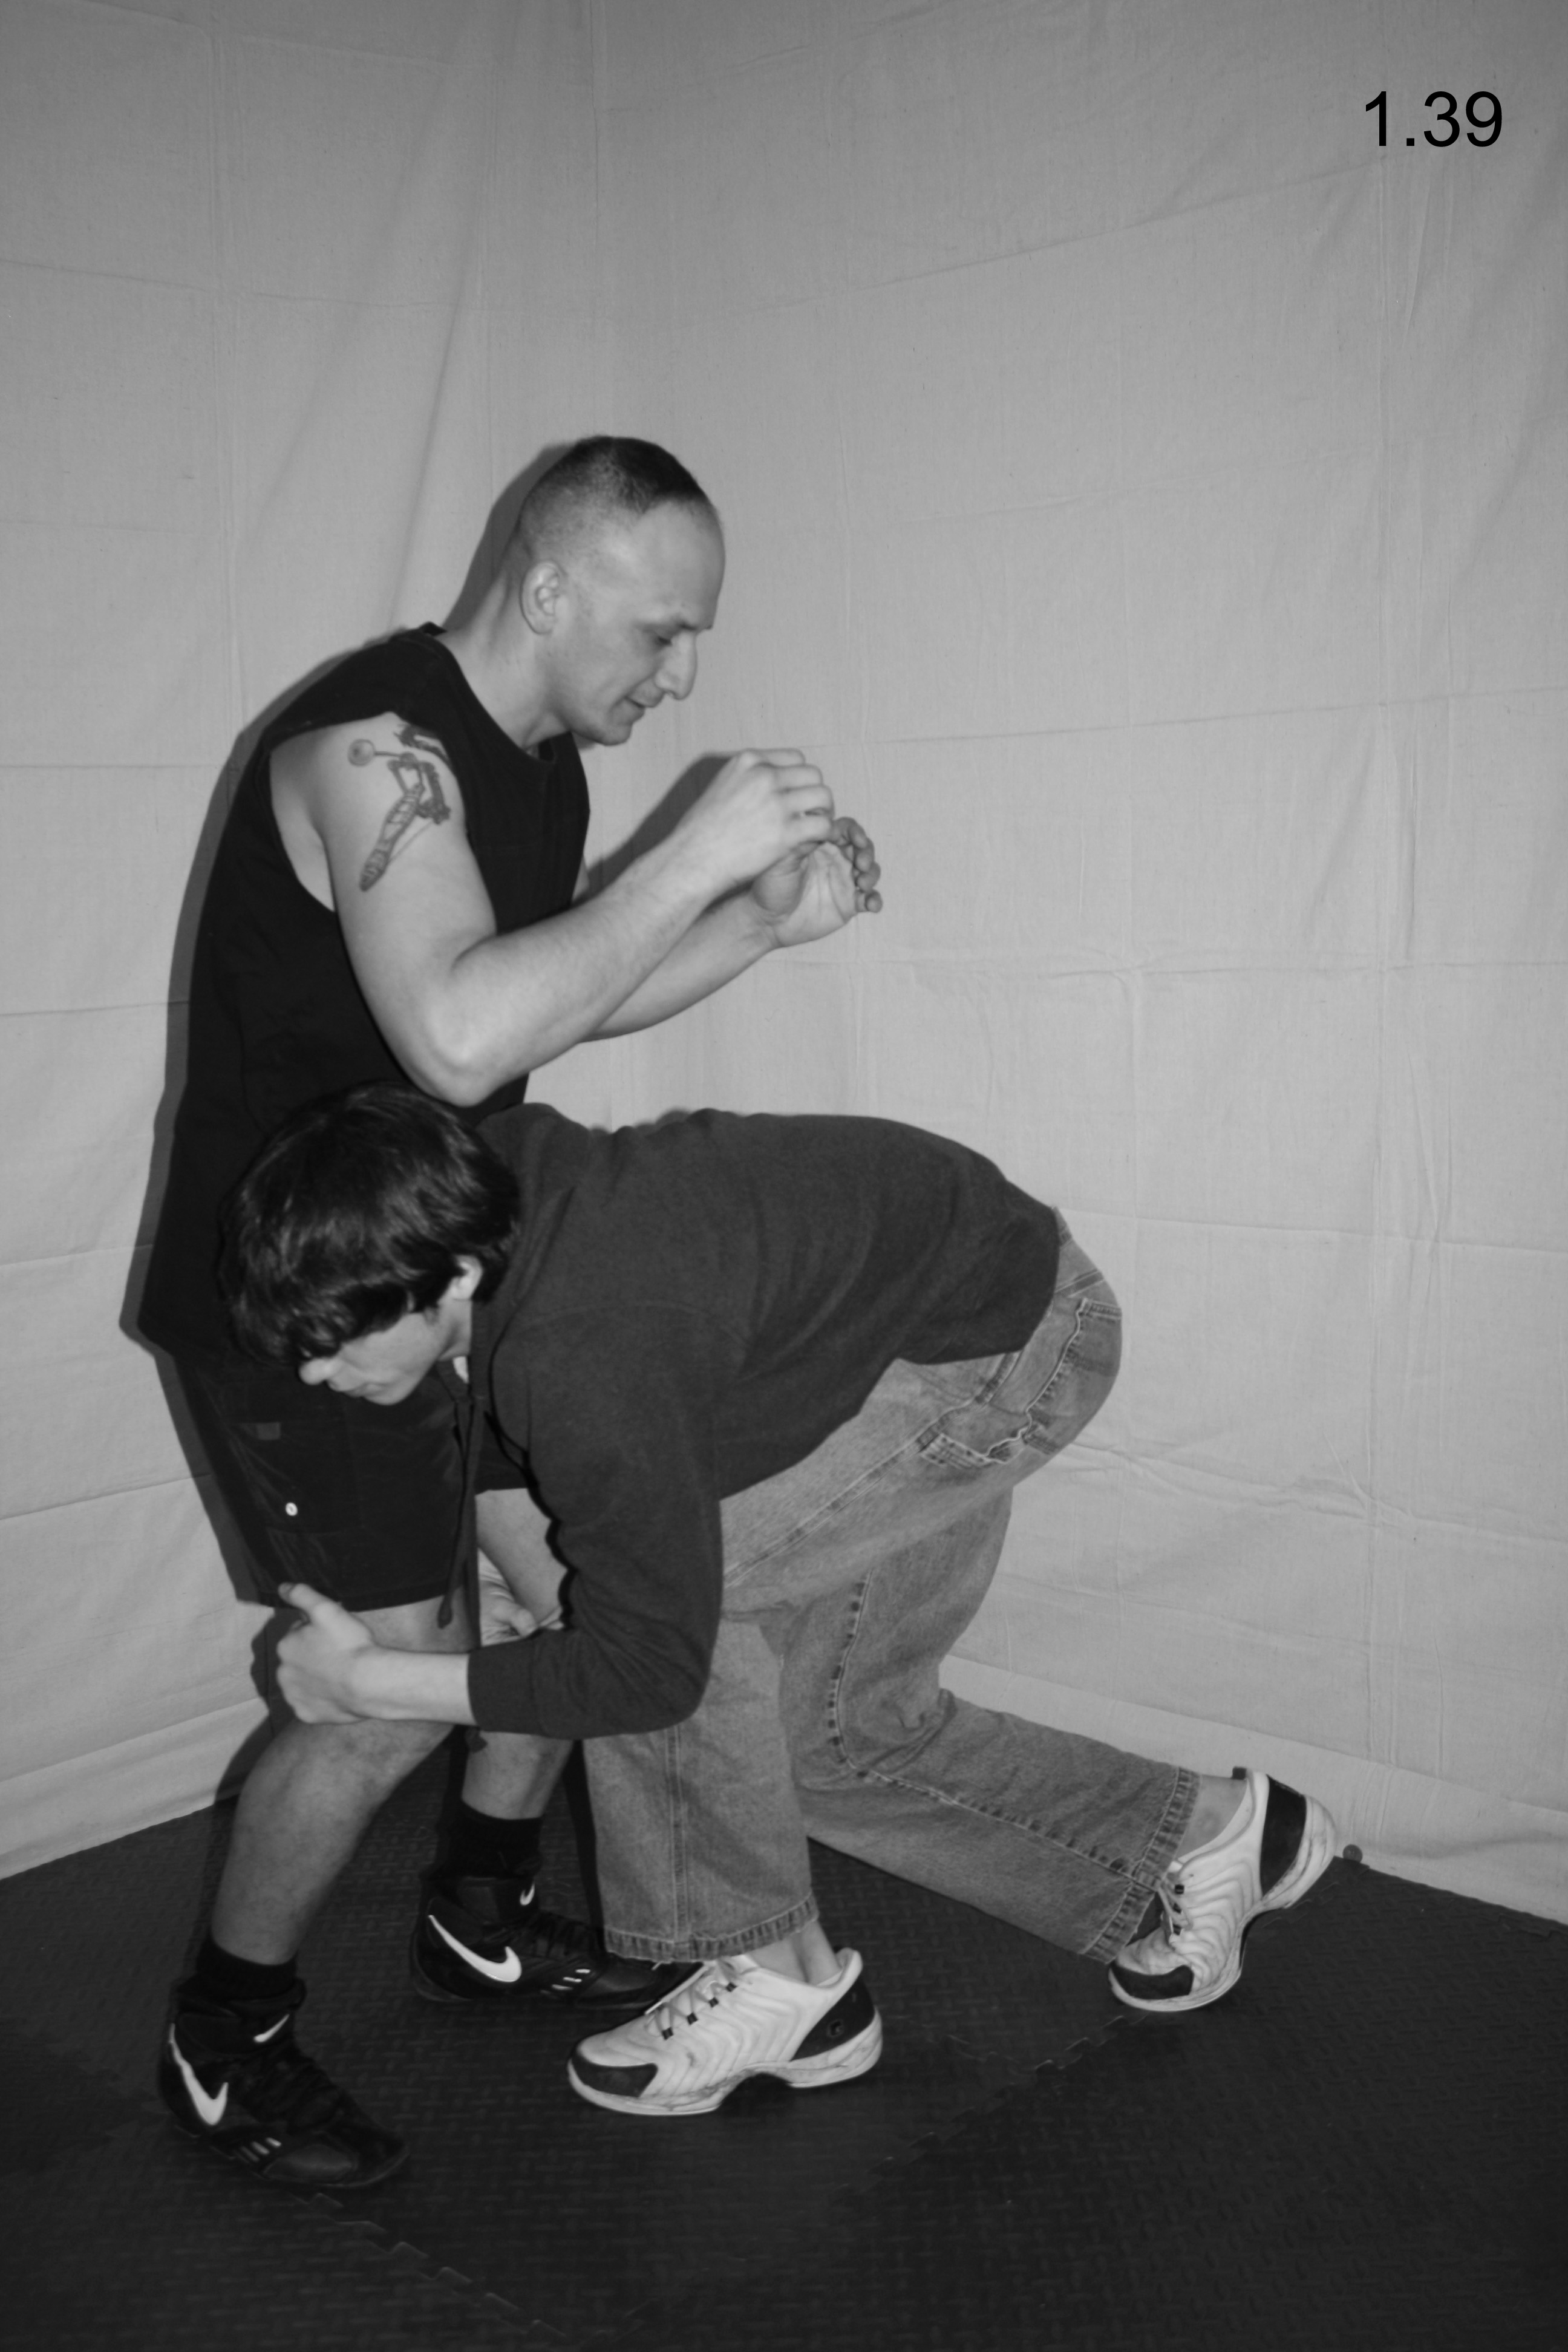
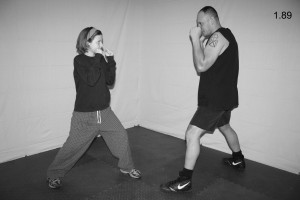
Step Two:   Have your partner begin moving toward you, away from you, to your right, to your left, circling you, etc. Instruct them to move slowly at first. As your partner moves, mirror his or her movement by utilizing correct footwork technique. If your partner moves toward you, perform a back step (see Fig. 1.89). If your partner moves to your right, perform a right side step (see Fig. 1.90). And so on. Try to stick to your partner like a shadow. As you become more and more proficient, have your partner move faster and faster. Before long, you will feel as comfortable doing this drill as you do walking around in your everyday life.

1.89

1.90

SKIPPING ROPE

Another excellent exercise for improving footwork is skipping rope. This can be a difficult exercise to perform at first. However, once you become accustomed to it, it will greatly improve your foot speed and coordination. It will also build endurance in your calf muscles and this can be important if a fight lasts an extended period of time.

There are various types and styles of ropes to consider, from the heavier ropes made for strength building to the lighter ropes made for speed. There are no wrong or right answers here, just a matter of personal preference. My personal preference is the rubber rope designed for speed, since my goal is to improve my footwork speed and endurance.

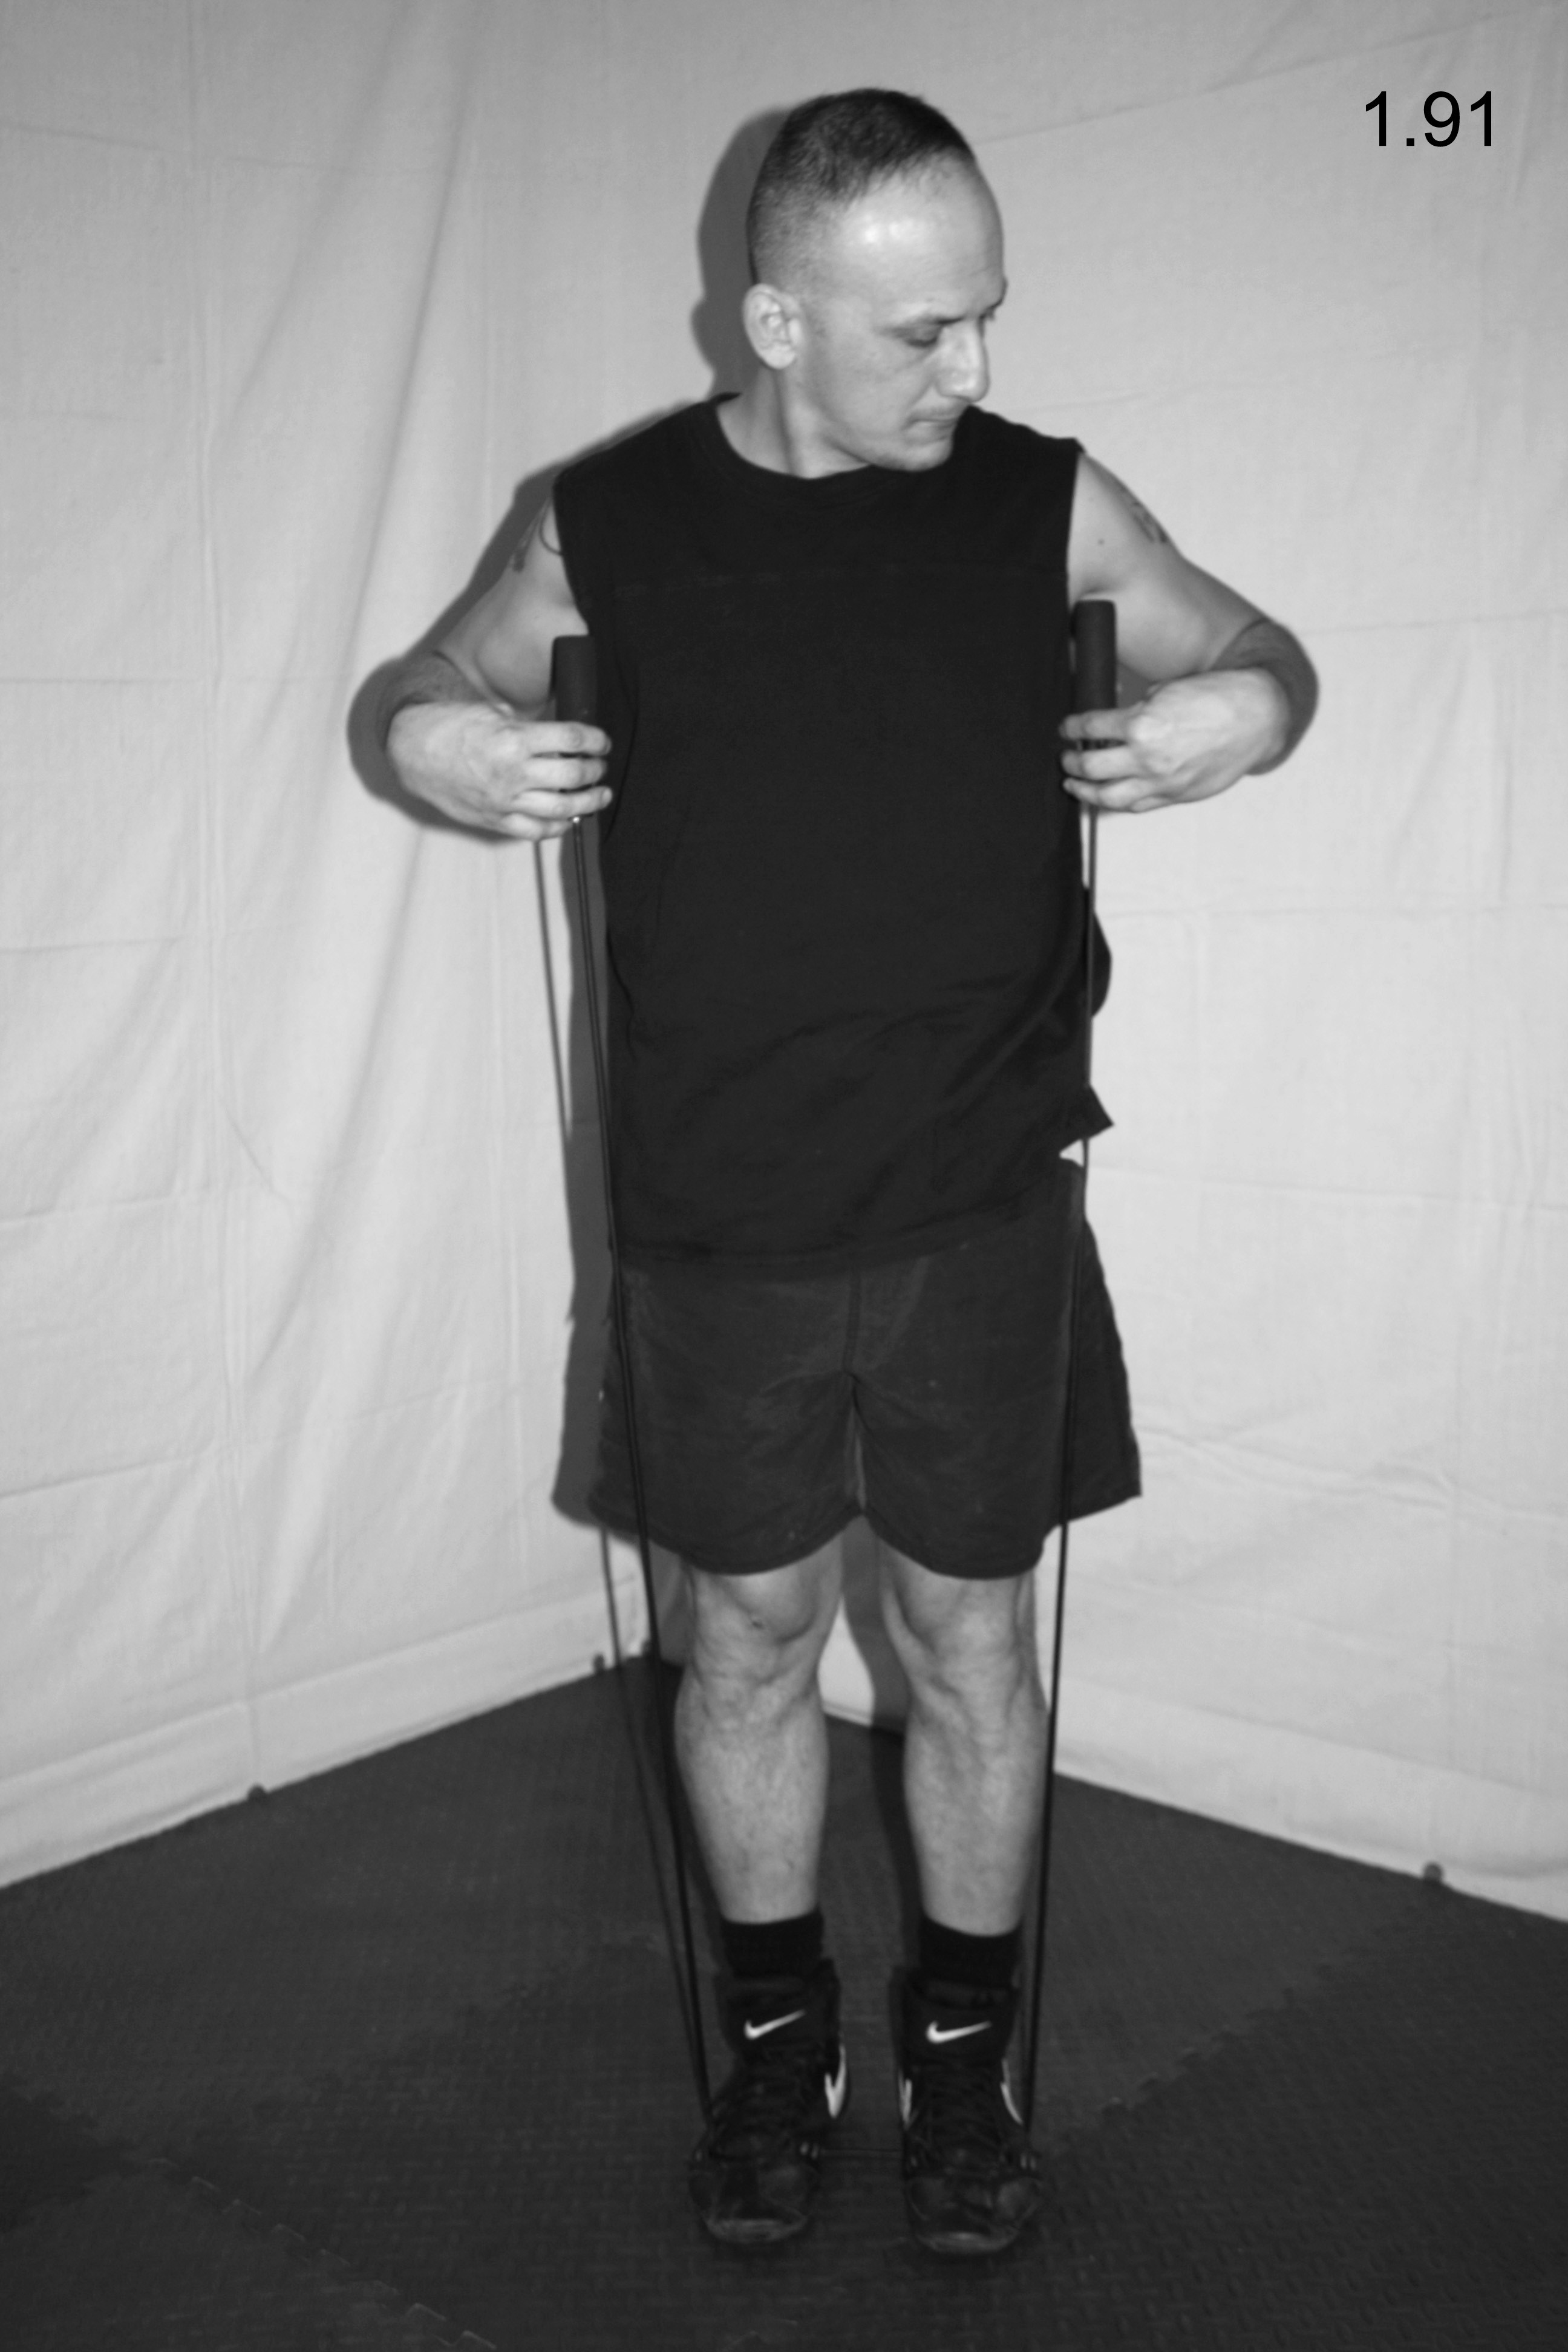
Once you have decided on what type of rope to go with, you need to determine the correct length. Do this by stepping on the center of the rope with both feet and raising the handles up toward your armpits. If each handle reaches the respective armpit, the rope is the correct size (see Fig. 1.91). If they do not reach the armpits, you need a longer rope. If they go beyond the armpits, you need to shorten the rope.

1.91

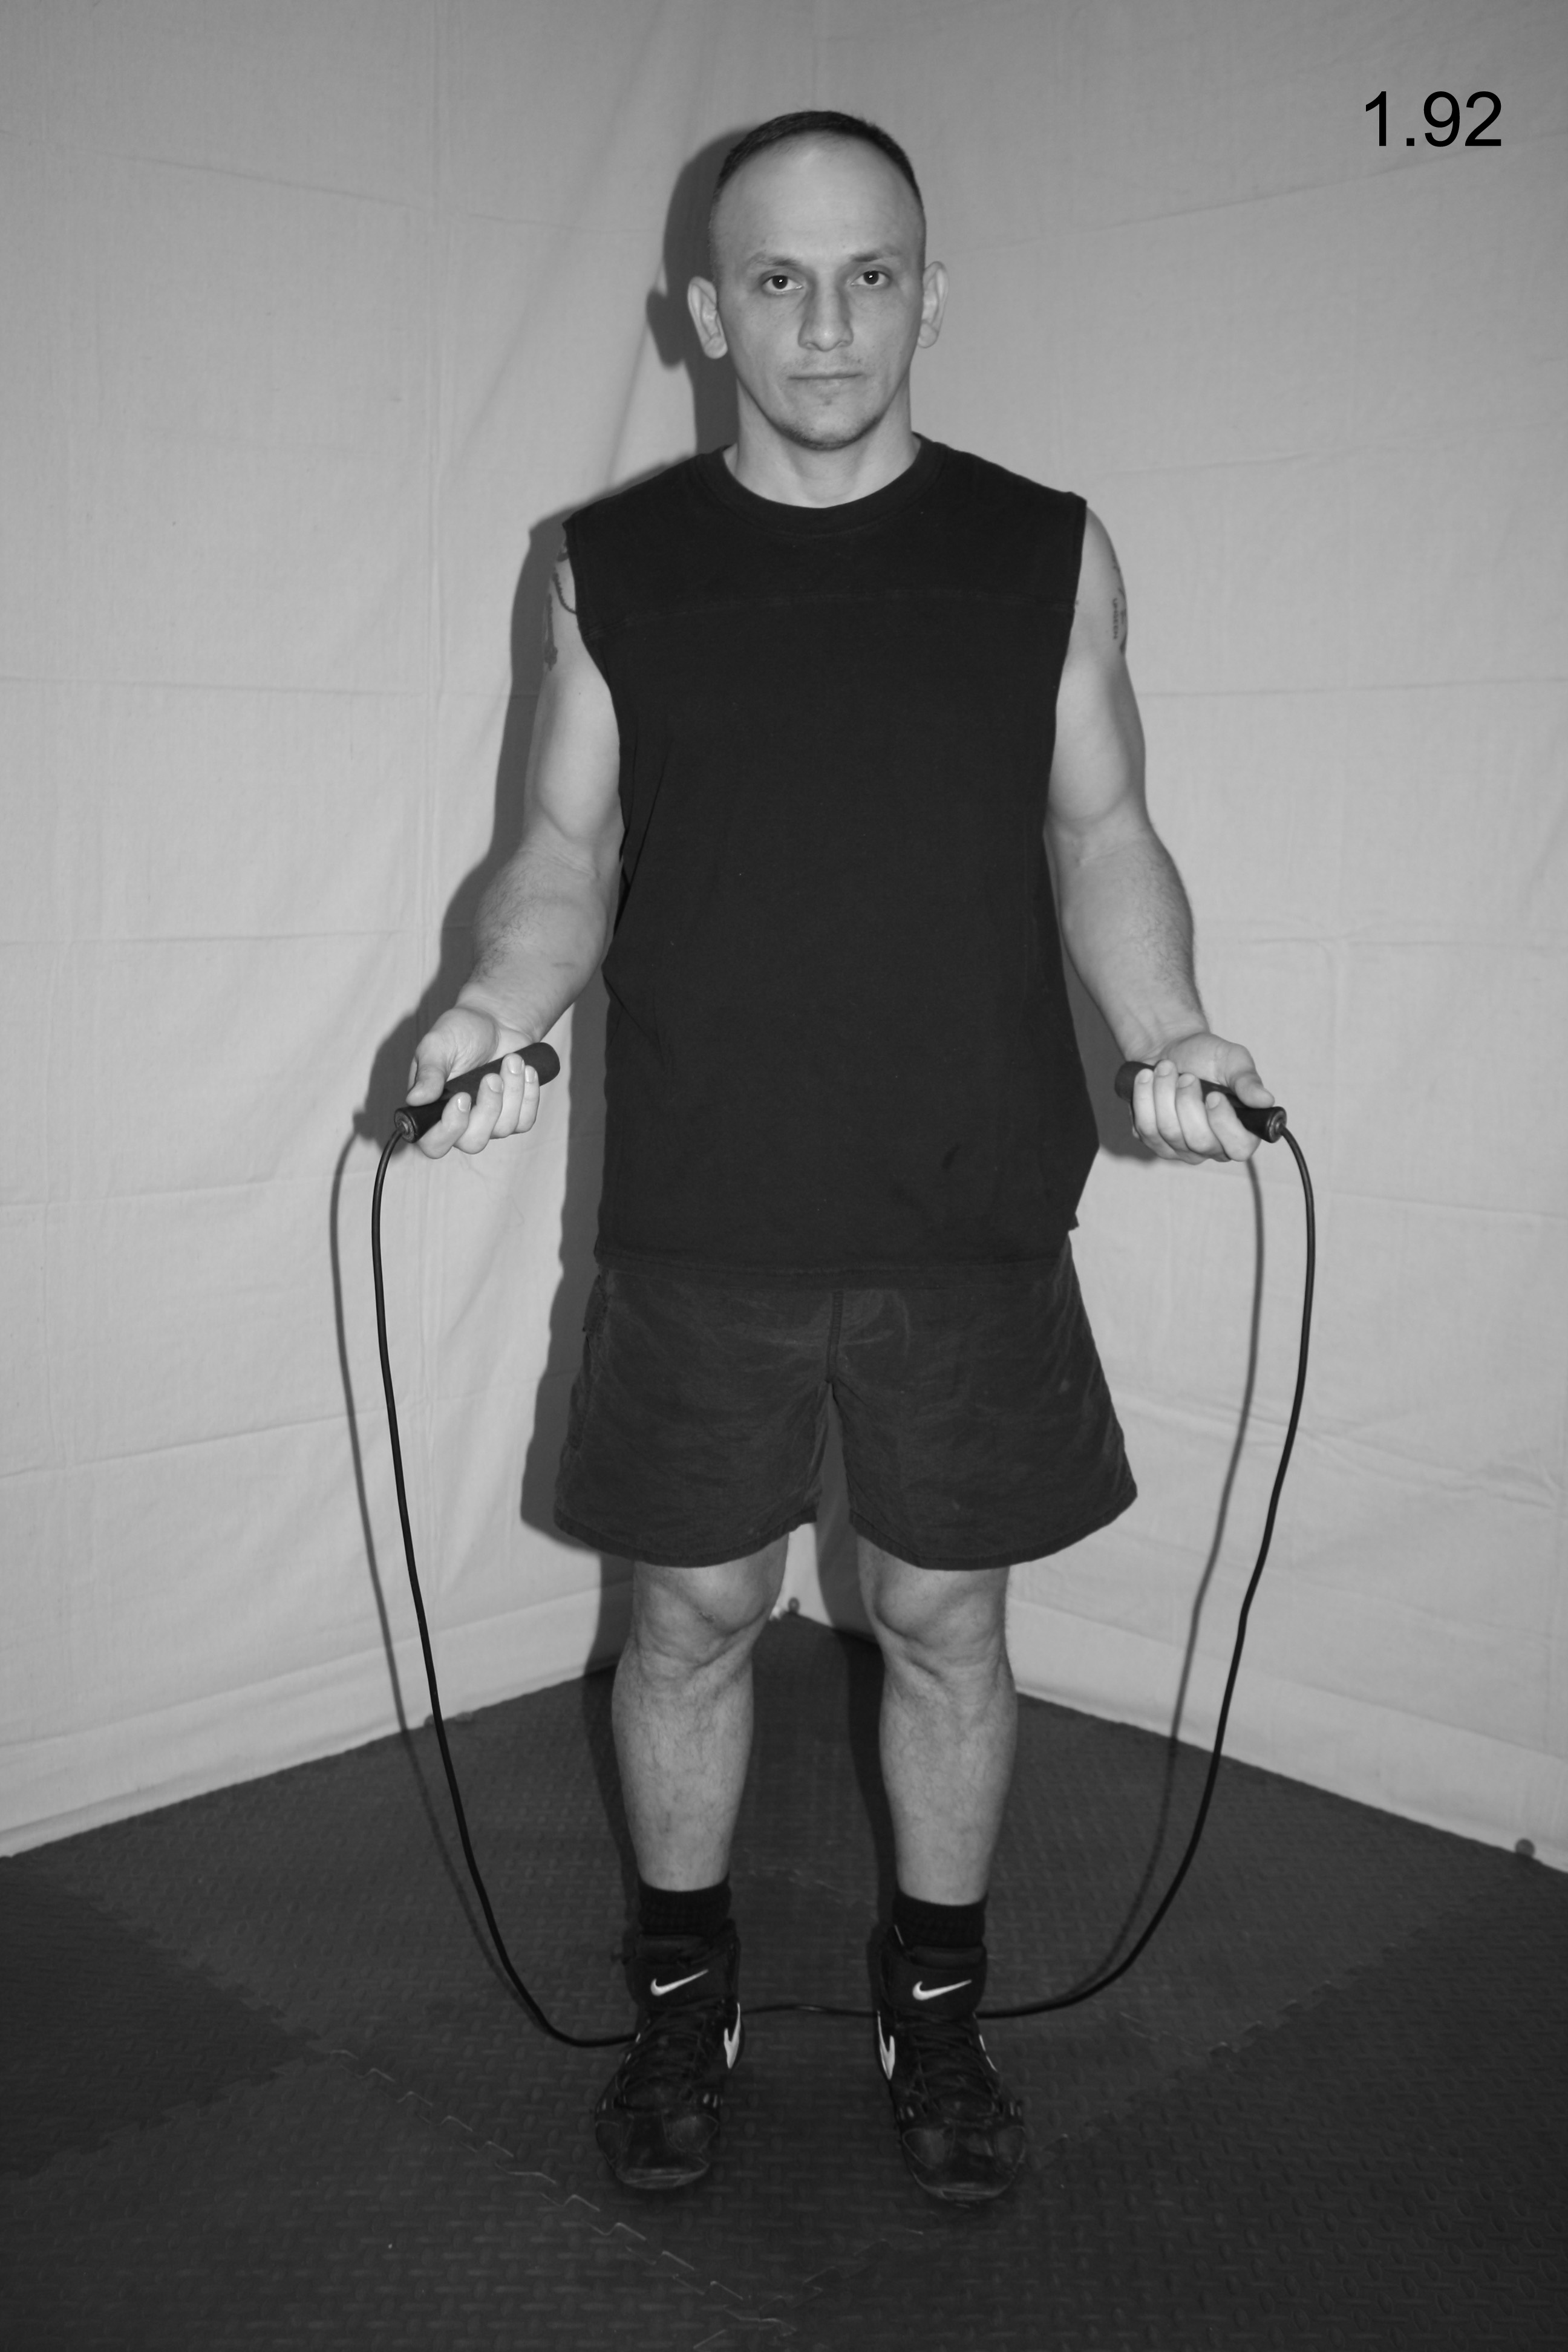
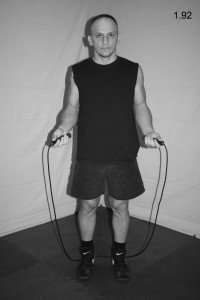
Step One:   Begin standing in front of the rope while holding the handles firmly in your hands. Your hands should be held about waist high at your sides (see Fig. 1.92).

1.92

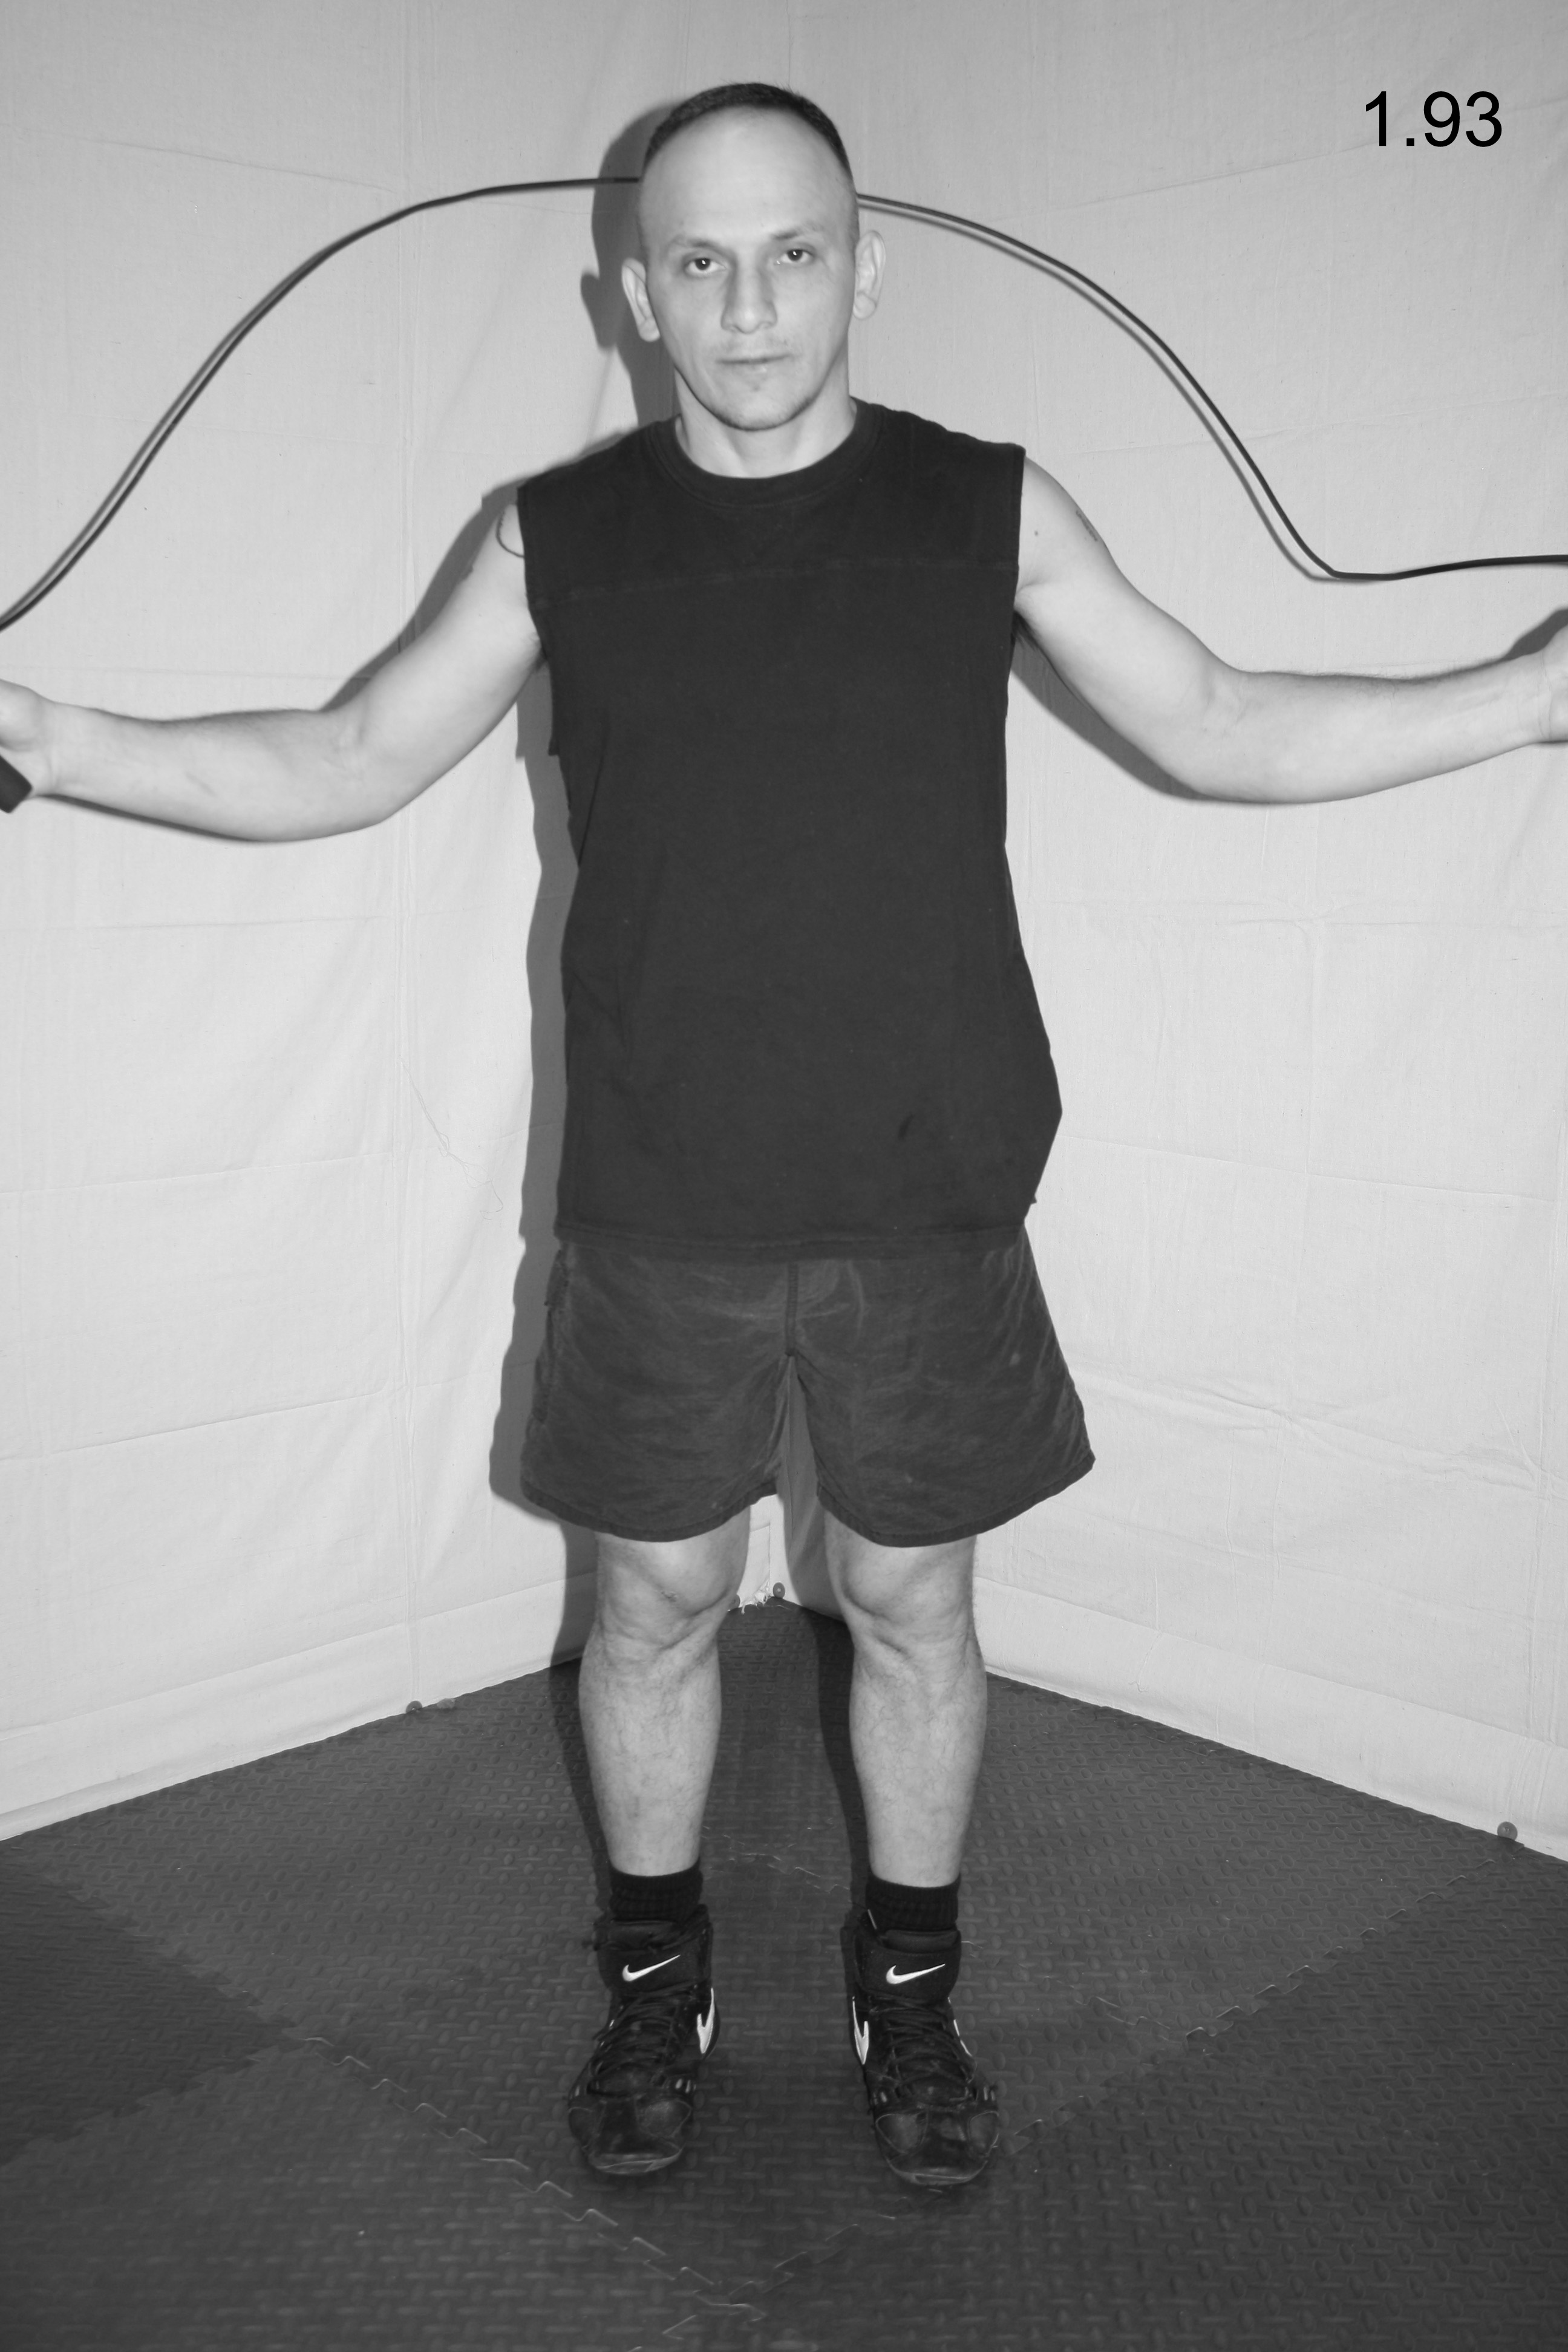
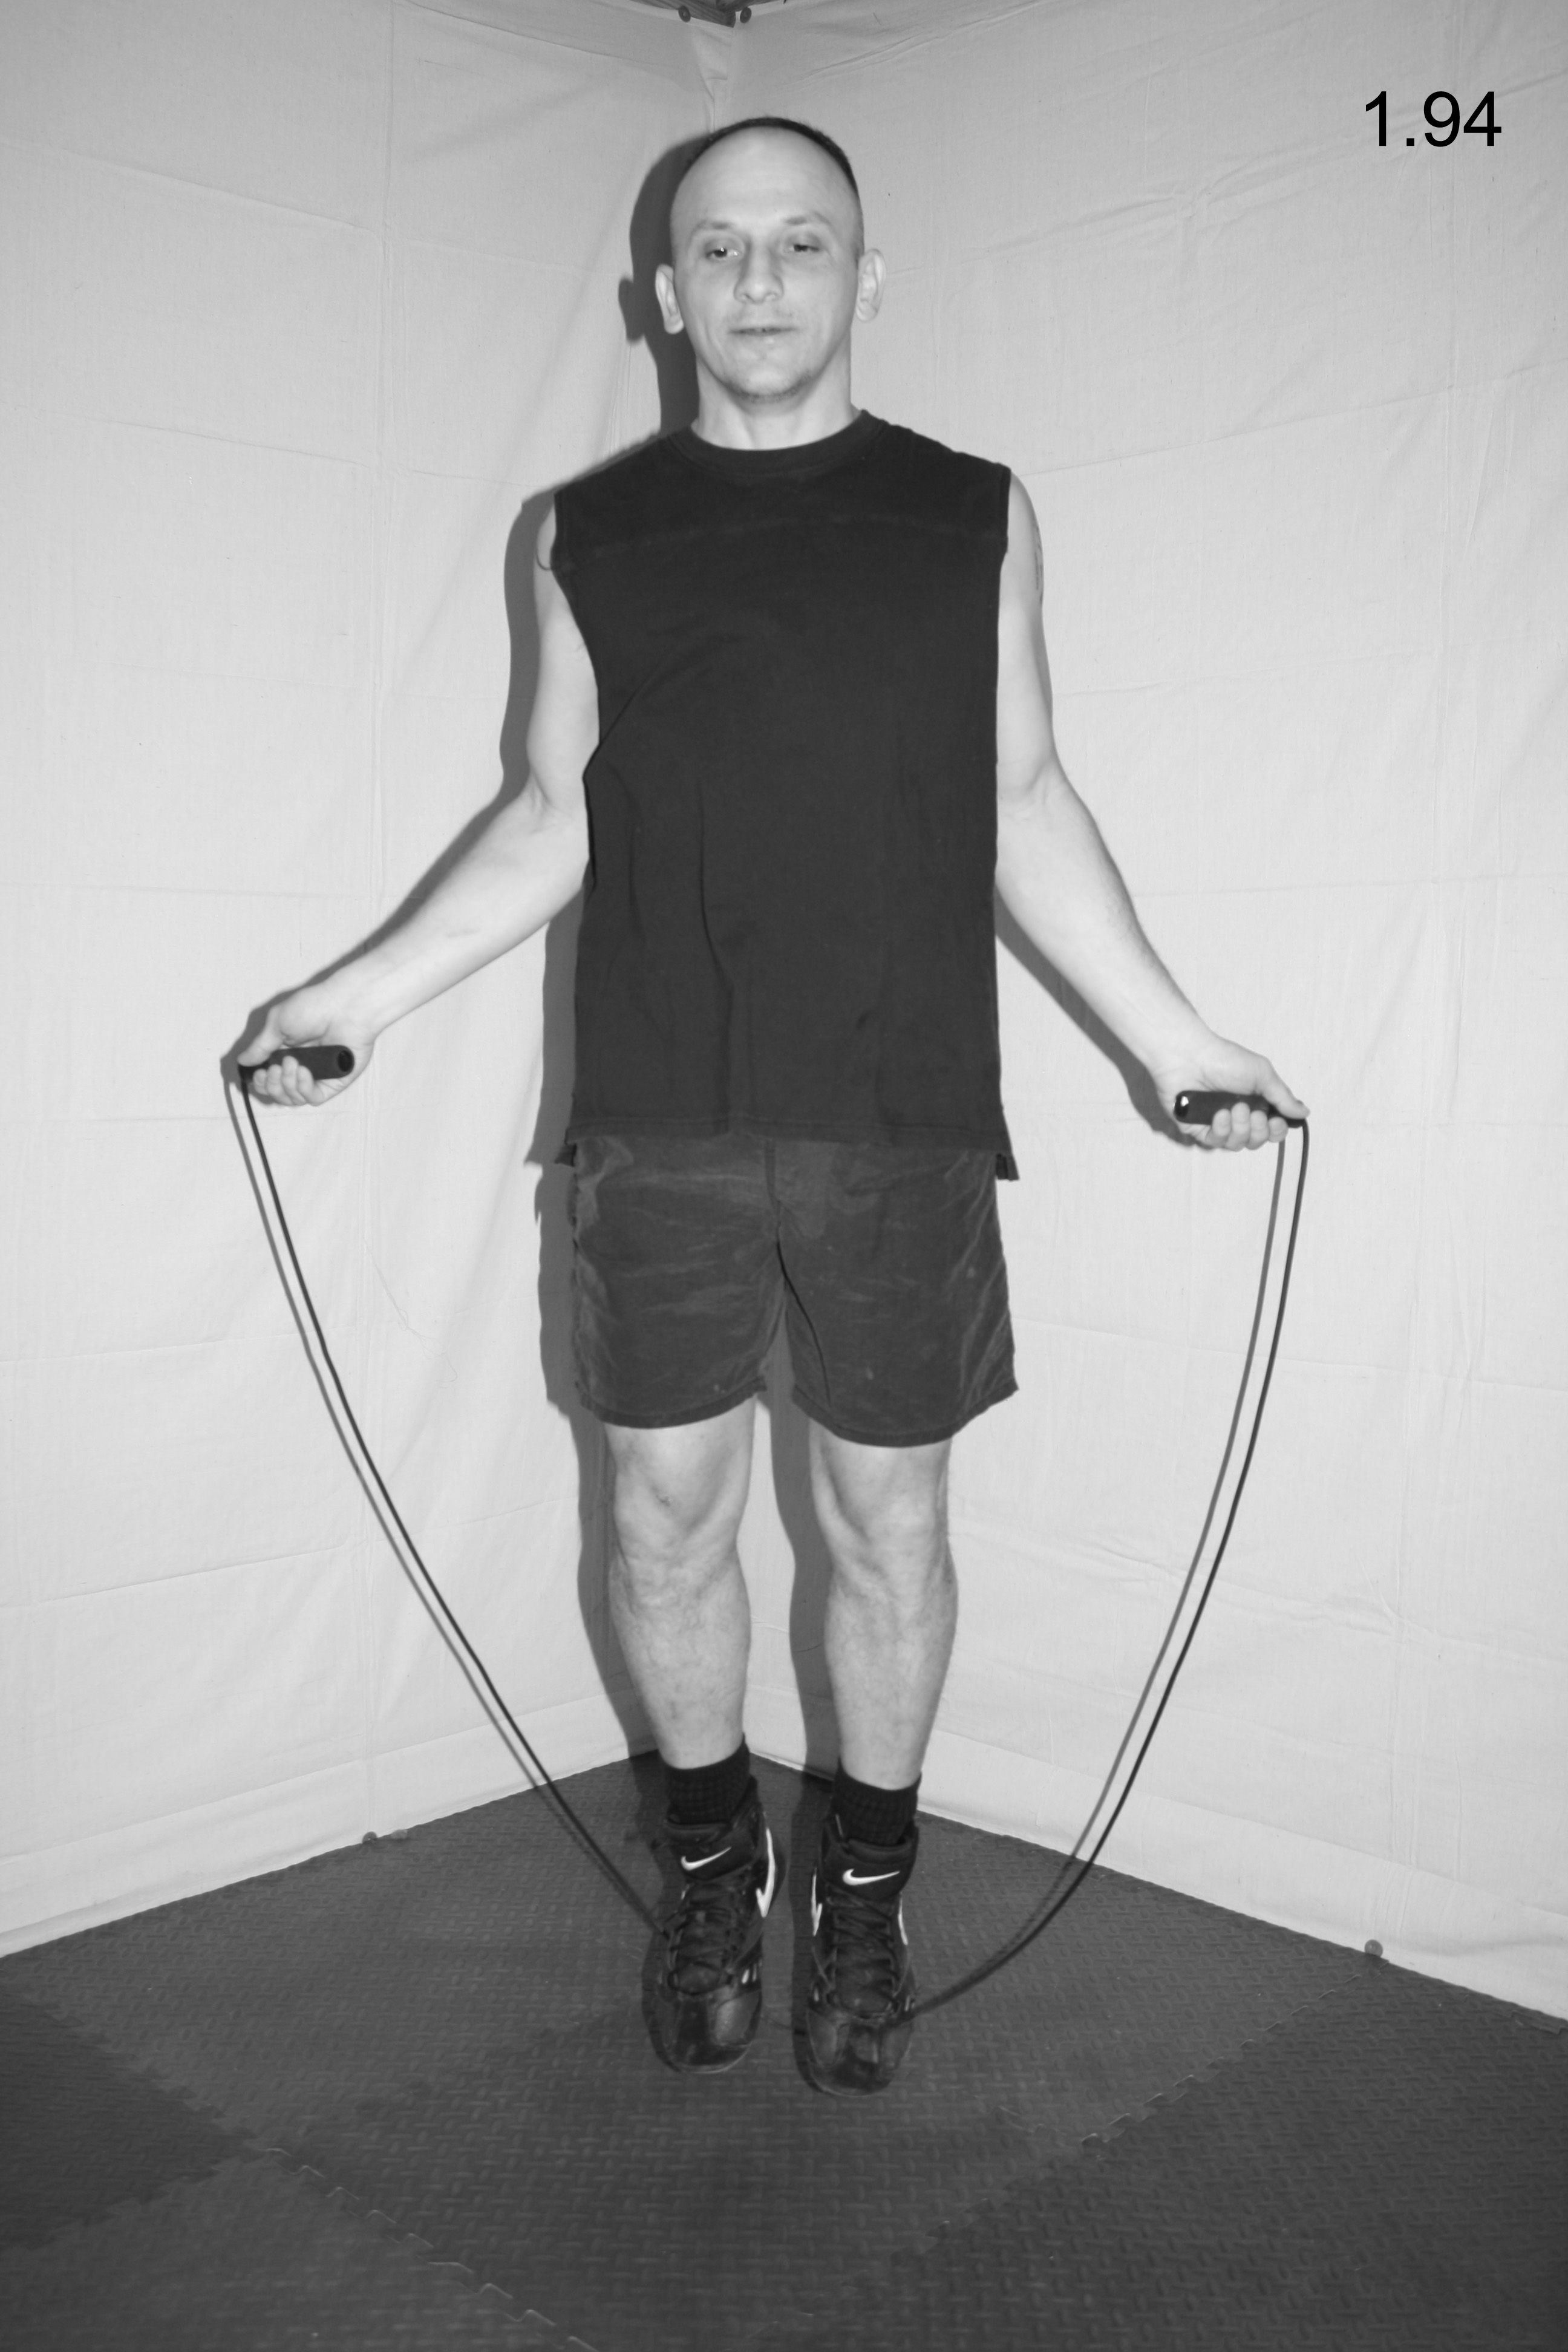
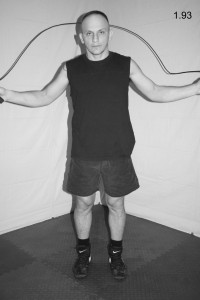
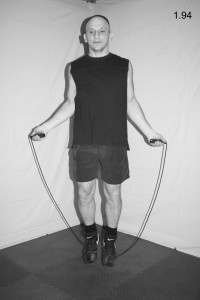
Step Two:   Rotate your wrists and arms back, up, and over in an exaggerated arc to make the rope travel up and over the back of your head (see Fig. 1.93). As the rope travels down along the front of your body, jump over it and continue the rotation (see Fig. 1.94). Once it gains momentum, you will use your wrists to keep the rotation going.

1.93  1.94

Tip One:   Make sure to jump only once for each revolution and only jump high enough to clear the rope, which should be about two to three inches. You might have a tendency to double-bounce and jump too high at first, but with practice you can alleviate this habit.

Tip Two:   As you skip rope, concentrate on keeping your chin tucked, as it will help to engrain this invaluable defensive technique into your mind.

At first, you can begin skipping rope by performing a predetermined number of repetitions, such as fifty. As you become more proficient, progress to skipping rope for a predetermined period of time.

There are several variations to skipping rope. One is to simply jump straight up and down as the rope crosses under your feet, which gives your calf muscles an intense workout. A second variation is to jog in place as you skip over the rope. A third variation is to skip for a predetermined number of repetitions on one leg, and then switch to the other leg. As with any exercise program, mix up your routine to make it challenging and fun.

CONCLUSION

This will conclude the August segment of Righting Crime Fiction. If any of you have any questions or comments or suggested topics, feel free to contact me at rightingcrimefiction@gmail.com and I will reply as soon as I can.

Until next time, write, rewrite, and get it right!

BJ Bourg is the author of JAMES 516 (Amber Quill Press, 2014), THE SEVENTH TAKING (Amber Quill Press, 2015), and HOLLOW CRIB (Five Star-Gale-Cengage, 2016).

Copyright © 2015 by BJ Bourg. All rights reserved.

A Writer’s Guide to Fighting: Footwork 1

Welcome to the July 2015 edition of Righting Crime Fiction. This month, I’m continuing with the “Writer’s Guide to Fighting” series and moving into footwork techniques. It might not seem like much, but footwork is as important as knowing how to block a punch. In fact, it should be considered your first line of defense in an attack. Next would be head movement and blocking.

Note: Again, I am addressing your law enforcement characters directly, because it is easier and more concise than constantly referring to them as “your characters”, “s/he”, “them”, etc.

IMPORTANCE OF FOOTWORK

The best way to avoid an attack is to not be there, which makes footwork an integral part of your defense system. Whether you are in an unarmed fight or a shootout, you will be harder to hit as a moving target than a stationary one. However, there are right and wrong ways to move during a fight, and I will detail the proper footwork techniques to utilize during a physical confrontation. This is an important section, because you could get hurt if you move the wrong way.

If Drew Brees explained in detail how to throw a perfect spiral, it would not make you a better quarterback. You would have to actually get up and practice those techniques. Similarly, merely reading these instructions will not improve your footwork. You must practice them until you can perform them effortlessly and without thought.

Proper movement during a fight differs greatly from everyday movement. All of our lives we have been moving around by putting one foot in front of the other, crossing our feet as we go (see Fig. 1.25 and 1.26). This is not the proper way to move in a fight. Crossing your feet in a fight should be viewed as a cardinal sin. The only way to keep from committing this sin is to spend countless hours practicing proper footwork.

1.25  1.26 

You will basically need to learn how to walk all over again. If you have never practiced this type of footwork, it will go against what seems natural to you. You might feel awkward at first, but within a few sessions you will find yourself moving quicker and more gracefully. With enough practice, the techniques will become second nature and moving during a fight will be as natural to you as walking down the street. It takes time and dedication to reach and maintain this level of proficiency, but it is a small price to pay for your safety.

As with the fighting stance, the footwork techniques listed in this book derive from boxing. A boxer’s footwork is more practical for law enforcement work than traditional martial arts footwork. The biggest problem with martial arts footwork is that they violate the rule of not crossing your feet. If you have ever studied traditional martial arts and have performed katas (patterns of movement that some claim will improve your fighting skills), you have violated this cardinal rule of crossing your feet (see Fig. 1.27 – 1.29). Every time you perform these katas, you are actually developing and reinforcing bad habits that could prove deadly in a real fight.

1.27  1.28

1.29

Boxers are taught not to cross their feet in a fight because it will compromise their balance and leave them susceptible to knockdowns (see Fig. 1.30 – 1.32). This is especially important for law enforcement officers, because if you get knocked down by a suspect you are at his or her mercy, and most of these suspects are not very compassionate.

1.30  1.31

1.32

Additionally, if you cross your feet during a fight your firearm side will be toward the suspect and it could be easily grabbed (see Fig. 1.33 and 1.34).

1.33  1.34

KEYS TO EFFECTIVE FOOTWORK

  1. Always remember that when moving during a fight, the foot closest to the intended direction moves first. As an example, if you wanted to move forward, your lead foot would move first. If you wanted to move laterally to the right, your right foot would move first. And so on.
  1. As you move, do not lift your feet off the ground. Instead, slide the ball of your feet lightly and explosively along the ground in the intended direction, moving one foot at a time. Never hop into the air where both feet leave the ground at the same time. If both feet are in the air, you are no longer grounded and you could easily be taken down. Being grounded is crucial to remaining balanced.
  1. Maintain your balance, head position, and hand position throughout the footwork techniques. As you move, your suspect could be punching and kicking at you, so it is imperative that your chin remain tucked, your hands up, and you stay balanced.
  1. Keep your movements short, quick, and smooth. Each foot should travel the same distance as the other. For example, if you move your left foot eight inches forward, you should also move your right foot eight inches forward. This will ensure you always return to the proper fighting stance.
  1. Do not move your feet too far apart. If you slide one foot too far from the other when moving, your stance will be too wide and you will be susceptible to leg sweeps (see Fig. 1.35 – 1.37). Likewise, you should not allow your feet to get too close together, because you could leave yourself open to double-leg takedowns (see Fig. 1.38 and 1.39).

1.35

1.36

1.37

1.38  1.39

FOOTWORK TECHNIQUES

I will cover eight footwork techniques that will enable you to maneuver effectively during a fight with a suspect.

Front Step

If your suspect is moving away from you or if you need to move closer to your suspect to execute combinations, you will perform the front step. A good strike to execute in conjunction with a front step is the left jab.

  1. From your fighting stance (see Fig. 1.40), push off with the ball of your right foot and slide your left foot about one half step forward, which should be about six to twelve inches (see Fig. 1.41).

1.40  1.41

  1. Quickly drag your right foot forward the same distance the left foot traveled, which will return you to your fighting stance (see Fig. 1.42). As an example, if the left foot travels six inches, the right foot should also travel six inches. As mentioned in Key Two, the ball of your right foot should drag the ground lightly as it moves forward. For a close-up of the front step leg action, see Fig. 1.43 – 1.45.

1.42

1.43  1.44

1.45

Back Step

If your suspect is advancing toward you, you can perform the back step to create distance between yourself and the suspect. You can also perform the back step if you need to create distance to allow you to perform a particular strike. For instance, if you are in punching range and you wish to execute a kick, you can perform a quick back step to give you the room to execute the kick.

Additionally, be mindful that it is not always good to move directly rearward as a suspect advances toward you. You will want to create angles and pivot to get out of the way, so you will need to utilize the back step in conjunction with other footwork techniques.

  1. From your fighting stance (see Fig. 1.46), push off with the ball of your left foot and slide your right foot about one half step rearward, which should be about six to twelve inches (see Fig. 1.47).

1.46  1.47

  1. Quickly drag your left foot rearward the same distance the right foot traveled, which will return you to your fighting stance (see Fig. 1.48). For a close-up of the back step leg action, see Fig. 1.49 – 1.51.

1.48

1.49  1.50

1.51

Right Side Step

If your suspect moves to your right, you can mirror him by performing the right side step. If he tries to circle around to your right to get behind you, you can also use the right side step to cut him off. If this happens, you must be prepared to execute strikes immediately upon taking that step. A good strike to use in cutting off your suspect to the right is the right hook punch or the right Muay Thai kick.

You can also use the right side step to avoid attacks and create varying angles of attack. For instance, if your suspect executes a straight kick or punch, you could perform a right side step and then immediately execute a strike of your own before he realizes you are “gone”.

  1. From your fighting stance (see Fig. 1.52), push off with the ball of your left foot and slide your right foot about one half step to the right, which should be about six to twelve inches (see Fig. 1.53).

1.52  1.53

  1. Quickly drag your left foot laterally the same distance the right foot traveled, which will bring you back to your fighting stance (see Fig. 1.54). For a close-up of the right side step leg action, see Fig. 1.55 – 1.57.

1.54

1.55  1.56

1.57

Left Side Step

If your suspect moves to your left, you can mirror him by performing the left side step. If he tries to circle around to your left to get behind you, you can use the left side step to cut him off. Like with the right side step, you must be prepared to execute strikes immediately upon taking the side step. A good strike to use in cutting off your suspect to the left is the left hook punch or the left Muay Thai kick.

Like the right side step, you can use the left side step to avoid attacks and create varying angles of attack. Since your body is positioned at a forty-five degree angle to your suspect, you will create different angles by moving left than you would by moving right. You should use this to your advantage.

  1. From your fighting stance (see Fig. 1.58), push off with the ball of your right foot and slide your left foot about one half step to the left, about six to twelve inches (see Fig. 1.59).

1.58  1.59

  1. Quickly drag your right foot laterally the same distance the left foot traveled, which will bring you back to your fighting stance (see Fig. 1.60). For a close-up of the left side step leg action, see Fig. 1.61 – 1.63.

1.60

1.61  1.62

1.63

CONCLUSION

That will wrap up the July segment of Righting Crime Fiction. If any of you have any questions or comments or suggested topics, feel free to contact me at rightingcrimefiction@gmail.com and I will reply as soon as I can.

Until next time, write, rewrite, and get it right!

BJ Bourg is the author of JAMES 516 (Amber Quill Press, 2014), THE SEVENTH TAKING (Amber Quill Press, 2015), and HOLLOW CRIB (Five Star-Gale-Cengage, 2016).

Copyright © 2015 by BJ Bourg. All rights reserved.


1.13

A Writer’s Guide to Fighting: The Fighting Stance

Welcome to the June 2015 edition of Righting Crime Fiction. In this month’s segment, I will discuss the keys to a proper fighting stance, the mechanics involved, and some tips to ensure your fighting stance is solid. It might be unnecessary to describe the exact position your character will be in during a fight, but if you, as a writer, can “see” it and “feel” it, you can convey your message more clearly.
Note: If there are no objections (and I don’t hear any:-), I will speak directly to your law enforcement characters, as this will help simplify the writing for me. Additionally, keep in mind that these techniques can be used in fight scenes between anyone (not just between a law enforcement officer and a suspect), and they can also be utilized in real life situations.
INTRODUCTION
Immediately upon recognizing that a physical confrontation is imminent, you should get into your fighting stance and prepare to defend yourself. Since physical confrontations often develop unexpectedly, it is imperative that this stance be as naturally a part of your everyday life as walking. You will not have time to think about proper body positioning. If you stop to think during a full-contact fight, you could get knocked out. If you stop to think during a fight with a suspect, you could “get dead”. Thus, you must spend hours upon hours in your fighting stance so your body will instinctively know what it “feels” like to be in the proper position. Developing this “muscle memory” is crucial to surviving a physical encounter. 
This fighting stance is derived from boxing, and it is the only stance you will need to utilize during an unarmed (or armed) confrontation. It offers a solid base and fluid mobility, enabling you to shift your body weight effortlessly from one technique to the other, while maintaining your balance and defensive posture. It is wider and more balanced than the ready stance, while providing optimum mobility.
KEYS TO FIGHTING STANCES
1. In life we usually begin and end our days at home. Similarly, your fighting stance should be considered “home” and everything you do in a fight should begin and end there. You will launch every technique from your fighting stance and, upon completing the technique, you must immediately return to your fighting stance, or your “home”.
2. The base of your fighting stance, which consists of your legs and hips, should remain centered at all times. You accomplish this by keeping your groin area centered between both feet. Even when you are moving, you should keep your groin area centered. You will shift your body weight while executing techniques, but your base should remain centered, except when you execute kicks.
3. To shift your body weight properly while maintaining your centered base, simply move your head slightly in the direction you want your weight to shift, while simultaneously bending or twisting at the waist. This shifting of your body weight is important to power striking and defense. Once the technique is completed, you must return your weight to center-line. You accomplish this by moving your head to its original position over your groin.
4. You must strive to always maintain your balance while in your fighting stance. This can be accomplished by focusing on proper foot position, which will be described in detail in the following section, keeping your knees bent, and supporting your body weight evenly on the balls of both feet. Also, remember to never turn your firearm side toward the suspect.
5. Keep your chin tucked and your hands up at all times. Additionally, if your suspect’s hands are up and in plain sight, focus on your suspect’s chest area. This will afford you a good peripheral view of his four primary personal weapons; his arms and both legs. If your suspect’s hands are hidden, it is imperative that you focus on them—while keeping track of his feet in your peripheral vision—because they could produce a deadly weapon.
FIGHTING STANCE
Step One: Begin by standing with your feet parallel and a little wider than shoulder-width apart (see Fig. 1.13). Remain relaxed with your head centered above your midsection. Imagine a suspect is directly in front of you and you are standing squared-up to him.
Step Two: Take a full step forward with your left leg (see Fig. 1.14). Your left leg has now become the lead leg, while your right leg has become the rear leg. The step will have turned your body at an approximate forty-five degree angle to your imaginary suspect, putting the lead leg closest to the suspect and the rear leg farthest. This simple maneuver places your right hip and firearm out of the suspect’s reach.
Step Three: Turn the toes of your right foot outward at an approximate forty-five degree angle, while keeping the toes of your left foot pointed at your suspect (see Fig. 1.15).
Step Four: Bend your knees slightly and distribute your weight evenly on the balls of both feet (see Fig. 1.16). Your heels should be raised ever slightly—they could remain in contact with the floor, but the contact must be “light”. This is important because you will be pushing off with the balls of your feet when you move and you will also be twisting on the balls of your feet when striking. If you bear your weight on the heels of your feet, you will limit your mobility.
Step Five: Tuck your chin by tilting your head forward in a bowed-head position, and lift your eyes to look directly forward at your suspect’s chest area (see Fig. 1.17). To assume the correct position, imagine you are looking down at a ticket book to write a citation. You merely need to lift your eyes to look directly in front of you. As long as you can see your eyebrows, your head will be tilted far enough. I call this “looking at life through your eyebrows”.
Step Six: Form a fist with your right hand (more on this later) and bring it up to the right side of your face, with your right elbow pointed directly downward and near the right side of your torso (see Fig. 1.18).
Step Seven: Form a fist with your left hand and bring it up to the left side of your face, with your left elbow pointed directly downward and near the left side of your torso (see Fig. 1.19). This hand and elbow positioning will provide protection against sudden and unexpected attacks, while keeping your arms in proper position for you to immediately defend yourself (see Fig. 1.20 and 1.21).
TIPS TO IMPROVE YOUR FIGHTING STANCE
Tip One: A good drill to help you focus on keeping your chin down is to clamp a tennis ball between your chin and your neck (see Fig. 1.22). Next, perform fighting techniques in this position. If the tennis ball falls, you lifted your chin too far. (I have to constantly remind myself of this.)
Tip Two: I have always preferred to keep my right elbow pressed against my firearm when in my fighting stance (see Fig. 1.23 and 1.24). This serves as a second line of defense for weapon retention, with the first line being the distance between the suspect and my firearm.
Tip Three: The muscles in your arms and shoulders should be relaxed. Tense muscles hamper speed and accelerate fatigue, so you should always focus on staying relaxed.
Tip Four: From the ready stance (described in the May 2015 segment of Righting Crime Fiction), you are halfway into the fighting stance and would only need to take a half step forward with your left leg to assume the fighting stance.
CONCLUSION
That will wrap up the June segment of Righting Crime Fiction. If any of you have any questions or comments or suggested topics, feel free to contact me and I will reply as soon as I can.
Until next time, write, rewrite, and get it right!

BJ Bourg is the author of JAMES 516 (Amber Quill Press, 2014), THE SEVENTH TAKING (Amber Quill Press, 2015), and HOLLOW CRIB (Five Star-Gale-Cengage, 2016).

© 2015 BJ Bourg
1.1

A Writer’s Guide to Fighting: The Ready Stance

Welcome to the May 2015 edition of Righting Crime Fiction. This month begins a series of blog posts about self-defense—one of my favorite subjects. In order for writers to create characters who can fight, they must learn how to fight.

INTRODUCTION

I’m a self-made fighter. At the age of about twelve, I began researching and studying every martial arts and full-contact fighting system/style I could find. I learned the techniques, perfected them, and then applied them in full-contact sparring sessions. I retained what worked and discarded what didn’t, developing my own fighting style using the best of each system I studied. Basically, I was mixing martial arts long before it became cool. Along the way, I joined a karate school so I could have regular sparring partners and even competed in several open karate tournaments, taking first place in all of them. The point system structure of tournament karate does little to prepare someone for brutal combat, and I eventually quit doing it. When a boxing gym opened up near where I lived, I joined and became a professional boxer (2002 through 2005) at the age of 31. I hung up my gloves in late 2005, because training at the boxing gym every night took me away from my children too much, and they were my priority. Currently, I continue to remain in fighting condition and I train my son, who is an amateur boxer, and my daughter, whose interest in fighting can be traced back to watching Ronda Rousey fight (she practically begged me to preorder Rousey’s MY FIGHT / YOUR FIGHT).

In 1990, I embarked upon a career in law enforcement and went through the police academy, where I was exposed to law enforcement’s defensive tactics. I found many of the techniques to be impractical. During my career, I’ve been attacked by many suspects while trying to arrest them. I’ve found myself facing individual suspects of various skill levels, multiple suspects at one time, and suspects armed with various types of weapons (firearms, knives, bats, etc.), and I’ve succeeded in apprehending all of these subjects with very minor or no injuries. Unfortunately, my success can’t be attributed to my training in the police academy. Rather, I survived those encounters because I’d made a lifestyle choice as a child—and that was to train everyday as a full-contact fighter in order to defend myself and those I loved from anyone who might try to do us harm.

Later, in 2003, I went to work as a fulltime police academy instructor and became certified as a defensive tactics instructor and instructor-trainer. I quickly realized they were teaching the same techniques I’d learned in 1990, many of which were impractical and some even dangerous to employ. When I started teaching law enforcement officers how to defend themselves, I taught them how to survive a full-contact fight, because law enforcement is a full-contact profession. Through those teachings, I coined the phrase “The Full-Contact Officer”, and I subsequently wrote a series of related articles that appeared in Law and Order Magazine.

In the upcoming series of blog posts—which will be based upon applied knowledge and not supposition or mere training—I’m going to share some of these fighting techniques and principles to help writers 1) develop characters who can take care of themselves and 2) write convincing fight scenes. Additionally, writers can use the information provided to develop their own self-defense skills

BALANCE

Balance is an essential component of self-defense. Whether interviewing subjects or making arrests, your cop characters must always maintain a position of balance while keeping their firearms away from the suspects. When cops lose their balance, bad things happen. Some of those bad things could include them being slammed to the ground, knocked out or disarmed, none of which are conducive to a long and healthy lifestyle.

IMPORTANCE OF A PROPER FIGHTING STANCE            

Before a house can be built, a sound foundation must be constructed. Similarly, before your characters can learn other aspects of fighting, they must first develop a solid fighting stance from which to launch their attacks and from which to thwart the attacks of their suspects. While a wider and deeper stance offers greater balance, it restricts mobility; and while a narrow stance offers greater mobility, it doesn’t provide sufficient balance. A solid fighting stance is one that offers an even blend of balance and mobility.

While the stances of most law enforcement self-defense systems are based upon traditional martial arts, the fighting stance I recommend derives from boxing. As a student of both, traditional martial arts and boxing, I learned very early in my life/law enforcement career that the boxing stance is more applicable to law enforcement work than those of the traditional martial arts.

The various martial arts stances, such as the front stance, back stance, straddle stance, and cat stance all lack the even mixture of balance and mobility that are necessary for your characters to survive a physical confrontation. By virtue of body positioning, they’re static and limit options, thus they’re not effective for real-world situations. They might be fine for performing kata or point sparring, where there are specific rules that all participants must follow, but they’re not appropriate for realistic combat.

Here are some of the reasons these stances aren’t suitable for practical law enforcement defense:

Back Stance:   The back stance requires officers to place about two-thirds of their body weight on their rear leg by positioning their hips over the leg (see Fig. 1.1). This greatly hampers mobility and leaves them vulnerable to a number of attacks, especially takedowns. It also inhibits them from delivering effective power kicks with the rear leg.
Cat Stance:   The cat stance is similar to the back stance, but there is more weight on the rear leg and the legs are closer together (see Fig. 1.2). The problems are also similar to those of the back stance.
Front Stance:   The front stance requires officers to place the majority of their body weight on the lead leg by positioning their hips forward, while the rear leg is straight and extends behind their body (see Fig. 1.3). This also hampers mobility, and makes it difficult for them to quickly defend against a kick to the lead leg.
Straddle Stance:   The straddle stance calls for an unnaturally wide stance (see Fig. 1.4). If the suspect is to one side of them, officers wouldn’t be able to launch an effective attack with the rear leg and arm from that stance, because the rear leg and arm would be positioned too far to the rear, and the stance would greatly hamper their mobility and prevent them from being able to launch kicking attacks. Also, the lead leg could easily be swept or broken with a roundhouse kick to the lower leg. If the suspect is in front of them, the “squared-up” position would leave them vulnerable to being easily knocked backward or taken to the ground.
STANCES FOR LAW ENFORCEMENT

I advocate two stances for law enforcement officers: the ready stance and the fighting stance (I’ll detail the fighting stance in the June segment of Righting Crime Fiction). Officers will perform most of their duties in the ready stance. I call it the ready stance because officers must constantly remain vigilant as they perform their duties—always ready for the unexpected. When a suspect becomes aggressive, your officer would then switch to the fighting stance. Some law enforcement trainers and administrators prefer to refrain from using the term “fighting” as it relates to an officer’s stance, choosing to call it a “defensive” stance instead. While I understand the logic behind this, I unapologetically call it a fighting stance. I want officers to realize that when they drop into the fighting stance, they are absolutely in a fight—potentially a fight for their lives.

READY STANCE

Whether writing citations, interviewing witnesses, or ordering a hamburger, your officers should always remain in the ready stance. They should never stand flatfooted and squared-up to anyone while performing their duties—especially when wearing their firearm—as it would place their gun closer to the suspect’s reach (see Fig. 1.5). Standing flatfooted will also make them susceptible to being pushed backwards (see Fig. 1.6) or taken to the ground (see Fig. 1.7).
Note:   For the purposes of this blog, I will explain and demonstrate each technique for right-handed officers facing right-handed suspects, as most people are right-handed. If you’re writing a left-handed character (commonly referred to as the “southpaw” position in fighting), simply reverse the hand/foot/body positions.

Step 1: To assume the ready stance, officers begin by standing with their feet parallel and shoulder-width apart (see Fig. 1.8). They should remain relaxed with their head centered above their midsection.
Step 2: They would then take a half step directly forward with their left leg, maintaining the shoulder-width distance between their feet (see Fig. 1.9). Their left leg would become the lead leg, while their right leg would be the rear leg. The step will have turned their body at a slight angle to their imaginary suspect, putting the lead leg closest to the suspect and the rear leg farthest. This simple maneuver places their right hip, which is where their firearm is located, farther from the suspect’s reach.
Step 3: They would then turn the toes of their right foot slightly outward, while keeping the toes of their left foot pointed at their suspect (see Fig. 1.10).
Step 4: They should keep their knees “soft” and loose while distributing their weight evenly on both feet. They shouldn’t bear their weight on their heels, as this would greatly limit their mobility.

Step 5: They would raise their hands above their waist, at chest-level, and keep them out in front of their body (see Fig. 1.11). This will enable them to more readily defend a sudden and unexpected attack. It is also a natural position for their hands to be while taking notes, writing citations, or merely motioning while talking.
Tip 1: Don’t have your officers clasp their hands together or interlock their fingers, as the suspect could grab and trap both of their hands with one of his, allowing him to pound on your officers with the other (see Fig. 1.12).
NOTE:   I heard one law enforcement officer tell a group of writers that real cops use “teepee” hands when talking to people—um, only if they want to get knocked into next week and wake up not knowing their name. If you’re describing an interview scene and you want your officer to be tactically proficient, don’t have her interlock her fingers or use “teepee” hands. She can simply gesture with her hands as she talks, keeping them above her waist.

Tip 2: Your officers can distribute their weight evenly on both feet by simply keeping their head above centerline (centered above their groin area).

CONCLUSION

Well, that will wrap up the May segment of Righting Crime Fiction. If any of you have any questions or comments or suggested topics, feel free to contact me and I will reply as soon as I can.

Until next time, write, rewrite, and get it right!

BJ Bourg is the author of JAMES 516 (Amber Quill Press, 2014), THE SEVENTH TAKING (Amber Quill Press, 2015), and HOLLOW CRIB (Five Star-Gale-Cengage, 2016).

©BJ Bourg 2015